
Tiny Dovetail Cube
14 Sep 2019Progress: Complete
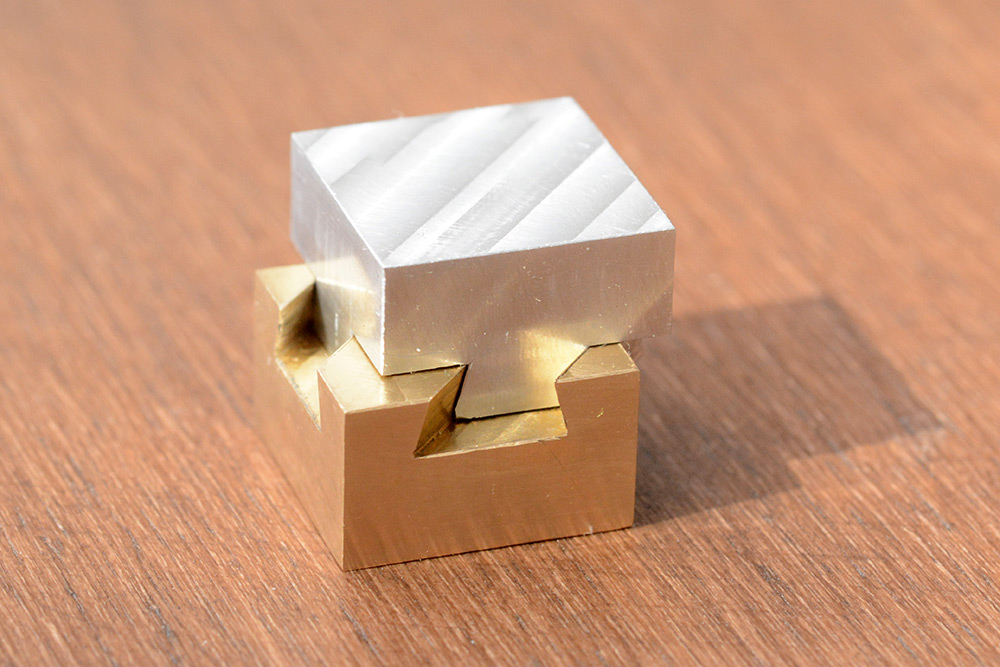
I first saw a dovetail cube puzzle at a model engineering fair. If you've never seen one before, don't scroll down, because it'll deprive you of the fun of working it out for yourself. I was mortified to find that by typing "dovetail cube" into google, it immediately reveals the trick. It also appears to be a more popular project than I'd realised, which is a bit disappointing, but I thought a miniature one would make an excellent trinket.

The project would be fairly quick if you already had the correct size stock, and already owned a correctly-sized dovetail cutter.
This was a very satisfying project and I regret not filming a video about it.
The cutter
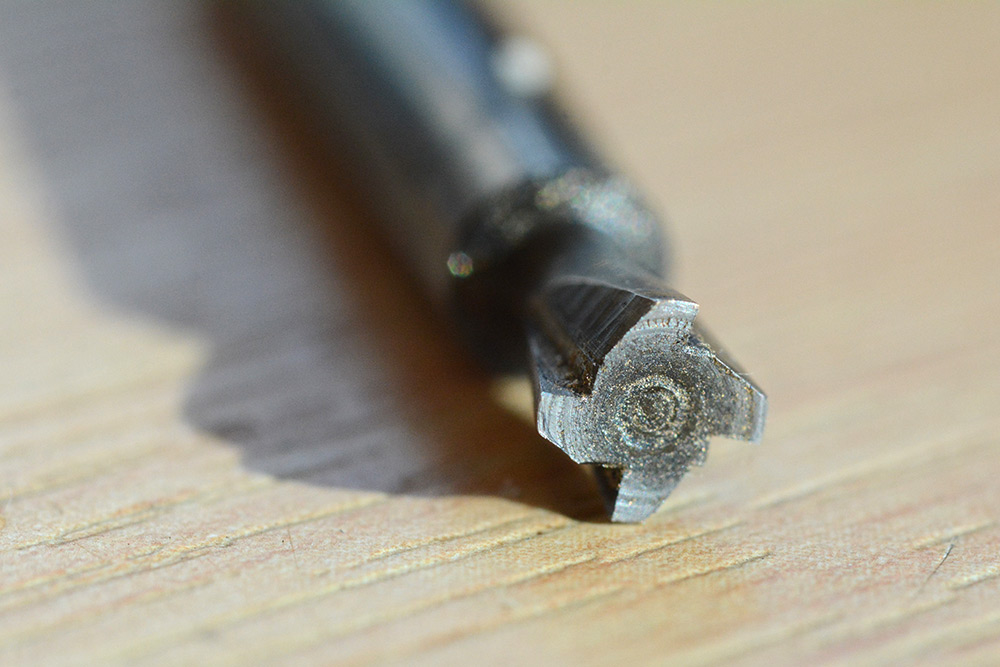
To cut a dovetail we need a dovetail cutter. The spontaneity of this project precludes ordering one.I've become quite keen on making reamers and things out of silver steel. It's one of the oldest types of tool steel but very easy to use. Since I only had 5mm drill rod, the dovetail would need to be smaller than that.
I didn't take pictures of making the cutter, but it went like this:
- On the lathe, cut a narrow taper for the main cutter and a small amount of relief on the face
- Mount the part in a four-sided collet holder and clamp that into the mill
- With an endmill, make the first cutting face. Then, rotate the part 90 degrees, and repeat
- Loosen the collet, and rotate the part about 45 degrees before tightening again
- Go through the same process to add relief behind the cutting edges
- With a blowtorch, heat the part to a glowing red and quench it in water. Lightly polish the surfaces and then again with the blowtorch, temper it to a straw yellow.
- Hone the cutting edges by running the corner of a sharpening stone over the faces
Note that because of how the dovetails are cut in this project, the apparent angle of the dovetail will appear more pronounced on the faces of the cube. I initially thought I'd gone for too narrow a taper, but it turned out fine.
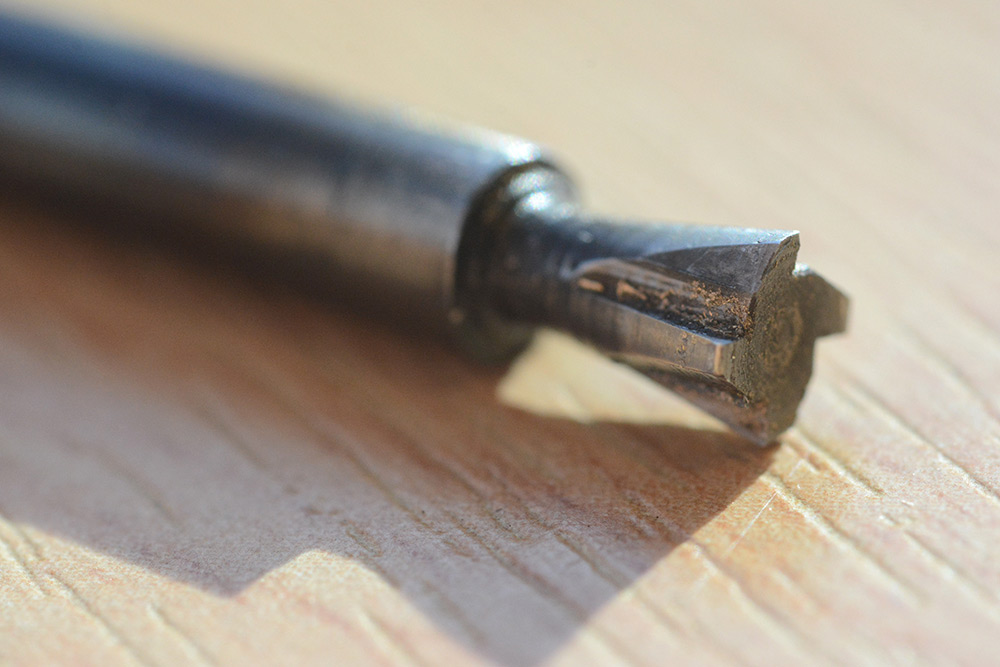
This geometry seemed to work fine, possibly could have done with more relief but I wasn't exactly taking heavy cuts here. One other thing to note is that I accidentally made it a left-handed cutter, so I had to keep remembering to reverse the spindle direction when switching between this cutter and the regular endmills.
First cuts
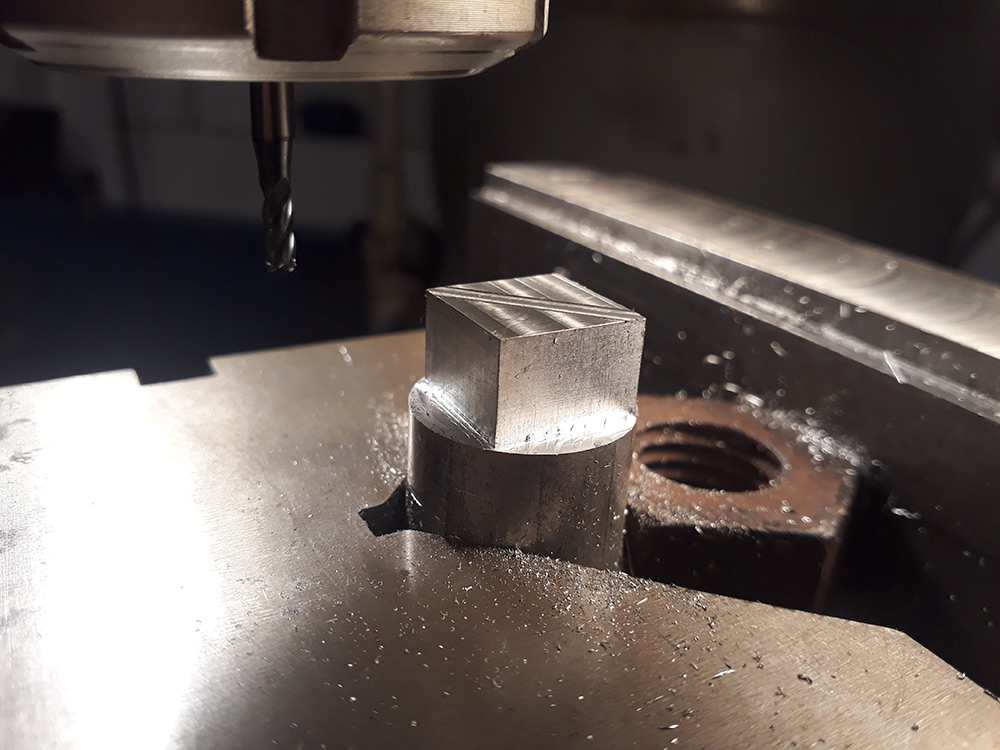
In my usual free-machining style, I had no plans or dimensions to work to. Pretty much all of the measurements were by eye. I found some aluminium and some brass rounds, which needed to be turned into squares.Starting on the aluminium, I clamped it with a v-block in the vice and machined the biggest square that would fit in the 22mm diameter.
Then I rotated the vice 45 degrees. With a chamfering tool in the spindle, I aligned the corners of the cube by eye and did a light test cut with a 3mm endmill.
Looking good, so I milled out a slot 3mm deep and 5mm wide. 5mm seems a good number, the cube is 15mm on a side, so that should look fairly balanced. I then, using the DRO and a calculator, took the hypotenuse to work out the position of each corner, and milled away half of 5mm from each of them.
Then we switch to the dovetail cutter. Taking the lightest possible pass and spraying it with coolant, we widen the slot until the full depth of the slope is cut.
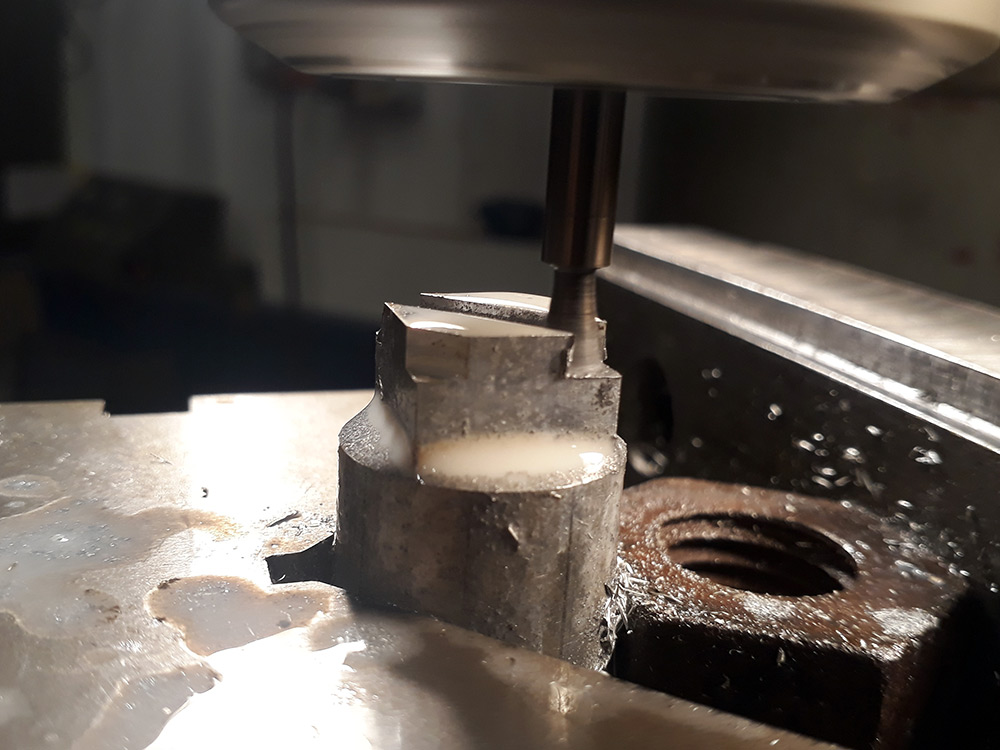
Again, remembering the depth outwards from the centre line, we come in from the corners to make it all symmetrical.
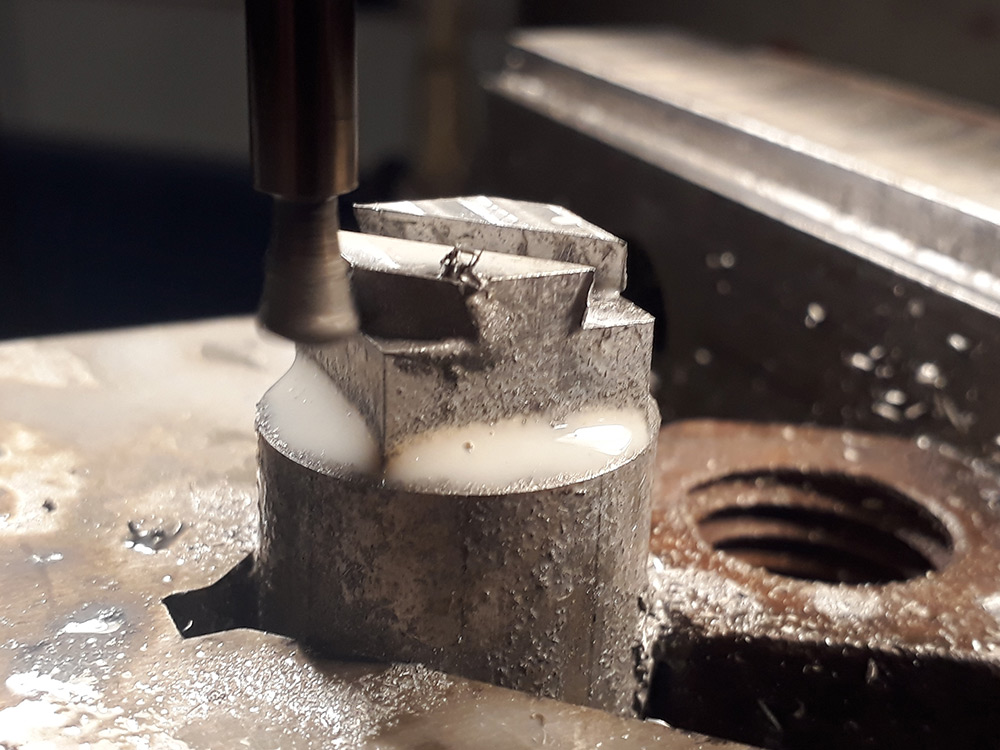
My extremely cautious feed rate led to some very fine chips.
Some gentle deburring and the aluminium part seems almost finished. All that's left to do is part it off in the lathe, but I decided to leave that till the end.
Brass
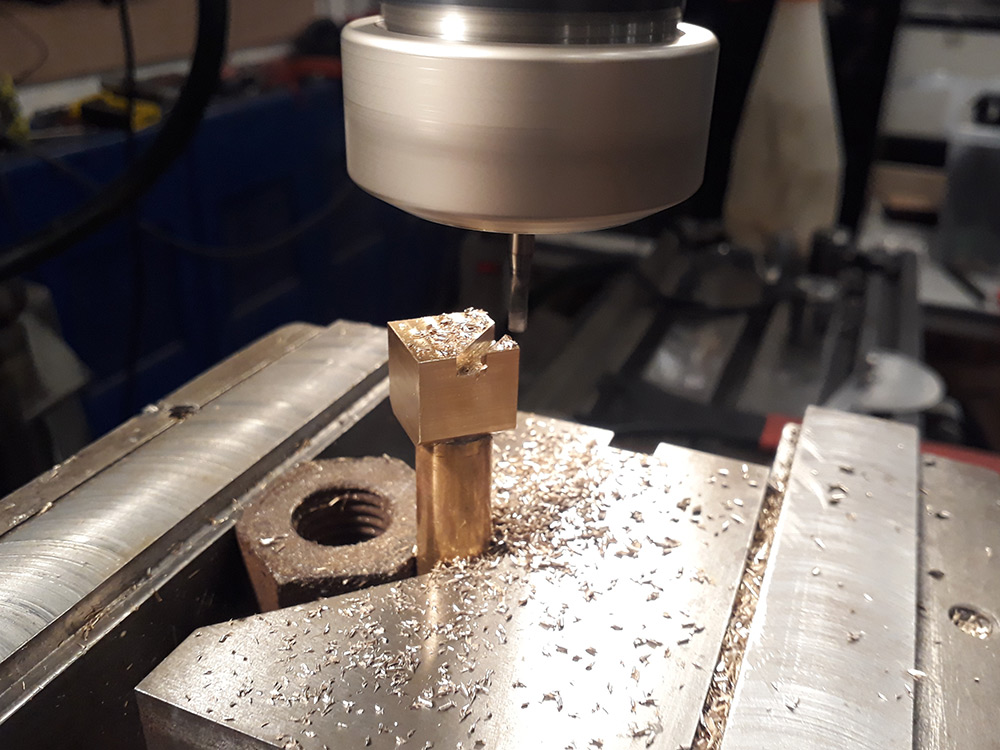
Disaster as I realized my brass stock was 20mm in diameter! I'd just assumed both bits of material were the same size. The Al was 22mm, big enough for a 15mm square to sit comfortably inside, but the biggest possible square in a 20mm circle is 14.14mm.Having already cut the aluminium, if we made the cube smaller now the dovetails would no longer be centred.
Any sane person would probably either start over, order more material, or give up. But given that the birthday I'm building this for was only a day away, I was quite keen to finish it within the evening.
I considered adding a chamfer to the cube, so the missing corners of the 15mm square in brass would not get noticed. Again, if I'd planned that from the beginning it would have been fine, but as it stands that would ruin the visual balance of the thing.
A cup of tea and some thinking later, I came up with the solution. Think in a different dimension! The brass only forms half the cube, so although we need a 15mm square, it only needs to be ~10mm tall for our needs. A 15mm x 10mm rectangle fits inside the 20mm circle. If we mount the round stock sideways, we should be able to get away with it.
I quickly milled a flat into it and got going with a hacksaw.
To hold this in the mill, my brilliant idea was to make use of the easy solderability of brass. A dab of flux, a blast from the blowtorch, and a poke with solder later and we've got a perfect handle on the piece.
Back to the v-block in the vice and start removing everything that doesn't look like a cube.
I'd been so cautious about cutting it too small that there was actually a fair amount of material to remove. Brass machines so nicely. Very satisfying to mill away.
Now we can plough ahead with the actual project. The vice was still at 45 degrees, so having cut our cube we spin it back to zero and find the corners again. This time we move to the midpoint of the centreline and the corner, and get cutting with the 3mm endmill once again.
Somewhat unintentionally we've created something that looks like castellations. Perhaps a rook. Perhaps a machined chess set could be a future project.
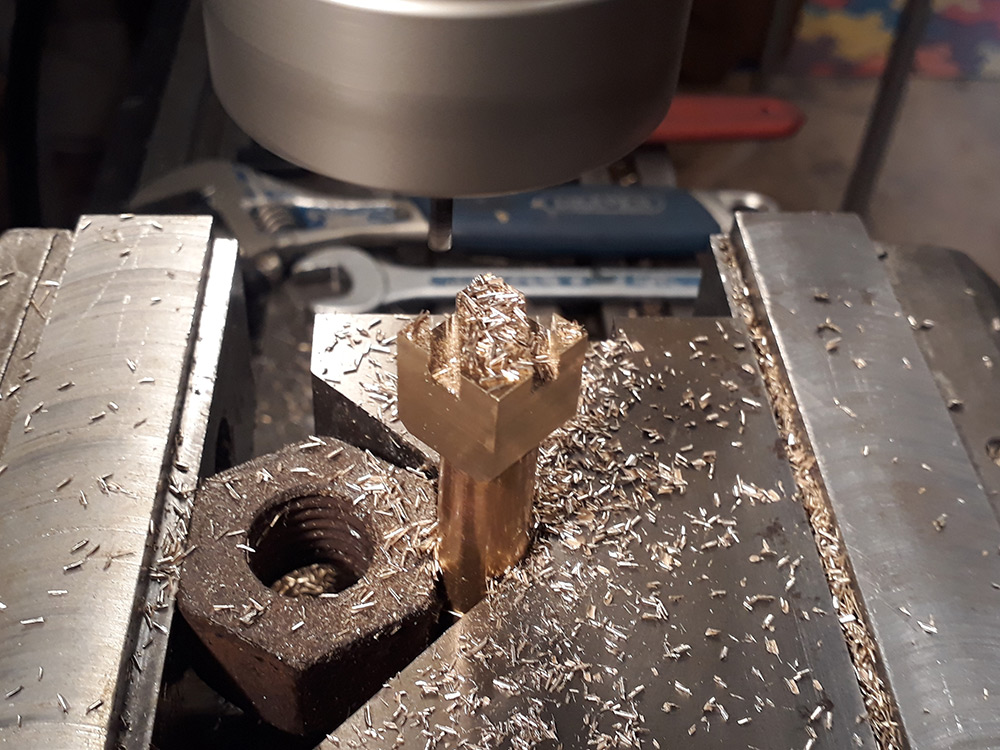
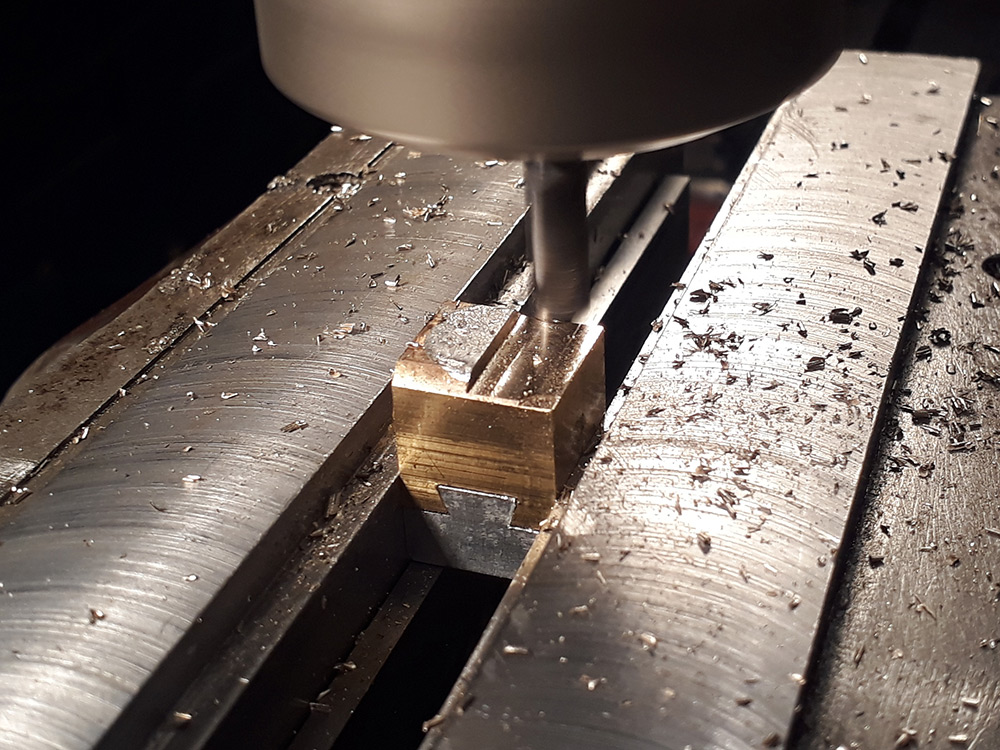
Now to the dovetail cutter, and coolant, and the slow feedrates. Brass is the harder of the two materials we're using, and I somehow chose the brass section to have the narrower dovetail slots which means the tool is cutting on both sides at once. Swapping the dovetail genders would have been a good idea, if I'd had a plan to begin with.
This is tense stuff. If I break the dovetail cutter now, it's game over. The parts will only mate if they were both cut with the same cutter, and I obviously didn't measure what the angle was so there's little hope of producing an identical one if it breaks.
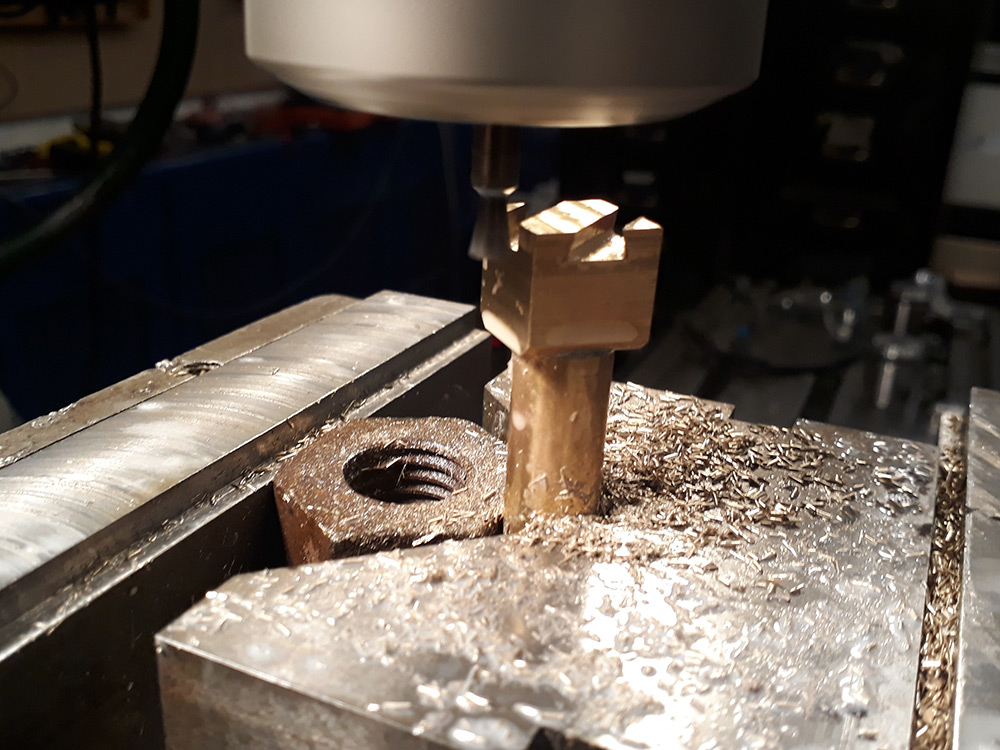
No real dimensions to work to, but the matching aluminium part can be held up to the work and it's pretty straightforward to sight how much needs to be removed. I took lots and lots of shallow passes as I really didn't want to overshoot. The dovetails should match with a tight enough fit that it isn't obvious how they come apart.
Eventually, after many careful passes, we got the two parts to mate.
Cube it up
I parted the aluminium bit off in the lathe, then slid the dovetails together and clamped them in place in order to mill the top of the cube.
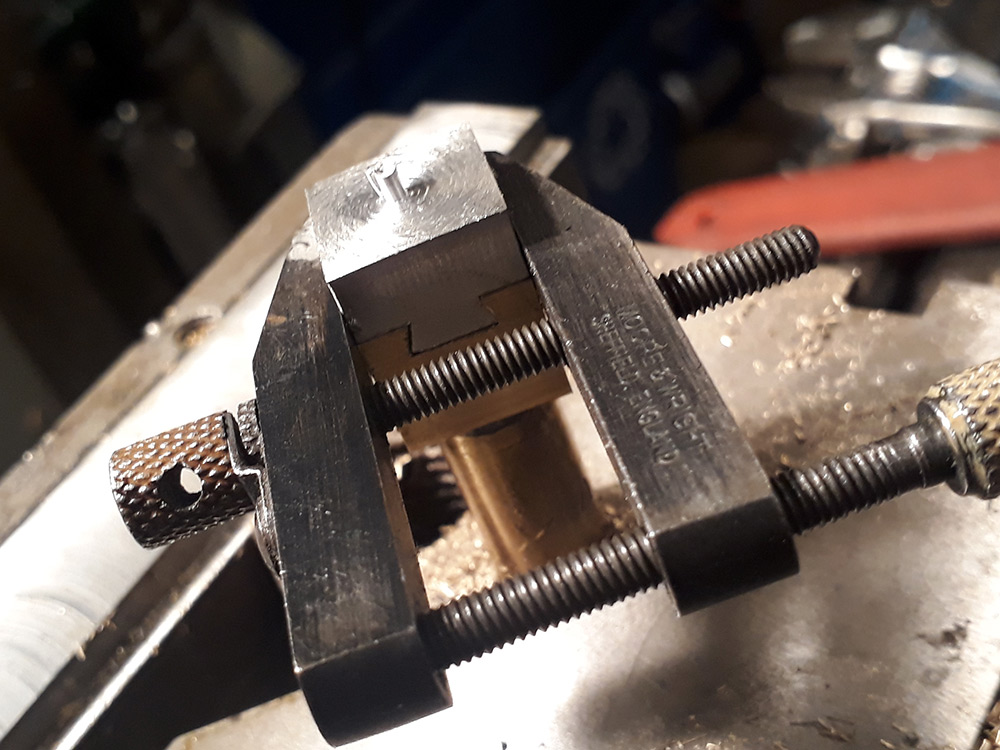
And finally, we hit it with the blowtorch to desolder the join, so we can mill the last surface.
I was aware, as I did this, that the visual alignment may be a problem. Aesthetically, the "weight" of the brass and the aluminium need to match, which doesn't necessarily mean being even in size. The dovetail plays tricks with the eye. I was however quite tired at this point, so I decided to place the join at the halfway mark of the cube. In retrospect I should have made the aluminium section larger and the brass section smaller. But, this is the price we pay for free-machining without a plan.
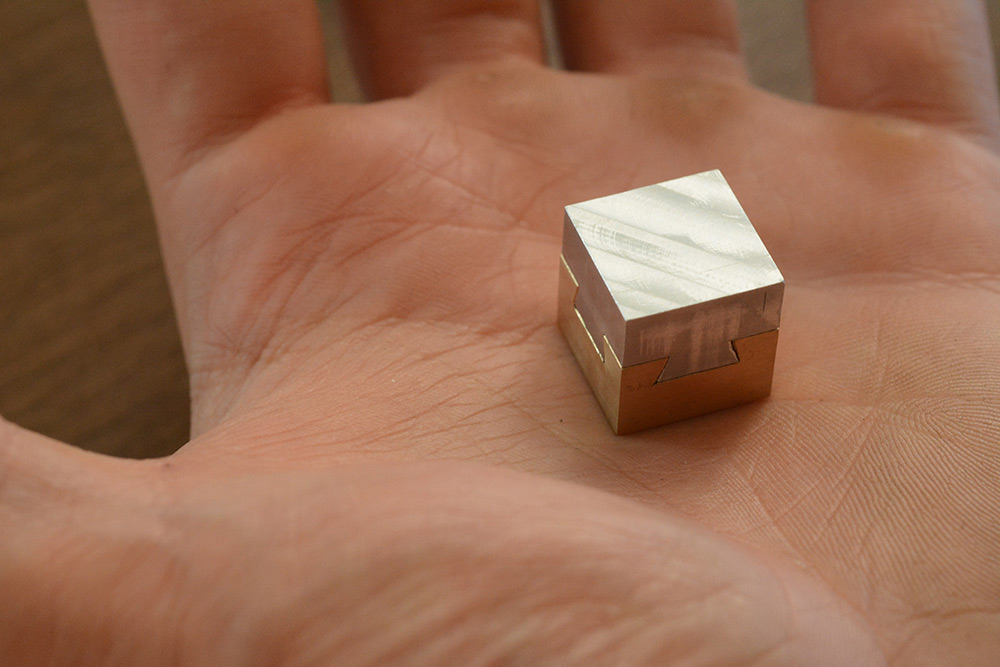
I should have been more careful with the deburring. I just ran a knife along the edges to create a micro-chamfer, but even that was big enough to make the dovetail look like less of a precise fit than it really is.
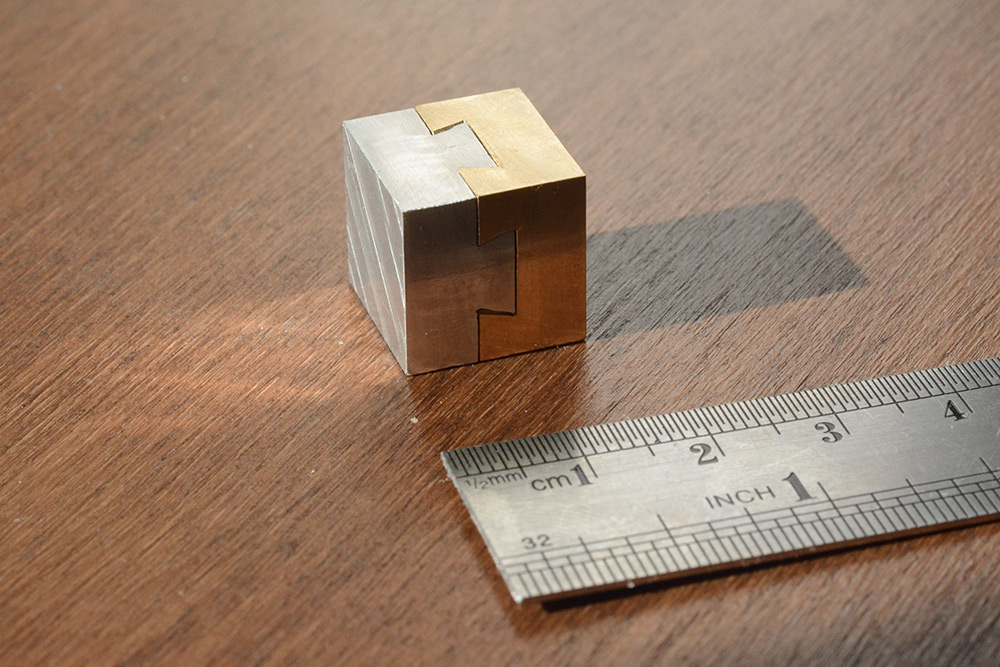
I lightly polished the faces with fine grit paper, but the top and bottom surfaces I left the toolmarks in place, as they look cool and make neat reflections in direct light.
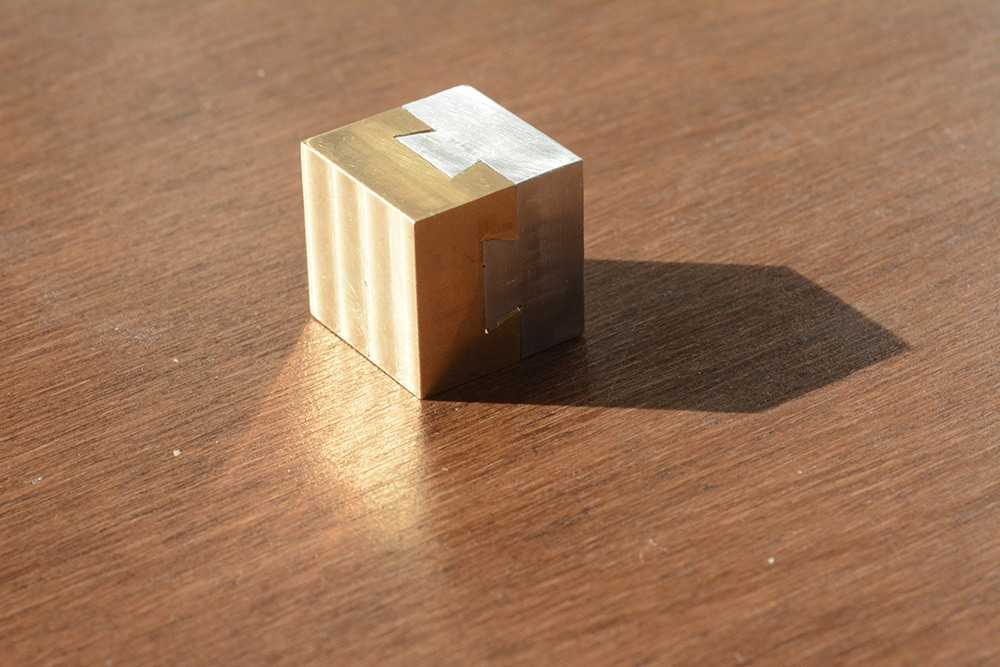
And of course, if you know exactly which way to shove it, the cube slides right apart.
This project was made using the Bridgeport mill at the London Hackspace. I am currently giving metalworking lessons there, so if you're interested in projects like this and you live vaguely nearby, you should become a member.