
About swotGB
27 Nov 2018Progress: Complete

[ Emulator Here ]
Yes, it's already been done. Yes, there are no-doubt compiled, WebAssembly emulators that probably run faster. Yes, writing this was a completely pointless, stupid waste of time. But it's about the challenge, the rite of passage, the pride in being able to tell people that you've written your own emulator from scratch.
The Challenge
I think I am quite susceptible to "nerd sniping". When presented with a sufficiently interesting challenge, I'm liable to drop everything in pursuit of the solution, even to my own detriment. Either that, or this is how the "mania" in "manic depression" manifests.The challenge was: is it possible to write a gameboy emulator in a day? Obviously it's impossible. There's no way you could do it. I know, I know. But... is it possible?
One day I was discussing this with Tom and we started looking up how hard it would be. There's tons of information about the gameboy hardware online. Dedicated people have reverse-engineered every last bit of it.
I had never written an emulator. An emulator is really a description of how every last detail of a computer works. There is something to that – can I really say that I understand computers when I've never emulated one?
The challenge was to write a gameboy emulator from scratch. Looking at the docs, looking at rom disassemblies, but not looking at the source code for other emulators, that would be cheating. And to do it in a day. Can't be done. Surely not...
CPU
Note: since there is so much information available (notably the Pan Docs, and also the gg8 wiki) I'm mostly just going to cover the bits I found interesting or insufficiently explained elsewhere.The gameboy has its own instruction set that's similar to a Z80 but with a few instructions added and a few others taken away. There are about 244 normal op-codes, and a further 256 extended op-codes that do bit shifting and swapping and things.
Here's a cool table of all the GB CPU opcodes. I only found this afterwards, it would have been really useful at the time. Note the cycle timings for bit n,(HL) instructions appear to be incorrect.
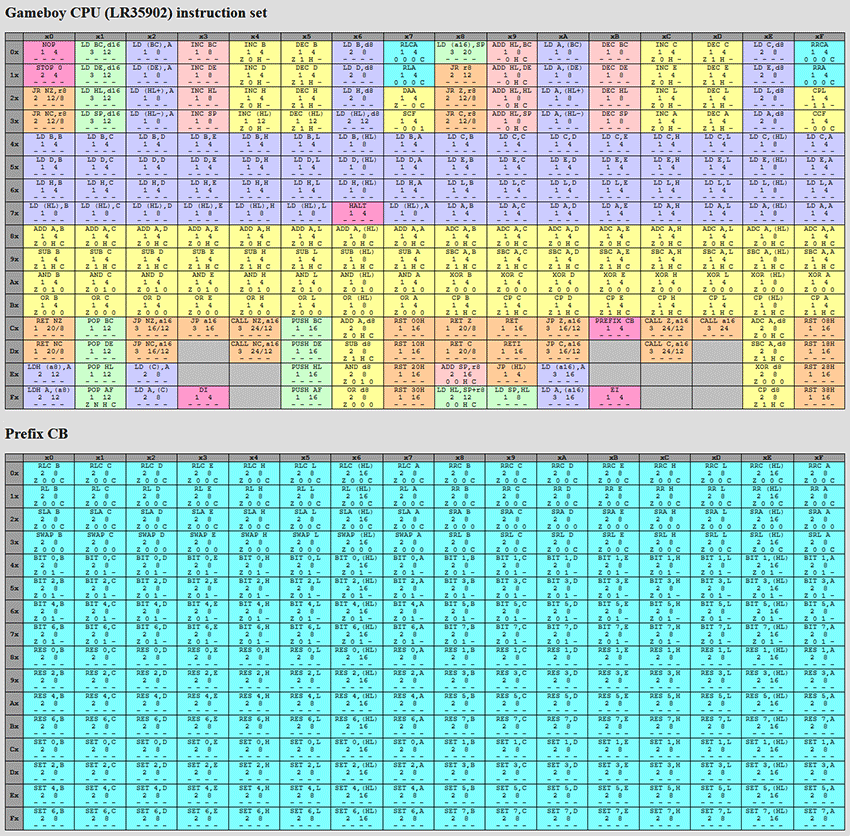
We need to implement every single one of them. There's a huge amount of overlap between them of course, in most cases one operation has a series of opcodes where the last few bits refer to which register to operate on. In a compiled language, you'd probably make heavy use of the preprocessor to minimize repetition, but in vanilla JS there's no such thing. (There are languages which compile to Javascript, but I'm not a fan of them.)
The straight-forward approach to an emulator is to have a big switch statement, with a case for every opcode. Very tedious, and also probably inefficient. Much better to have an array of function pointers – that's very easy in Javascript at least. But writing out nearly 500 functions, even with copy and paste, would be exceedingly tedious.
The most javascripty solution is to write opcode factories (functions which return functions). A simplified example:
function ld(a,b){
  return function(){
    REG[a] = REG[b];
    PC++
  }
}

opcodes[ 0x78 ] = ld(A,B);
opcodes[ 0x79 ] = ld(A,C);
opcodes[ 0x7A ] = ld(A,D);
opcodes[ 0x7B ] = ld(A,E);
opcodes[ 0x7C ] = ld(A,H);
opcodes[ 0x7D ] = ld(A,L);
This runs when the page loads and populates the opcode array with different functions. The fake enums persist in the closure of each function call. If a block of opcodes are particularly repetitious, such as all those extended shift functions, we can even set them up in a loop. Most importantly, if we find there's a typo somewhere, we only have to correct it once.
It's not all as straight forward as that. In the case of the ALU, there are a lot of bit-mangling flags to calculate, and I decided to put most of it into a conventional function that the opcodes can call. This might represent a performance hit, but you've got to draw the lines between efficiency, clarity and typing speed somewhere.
With that, the core of the CPU looks something like this.
while (true) {
  opcodes[ MEM[ PC ] ]();
}
I think it was about ten hours' work to get all of the opcodes implemented. We also need to implement interrupts. Once the call and ret instructions are in place, interrupts can be squeezed into that main loop with similar logic. There are five interrupt vectors on the gameboy, but one of these is the LCD STAT interrupt, which has a further set of flags as to what it represents. Time to look further into that.
Display
I had rather stupidly assumed that implementing the CPU was the bulk of the work. If that had been the case, maybe we could have finished it in one day. But the gameboy LCD is its own bit of hardware that has to be emulated, and there are no shortcuts! Emulating the display turned out to be three or four times as much work as emulating the CPU.I think if all we had wanted to do was to get as far as it playing tetris, maybe writing it all in a day would have been possible. Tetris is extremely simple, and doesn't use many of the gameboy's features. The ROM is so small that it doesn't have a memory bank controller. The graphics don't use background scrolling, or the window (more on that in a bit), or sprite flipping.
I was vaguely aware of OAM (the Object Attributes Memory) and knew that this was a list of sprites and their positions. For some reason I'd thought that we could just plough through this list and render sprites to the screen. For tetris, perhaps so.
The fact is, we have V-blank interrupts, we have H-blank interrupts, we have scanline coincidence interrupts and the vast majority of games depend heavily on these behaving correctly in order to work at all. The coincidence is an interesting one, the LYC register can be set to a particular value and the interrupt will fire when that number scanline is about to be drawn. This is used for wavy effects, true, but it's also used for more mundane reasons. The parallax scrolling in the opening scene of Zelda makes heavy use of it – each time the interrupt fires, the LYC is adjusted so that another will fire a few scanlines later. And each interrupt, the background is shifted slightly, creating the perspective effect.
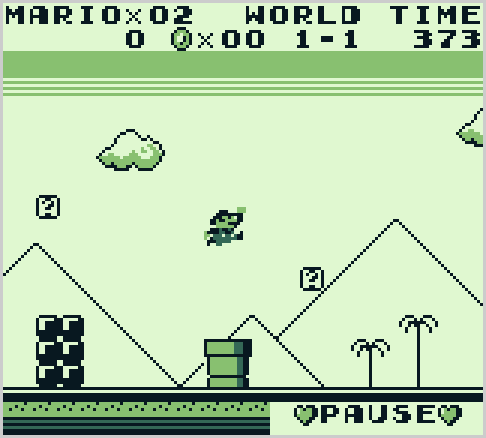
Without the coincidence interrupt, Zelda's opening scene looks pretty flat. But even Super Mario Land, one of the early and not-too-complicated games, depends on the interrupt in order to render the score along the top. The background scroll position is zero, but after the coincidence interrupt it updates it to the correct scroll value. So there's a fixed bit of background at the top, but without the interrupt, the whole of the background is fixed and the game is unplayable.
There are tiles, and different banks of tiles, and there are multiple palettes these tiles can have, and there's the sprites, and there's the window, and the background and the window have different maps they can use, and at this point I still didn't understand what the "window" was. There is good information out there on almost all of this hardware, but most of it assumes you know what the window does. Took me a moment to get my head around it.
There's the background, which is a collection of tiles that is rendered with an offset position (the scroll x and y registers). The window is an alternate set of background tiles, it has an X and Y position on the display, and everything to the left and below that position is overwritten with the window.
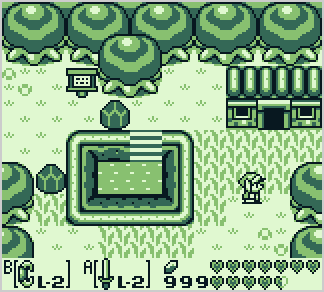
In the SML screenshot above, the window is used only for the "pause" overlay. It's using both the WX and WY offsets, most games only use one of them. Another example is the menu/HUD in Zelda. When you hit Start, the WY register is used to scroll the window up over the screen.
The gold standard gameboy emulator is BGB, which apparently is as close to the real hardware as you can get. It has excellent debugging features and also has a neat VRAM viewer where you can see the tile maps, and the background and its scroll position. But it doesn't show the window! Bah.
The point of all this explaining is that it became quite clear that writing an emulator in a day wasn't going to happen, and I should just give up now and go to bed.
Display Attempt 2
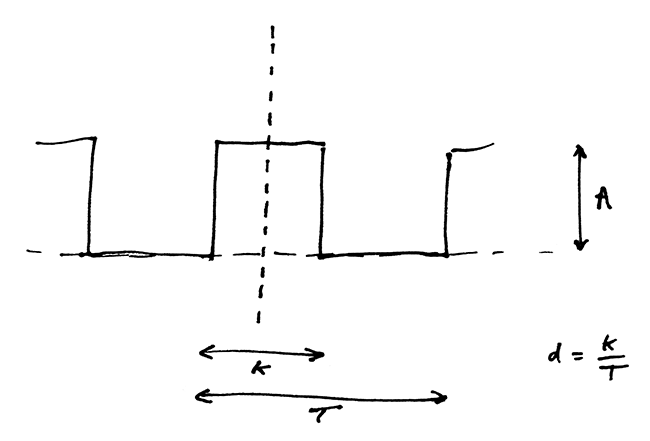
Tom came round and we had a collaborative stab at this thing. It's really not too hard. Emulate a scanline, that takes 456 clock cycles, which is split into a few different sections where the LCD is in different modes. Trigger H-blank if enabled, increment LY and repeat. V-blank at the end.The pixel format is inconvenient since it takes a lot of bitwise work, which javascript is not great at. Two bytes are used to represent eight pixels, where each pixel has a 2-bit index to the current palette (of four colours). The bits are interleaved (the first pixel's bits are the MSB of the first byte, and MSB of the second byte).
But remember that in javascript, we might not have much processing power, but we do have infinite RAM! To decode the pixels we take two bytes and return an array of 8 values. That means there are only 65,536 possible arrays and we can cache them all. This'll consume about 8MB of RAM, but in the world of javascript that's nothing.
Anyway, the scanning populates an array which at the end of the frame gets dumped into a canvas element. It was quite an elating moment to run the bootcode and finally see the Nintendo logo. With just the background working, games could load and sort-of be played! Sprites can come later.
Memory bank controllers
One of the nice things about writing an emulator is that there's such a diverse range of things you need to emulate. Getting tired of writing the display? Work on the MBC emulation! It's quite tedious, but easy and useful if you just want to feel like you're making progress.
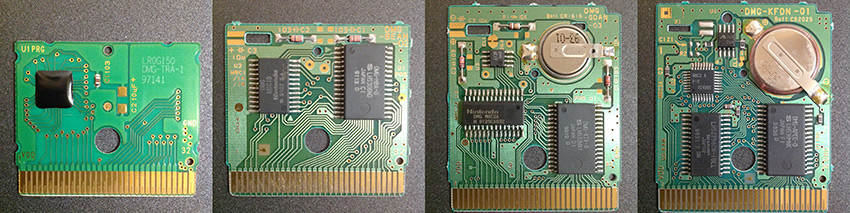
See more pictures of the insides of gameboy carts here.
The idea is that cartridges have these MBC chips on board, and different generations of cartridges have different MBCs with slightly different behaviours. All of it is so that you can squeeze more memory into the limited address space. Some also have additional hardware, like real-time-clocks. I didn't emulate those yet.
It turns out that most gameboy games use the first type, MBC1, so that's pretty essential to emulate correctly. Now that we could load various games, we can finally get to the fun bit.
Sound
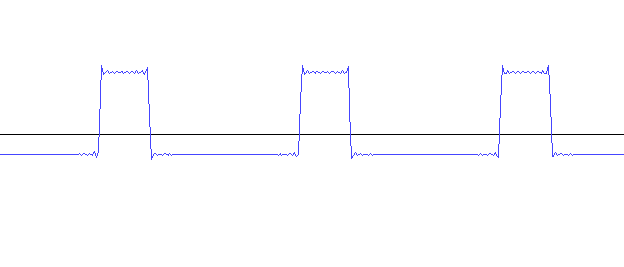
...is supposed to be the hardest part to emulate. I think this is mostly because if you're not familiar with Nyquist aliasing, square waves sound easy, until you hear them, and they sound terrible. But with the Web Audio API we can circumvent almost all of the aliasing with the built-in oscillators.The first two sound channels are rectangular waves with a selectable duty cycle. With the Audio API, we can just ask for a new oscillator, set its shape to "square" and give it a desired frequency. Very easy, very clean square wave results. It's a little bit harder to do the pulse duty though.
The Audio API has a feature for createPeriodicWaveform(). This asks for the Fourier components of the waveform you want to make. Aha, excellent! A chance to wax our algebra skills!
If we put the waveform symmetrically around zero, the bn terms will be zero, and the an terms are given by

Yep, it's a sinc function. Now we can plug those coefficients into our oscillator (set A=1 for simplicity).
function setPulseDuty(duty) {
  var real = new Float32Array(512);
  var imag = new Float32Array(512); // defaults to zeros

  for (var n = 1; n<512; n++) {
    real[n] = 2*Math.sin( Math.PI*n*duty )/(Math.PI*n)
  }

  var wave = audioCtx.createPeriodicWave(real,imag);
  oscillator.setPeriodicWave(wave)
}
and this makes a perfectly bandlimited pulse wave! See – mathematics can be useful after all.
The third sound channel is similar to the first two, except we get to specify a custom waveform. 32 4-bit samples represent a single cycle of the oscillator, which is played back at a given frequency like the first two oscillators. We can again use createPeriodicWaveform, but this time it's probably best we use an FFT. It's not enough to just transform the wave and hand it to the oscillator, that produces a very smooth and perfectly interpolated waveform. The lower notes on Sound 3 have a characteristic crunchy sound due to the sharp edges of the low bit-depth, and to simulate that we can upsample the waveform before transforming it. I replaced every sample with 16 samples of the same value, to give some nice flat spots to the waveform.
Once again the API's oscillator handles rendering this without aliasing.
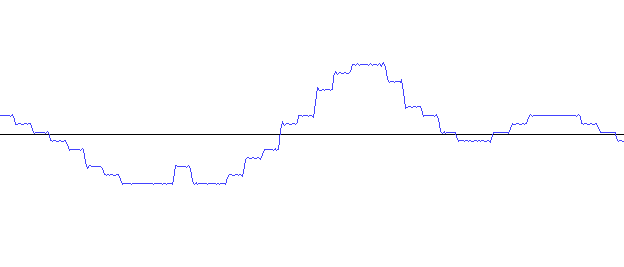
Delicious, simulated low resolution.
The fourth sound channel is called the "noise" channel, but it's not white noise! If I had understood what it really did I could have saved myself an awful lot of time. To begin with I just chucked a simple white-noise algorithm in place, but the noise channel is a very specific circuit which can produce anything from an electrical buzz, to pure white noise, to a completely tonal note. Example: the ka-shing! of a sword as the title sequence of Zelda loads is produced entirely by sending different commands to the noise channel. I decided that implementing this properly could wait until later.
Sounds 1, 2 and 4 also have envelopes. These just progressively decrease (or increase) the output volume. The sounds can also have fixed lengths, automatically stopping them after a while. There's a huge amount of information on the precise timing of these things, which I didn't pay too much attention to, I just tried several different games and listened to if it sounded OK. The timings might not be exactly right, but no one's going to notice. It's funny that some games approach sound completely differently to others, and one game might be working perfectly, and then another doesn't work at all. For instance, the opening sequence of Pokemon keeps oscillators turned on, and shuts them off by sending zeros to the stereo multiplexer. Weird.
Sprites
I was pleased to have the square waves working. The opening sequence of Tetris could be heard quite clearly. Interestingly, left alone, Tetris goes into demo mode, and we can see the gameplay is nearly all based on background tiles. The blocks were not yet visible while moving, but once they've hit the ground they are rendered onto the background.Implementing sprites is actually fairly straight forward, but we need to squeeze it into the scanline routines. There are an awful lot of little details to watch out for. Sprites can either be 8x8 or 8x16, and they can be flipped on either axis, and they have transparency on their colour zero (that's index zero, white is still available if placed elsewhere in the palette), and they are drawn on top of the background and the window unless the obj-to-bg priority bit is set, in which case they are drawn behind the background, but never behind the main background colour (in index zero of the background palette). Tedious!
But as I mentioned, Tetris only makes very simplistic use of the features, and we can get it working very quickly.
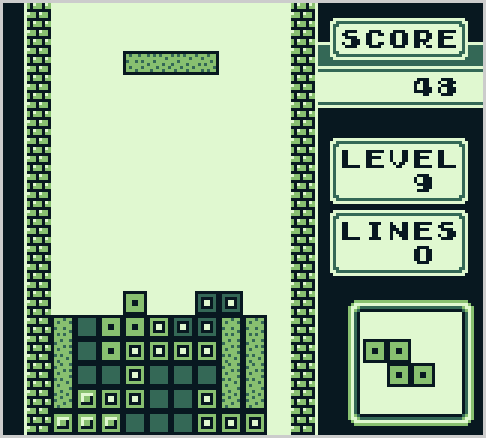
The problem with doing this is that the next few hours are lost, playing Tetris.
It was approaching one week, by the time sprites were implemented. Makes our initial goal of just one day seem embarrassing. The following week was spent playing games, and fixing glitches as they appear. There are a lot of subtleties that don't appear until you get quite far into a game.
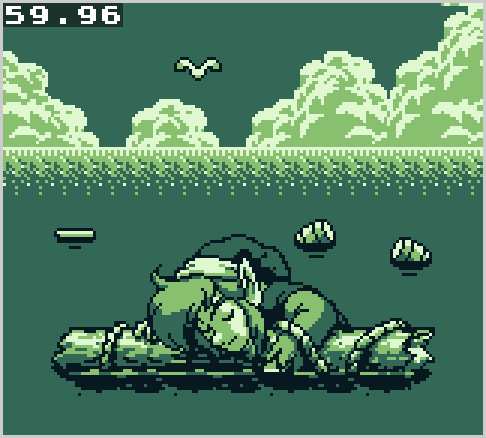
One example is the 8x16 pixel sprites. In this mode, all sprites are double-height compared to normal, and the extra image data is loaded from the next tile in memory. Zelda is one of the games that makes use of this mode, and almost all of the sprites are addressed by the lower tile, so the game appeared to be working correctly until we reached halfway through the first dungeon:
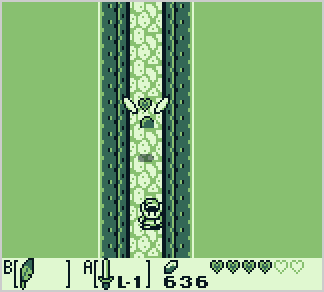
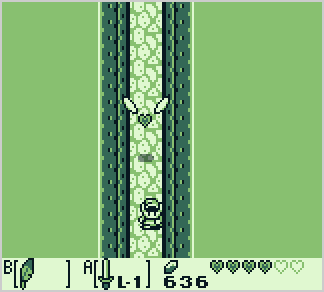
This is the first instance of the sprite being addressed by the upper tile. The specification does say we should ignore the lowest bit of the tile address, but until this point it hadn't made any difference. The tile in memory immediately before the small heart is a completely transparent one, the tile after it appears to be part of a big heart container.
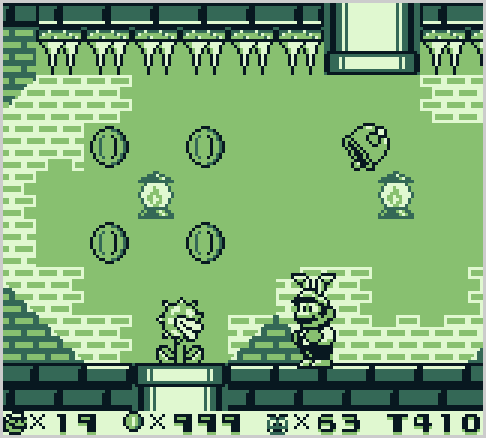
Another subtlety is that the "background colour" is whatever is in index zero of the background palette. But nearly always, the background colour is white (which is represented as zero). I'd accidentally been checking that the colour was zero, and this didn't make any visible difference until we got to Pumpkin Zone in Super Mario Land 2. In this level, the pipes are white, and the piranha plants peek out of them.
So, it's important to play games properly instead of just loading up the title screen. More dramatically, it was only after we reached the moblin cave (to rescue Bow Wow) in Zelda that the game suddenly crashed entirely. This was a problem with the MBC1 implementation. The ROM is only 512kB, but MBC1 supports up to 2MB. So when Zelda switches banks, clearly the highest bits of the translated address are not used. For some reason in the moblin cave, it attempts to access bank 66, which doesn't exist. The array returned undefined, and the entire CPU halted. The correct behaviour as far as I can tell is to just wrap around, so when it asks for bank 66, select bank 2.
One of the instructions I had struggled with was DAA. This is the only instruction that really makes use of the H and N flags, and it's used to do BCD arithmetic. I really wasn't too clear on how to implement it, gave it my best shot, left a comment on that line and moved on. It's one of those things where you think, are any games even going to use this? Well, lots do. Turns out my DAA was working fine for addition, but not for subtraction. Most things that get stored in BCD, such as total score, are only ever incremented. It wasn't until I bought the shovel from the shop in Zelda that I noticed it subtracted the wrong amount! At this point I cheated, googled the correct logic for DAA (there are conflicting answers) and fixed it up. There are test roms available written by Blargg (Shay Green) that can check every instruction – very useful. I also tried the instruction timing one, which flagged that my bit n,(HL) was taking too long. It seems that some sources incorrectly state that it takes 16 cycles, but Blargg's rom says 12. There are other test roms, but I haven't tried them: I'm not trying to make a cycle accurate emulator here, I'm just trying to make something that's good at playing games. Coincidentally, Blargg is the same person who wrote the sound libraries used by VBA and several other emulators.
LFSR
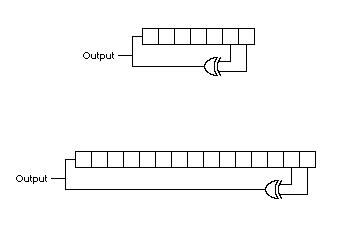
Part of the reason I found this difficult is that none of the descriptions of it really make sense. We're familiar with an LFSR (linear feedback shift register) which is a simple pseudo-random number generator. The gameboy can select between two LFSR arrangements, a 7-bit LFSR and a 15-bit LFSR. The (first) confusing part for me is that there is both a clock divider and a clock prescaler controlling how fast it's clocked. Most of the descriptions are aimed at people using the gameboy's sound chip, rather than trying to emulate it, so they rarely explain this part.From what I can gather the two different clock dividers are just a hardware quirk, one feeds into the other, so all we need to worry about is the ultimate frequency with which the LFSR is clocked, that is, just multiply their division factors together.
The second problem is that we know we can select between two different LFSR polynomials, but nobody seems to know what those polynomials are! I suppose the important thing is the sequence length, both of those polynomials will be maximal length, so their periods will be 127 and 32767.
I did some searching and finally found this page which is talking about the Gameboy Advance hardware, but the first four sound channels on the GBA are the same as on the GB. At last, someone going into a little more depth! And it includes a neat test rom. They link to an old java applet as their source, unfortunately I don't think I have enough effort to get a java applet to run in this age.
That gives us the polynomial for the 7-bit sequence. The 15-bit sequence is still a mystery, but we can probably just wing it because a sequence that long is not going to be recognizable by ear. In case it wasn't clear, there are multiple maximal-length polynomials for 7-bit and 15-bit LFSRs. Wikipedia has a table of them, and their example 7-bit polynomial is different to belogic's. (It could be a mirror image of it though.)
Regardless, I implemented two LFSR functions that give sequences of the right length.
Again, javascript has essentially unlimited RAM, so we can cache the entire thing and step through it at the specified speed. I'm not doing any kind of antialiasing. The real LFSR on the gameboy can be clocked much faster than our samplerate, so aliasing is definitely going to be present, but after all, it is a noise channel, so maybe we can get away with it. I did some experiments with sticking the whole sequence as a waveform into another audioContext.createPeriodicWaveform(), but the results were not good.
Bootcode
I don't really get the attitude on this (but as you may have noticed I am not a lawyer). Distributing ROMs of games is illegal, OK. I'm emulating games which I own physical copies of, and reading out the ROMs is pretty easy.But the bootcode in the gameboy is different. The bootcode is what loads up the Nintendo logo from the game, checks it's correct and allows the game to run. This was intended as legal protection against unlicensed games: if you want the game to run, you must include the Nintendo logo, and if you do that without a licence, you've violated copyright law. Having the Nintendo logo scroll down is a really nice part of the emulator, but asking the user to provide the 256 bytes of bootcode is lame.
We are making a gameboy emulator, and the boot sequence is an integral part of its behaviour. Unlike the games, very few people have the means to extract the bootcode "legitimately". It's implemented as interconnects on the metal layer in the silicon, and was dumped by reading it out using a microscope!
Photo courtesy of neviksti, see the original forum thread here.
It might also be possible to rip the bootcode by creatively fluctuating the power and running a custom ROM, which is how I think the gameboy colour bootcode was ripped, but again this is out of reach of most people.
Well, whatever. If that Nintendo logo bitmap is the copyrighted content, let's not include it. As you may have already noticed, I've replaced the bootcode with something much better. It no longer checks the logo from the ROM, of course. If you want to restore the original behaviour, just drop the real code into the window.bootCode array using the dev console before loading your ROM.
Conclusion
A very educational challenge and I highly recommend everyone have a go at it. Preferably without looking at my source code (or even without reading this page). It's approaching three weeks now since that first discussion that started off this adventure, although a fair amount of that time was spent playing games (for testing purposes, of course). I played Zelda all the way through to the end. Being able to export the battery-backed cartridge RAM as a .sav file is extremely useful, because in addition to saving your progress it lets you load up the file in another emulator and check how a glitchy part is supposed to behave.
Other games I played all the way through include Super Mario Land 1 and Super Mario Land 2.
Writing an emulator is weird. I guess for a more complicated system you'd depend heavily on test cases. I didn't have any test cases for this except ROMs. Writing large amounts of code without any way of testing it does tend to induce a rather uneasy feeling.
At one point I declared the emulator "finished" then immediately proceeded to add more to it. I kinda like the way you can go on adding to it, finding more and more things where it's inaccurate to patch up. But having reached the conclusion, I'm now able to look around and check out other people's emulators. It's really interesting to compare how different things were implemented. I'm also impressed by the sheer number of people who've written gameboy emulators, I guess it's a great system to use to learn about emulation.
One of the hardest games to emulate is apparently Prehistorik Man. I looked up the intro clip for the game on youtube, and yeah, I can see the problem. The entire thing plays like something from the early-90s demoscene. Aside from the impressive layered scrolling and pseudo-3D, the overlay text does a blending effect by toggling the palettes mid-scanline. There is no way my emulator is going to run that correctly, I'd have to rewrite the way the display is done. But what a soundtrack! Some seriously impressive chiptunes in that game.
I will probably continue to add things and patch things for a while.
One last thing I think would be really neat to add is link-cable support. A relatively new web technology is WebRTC, which allows you to set up peer-to-peer connections between browsers. This could let us trade pokemon in-browser! Perhaps soon.
Known issues / to do
- Transparency problems when background palette has two of the same colour
- Savestates don't save/restore sound state
- Some games still have sound problems (writing 0x80 to 0xFF14 should mute sound?)
- No 10-sprites-per-line limit, some games use it to hide sprites
- Window with negative coordinates is drawn from zero
Update: video
About 60 hours of work condensed into 6 minutes. Totally pointless, but kind of hypnotizing, don't you think?
This video isn't a recording, it's a timelapse generated directly from the git history. As such the typing doesn't quite line up with what really happened, but the commits were frequent enough that it's pretty close.
The soundtrack was supposed to be produced entirely on a gameboy, but that got tedious and I cheated a bit in places.