
Portable Probability Panel
20 Jul 2024Life is full of surprises, mysteries, and risk. But probabilities are peculiar, and out of the unknown comes stability – predictability from random chance. With a large enough sample size, outcomes can be guaranteed.
This is the cornerstone of statistics, and a vast number of derivative fields, but the jarring nature of the idea is so counter to human judgement that the concept can be difficult to accept.
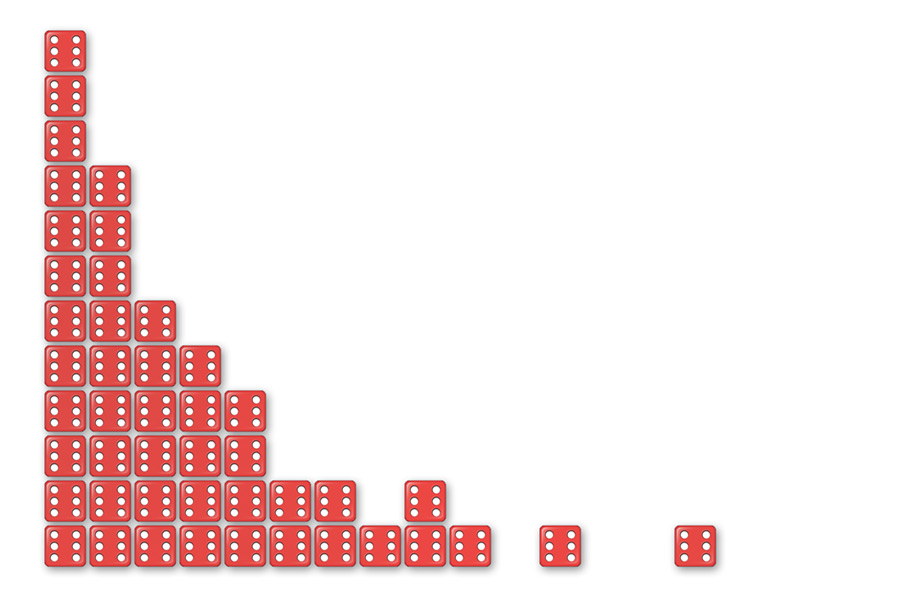
Perhaps the best demonstration of extracting order from chaos is using a bucket of dice to illustrate radioactive decay. Roll a thousand dice, and count the number of sixes, then put those dice to one side. Roll the remaining dice, and repeat. Even though each die has a random, one-in-six chance of landing on a six, the graph at the end is always a perfect exponential decay curve.
But by far the most pervasive probability peculiarity is the Central Limit Theorem (CLT). In layman's terms, everything tends towards a Gaussian. The bell curve. The normal distribution. Whenever you think, oh surely not, there's no way this thing will look like a Gaussian – bam, the Central Limit Theorem rears its head and smiles that Normal grin.
You can demonstrate the CLT with dice: roll several and sum the result. The distribution ends up as a Gaussian. But there's a much more visually pleasing demonstration, providing immediate gratification, in the Galton board.
I once witnessed this effect at a science centre called Techniquest. They have a large installation, maybe four or five metres tall, where an air pump sends balls into a series of Y-junctions, ending in a series of bins. The path of each ball is random, but at the bottom we get a beautiful Gaussian curve. It's poorly publicised but there are pictures of the installation here: Probability Path Exhibit.
More recently, somebody showed me a much smaller Galton board. Essentially a pachinko board with histogram bins at the bottom, it makes the central limit theorem immediately obvious. An executive toy that can be flipped over, the small scale means the whole effect runs in only a few seconds.
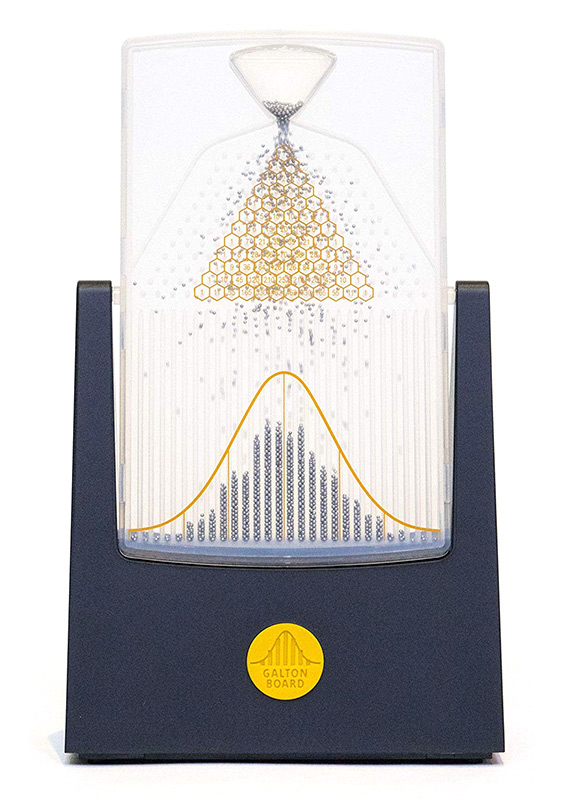
I would have bought one right away if the far east were cranking them out for pennies, but the niche subject and the executive-toy territory means the artisanal lump of plastic above costs about $100. Additionally, they appear to be sold out and are selling for substantially more than that on eBay.
This had me thinking though. I could laser-cut one for a lot less than that. I do like miniaturising things. The idea of a pocket Galton board, about the size of a credit card, has enormous appeal. A kind of totem, to be carried with you, for periodically reminding yourself that the Central Limit Theorem still applies.
I gave it a shot.
Laser me once
I started by acquiring a thousand 1mm ball bearings. A thousand doesn't go as far as you'd think.
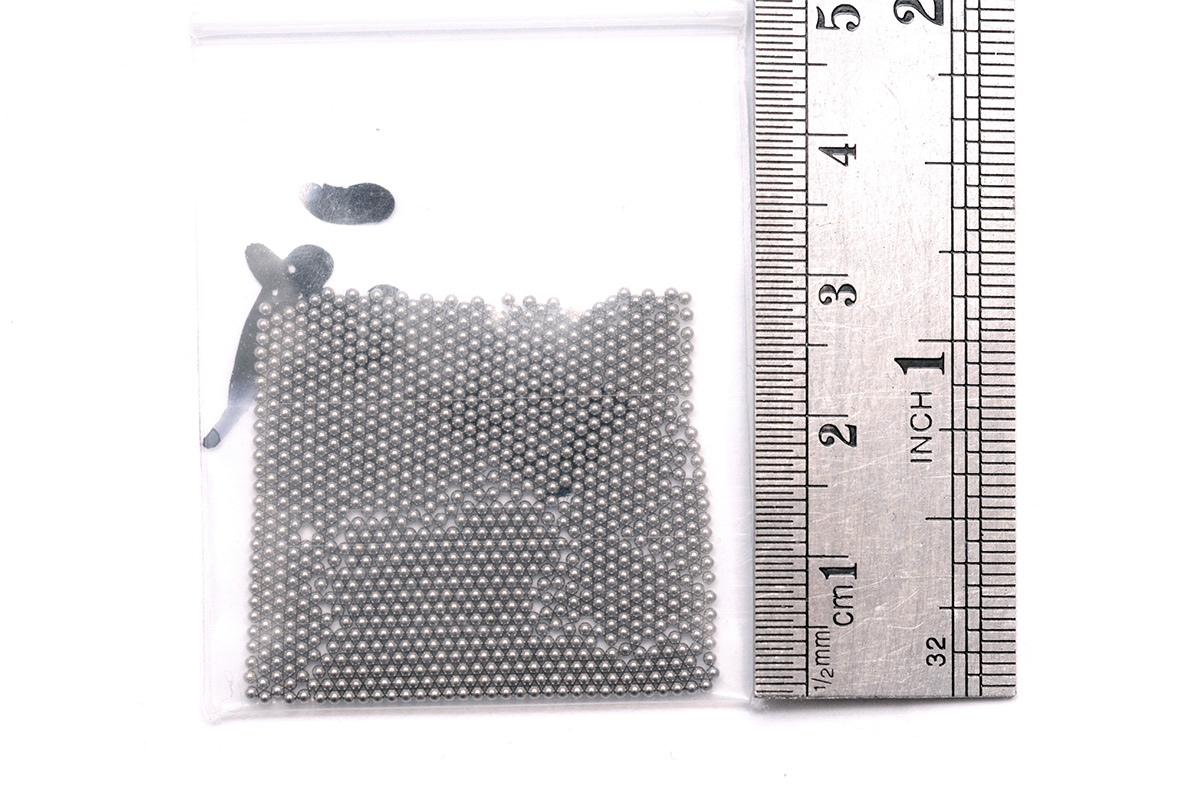
Feel free to count them (I didn't).
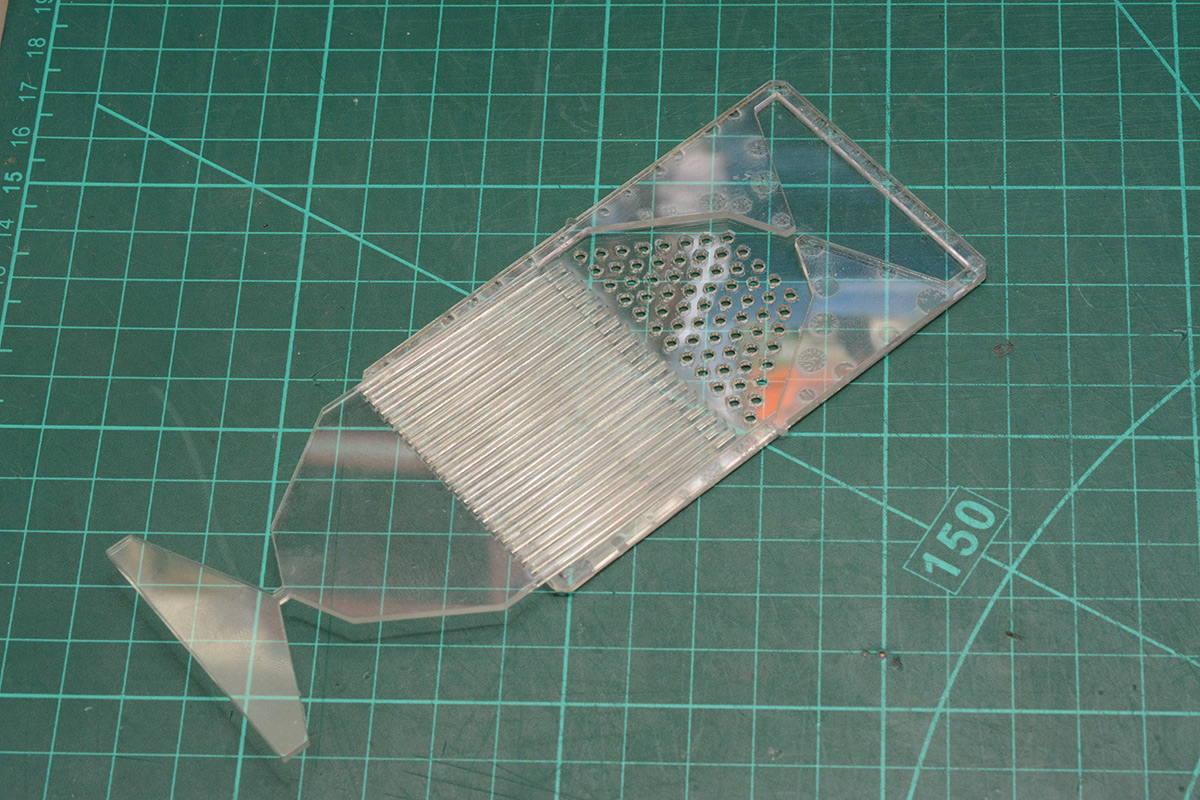
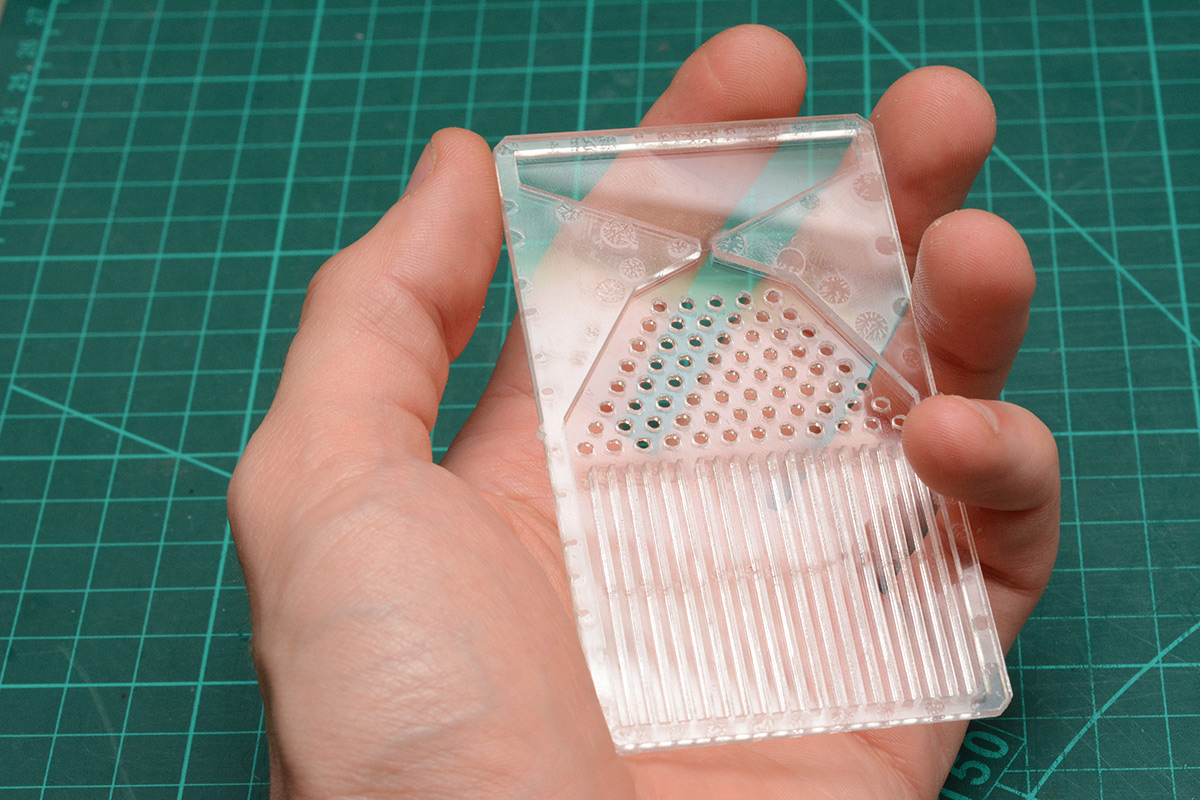
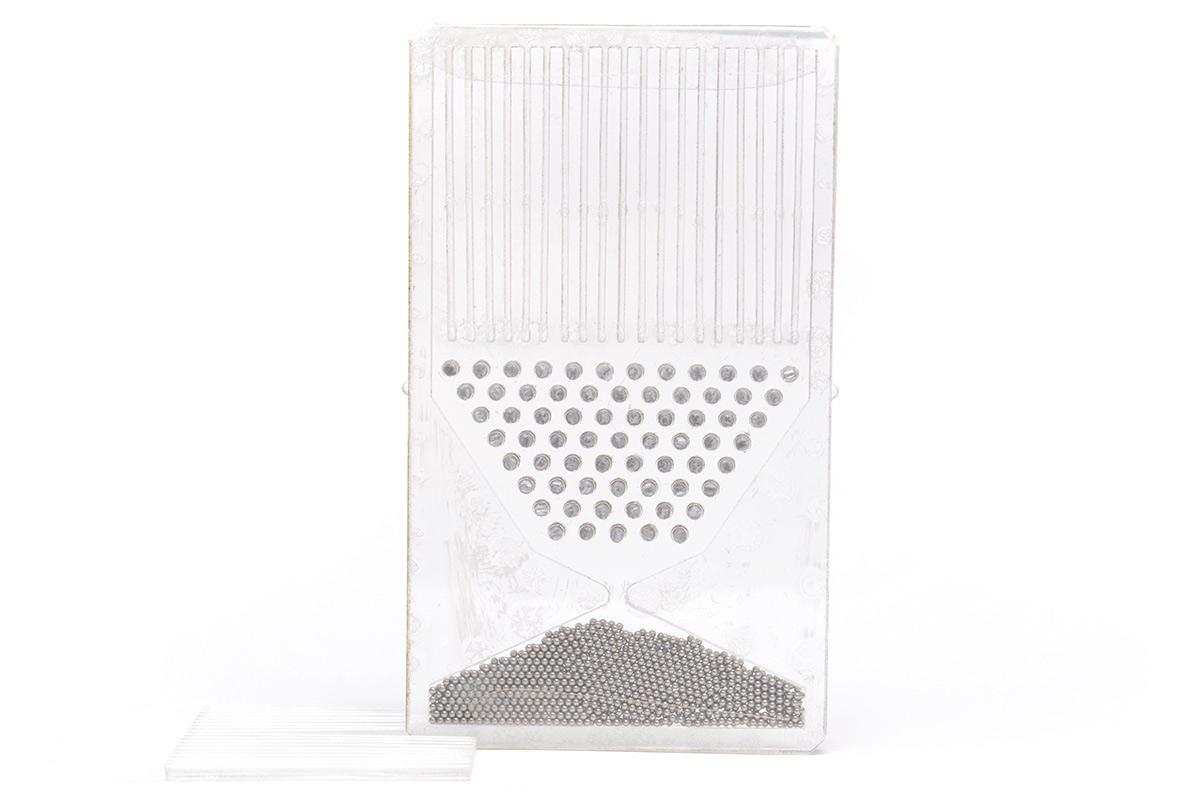
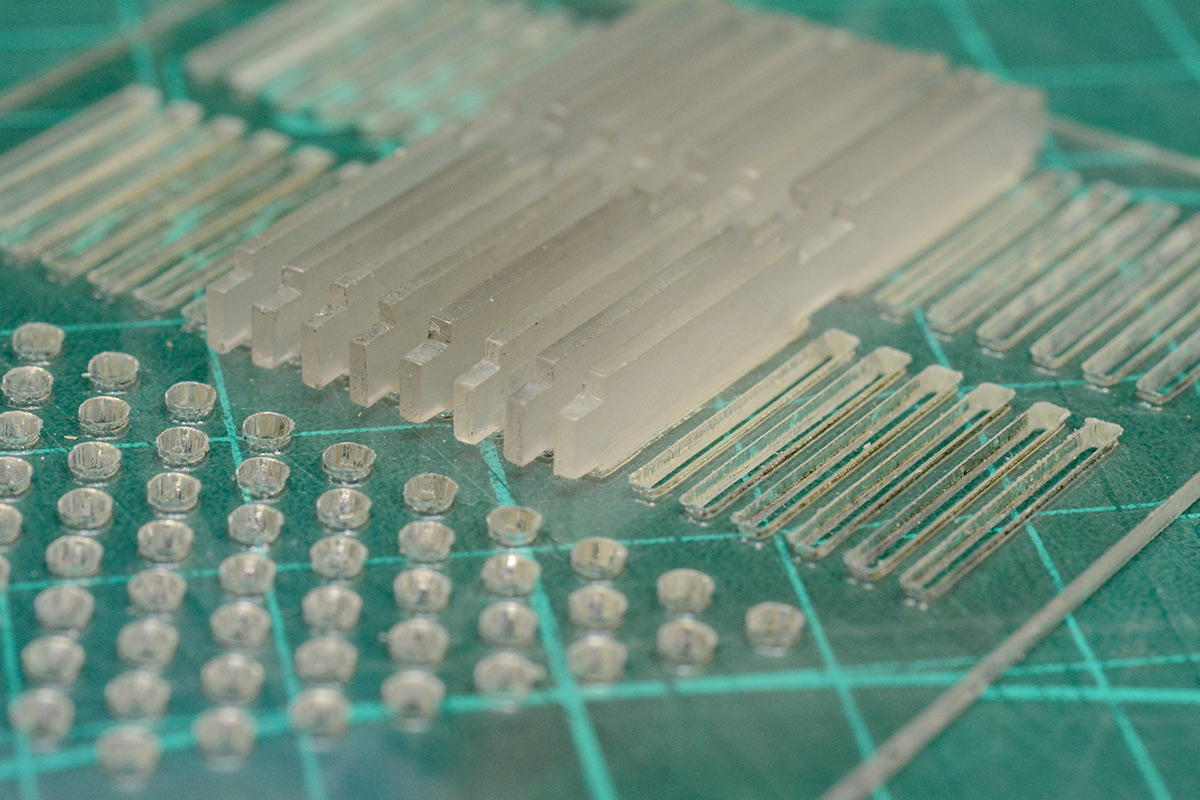
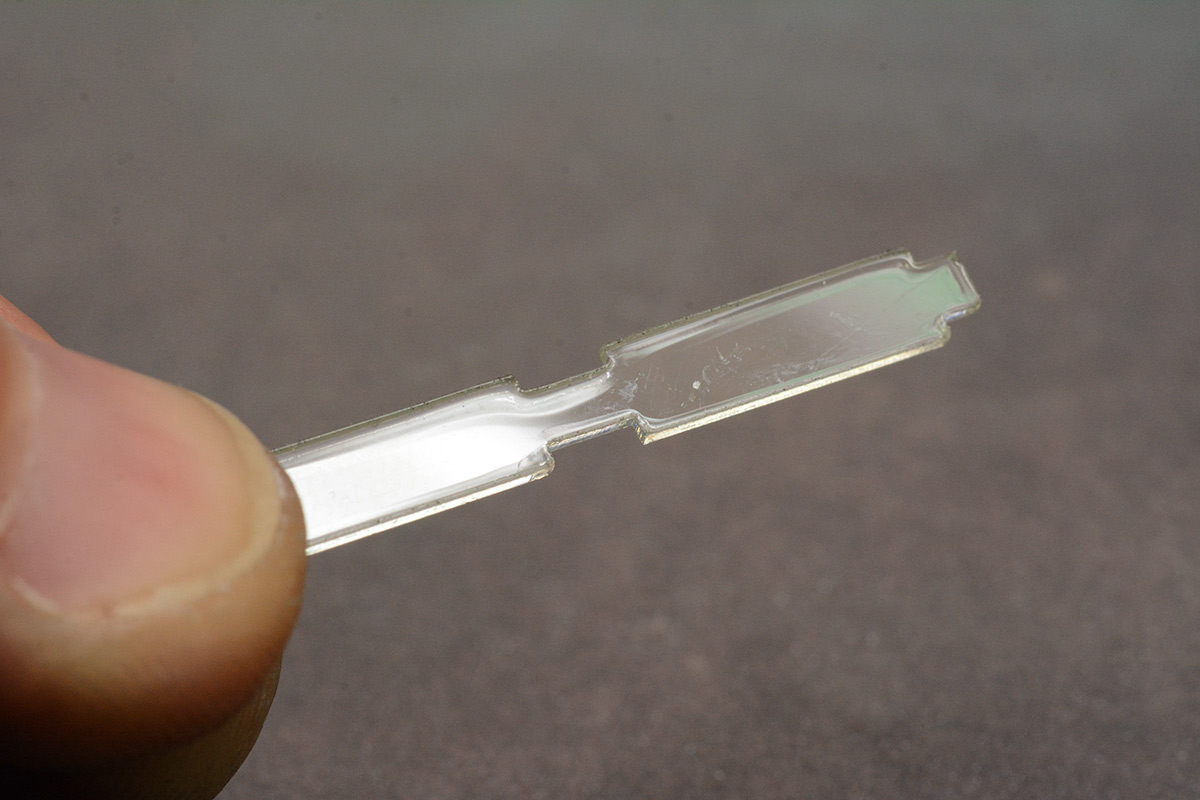
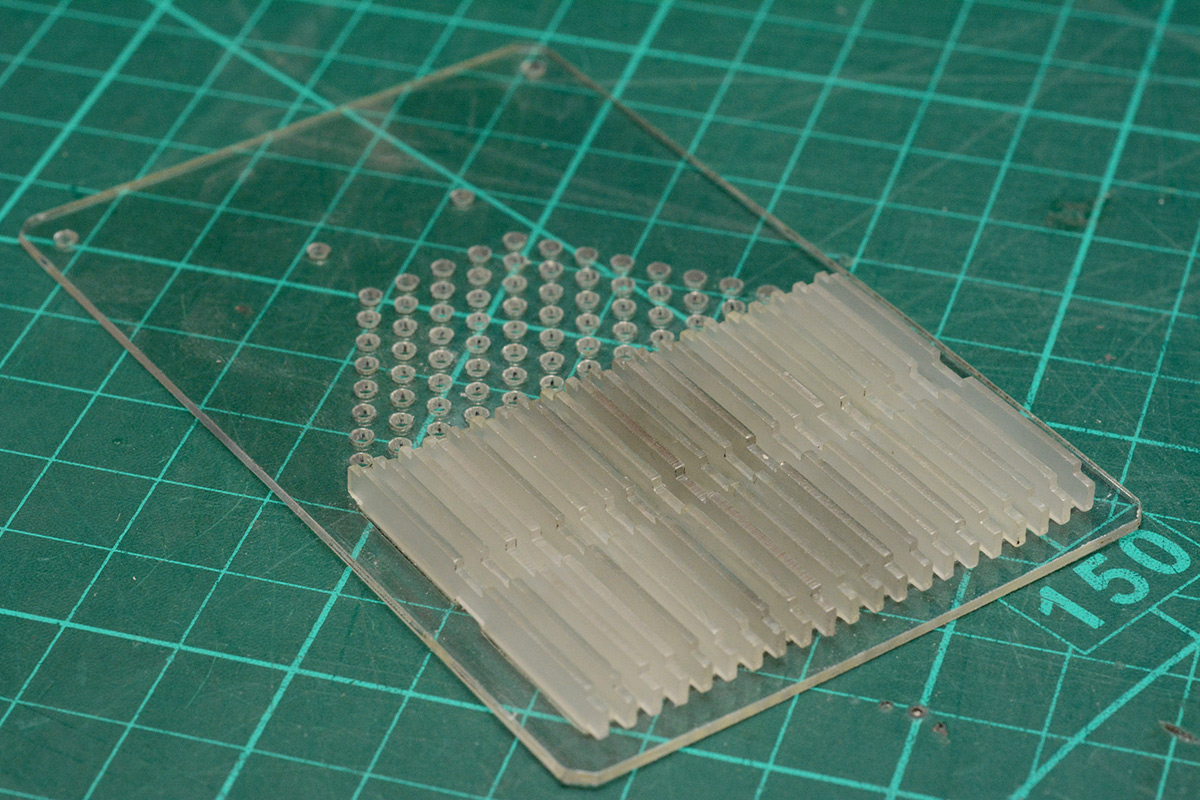
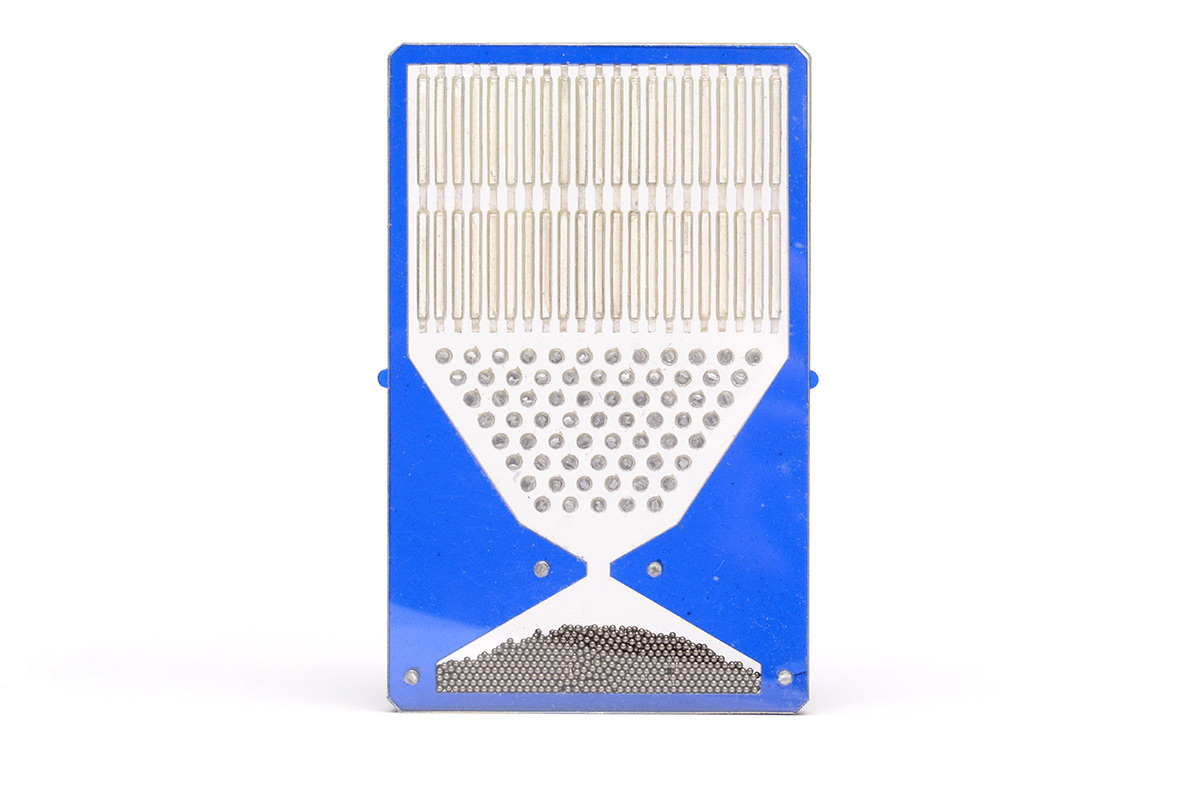
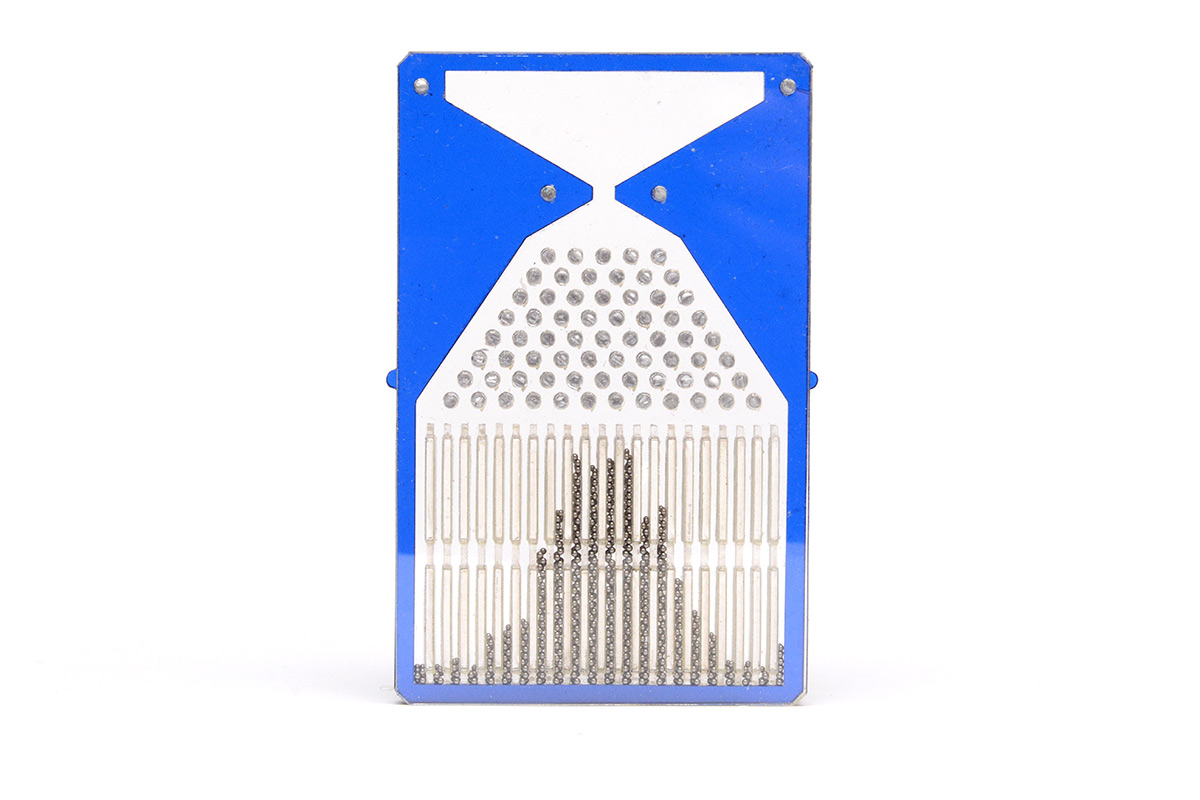
On the back of an envelope I came up with some ideas for the size and shape of the device. We need to know how many bins, how many pachinko pins, how big both of those should be and what angles to place the slopes. Cutting the main histogram out of 2mm acrylic, I attempted to place 1mm tines in a comb of 1.5mm bins.
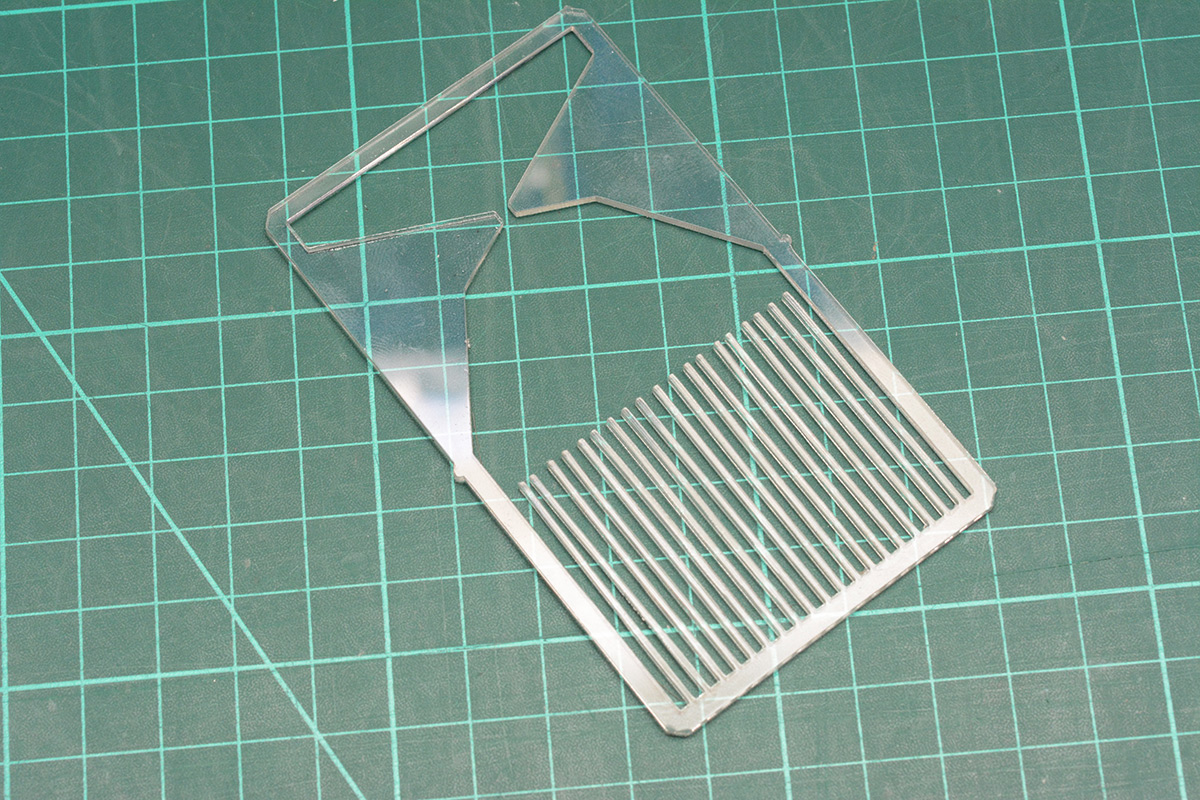
Acrylic has a tendency to deform as you cut thin shapes. I did this in three very light passes, but it wasn't quite light enough to stop the comb ending up slightly uneven.
This part is to be sandwiched between two layers of 1mm acrylic. The pachinko pins are going to be bits of 3D printer filament applied in an unconventional way. I cut a bunch of holes that form a friction fit with the filament. The laser leaves a kerf, so the holes are slightly conical. It's much easier to push the filament through in one direction than the other.
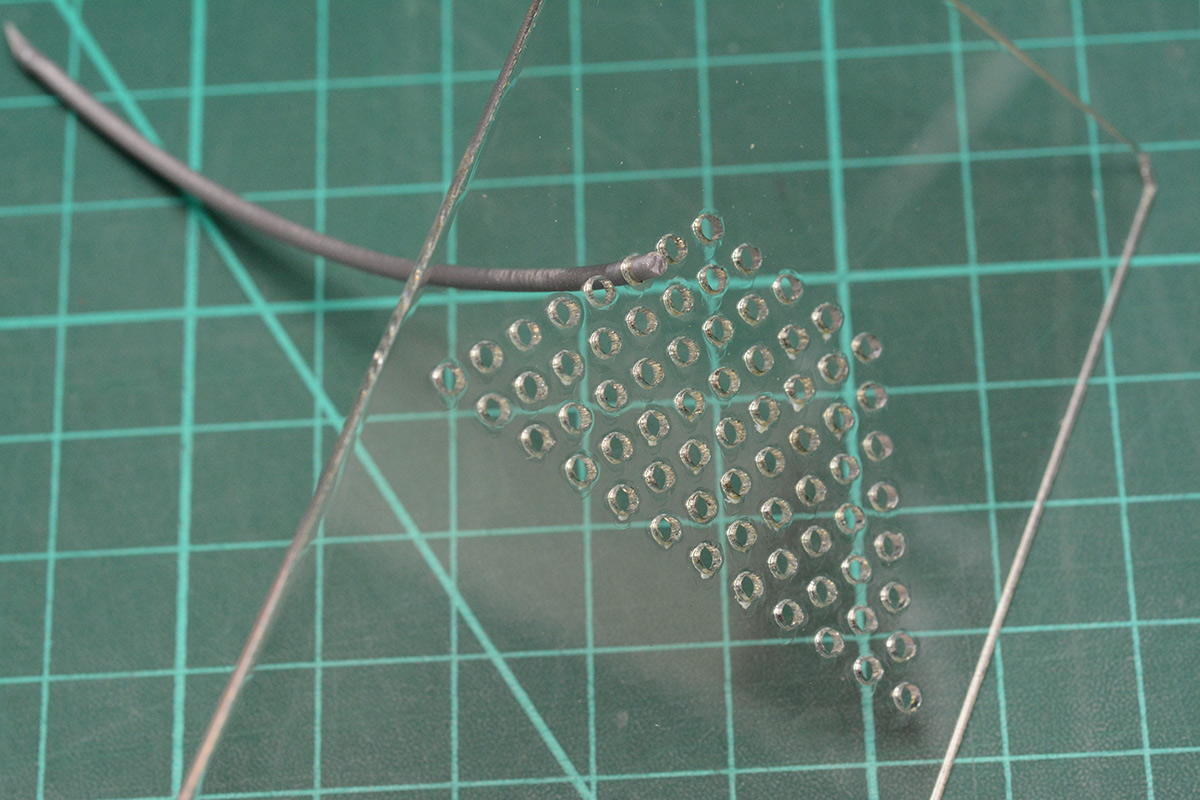
Worried about the unevenness of my histogram bins, I decided to try and glue them in the right places. I used the comb-shaped cutout to support them while the tiniest amount of superglue dried.
Super glue is notorious for out-gassing as it cures and fogging any optically important surfaces nearby. I've seen this happen plenty of times, but if you use a teeny tiny amount you can usually get away with it.
The result is not unusuable but it probably could have gone better, and the sparse spots of glue are a little antithetical to the executive toy aesthetic.
Undeterred, I pressed onwards to see if this pachinko thing was going to work.
The second layer isn't glued, it's just held in place by the friction of the pegs. These were just trimmed approximately for the moment.
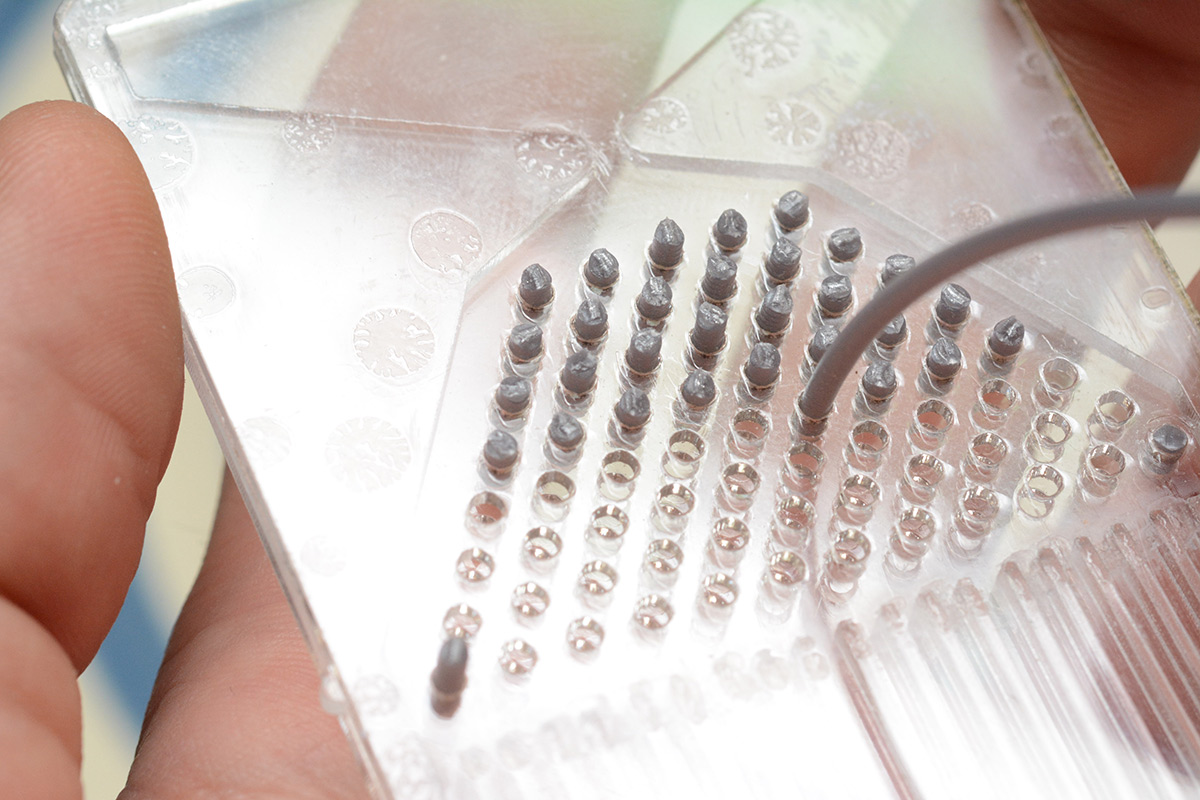
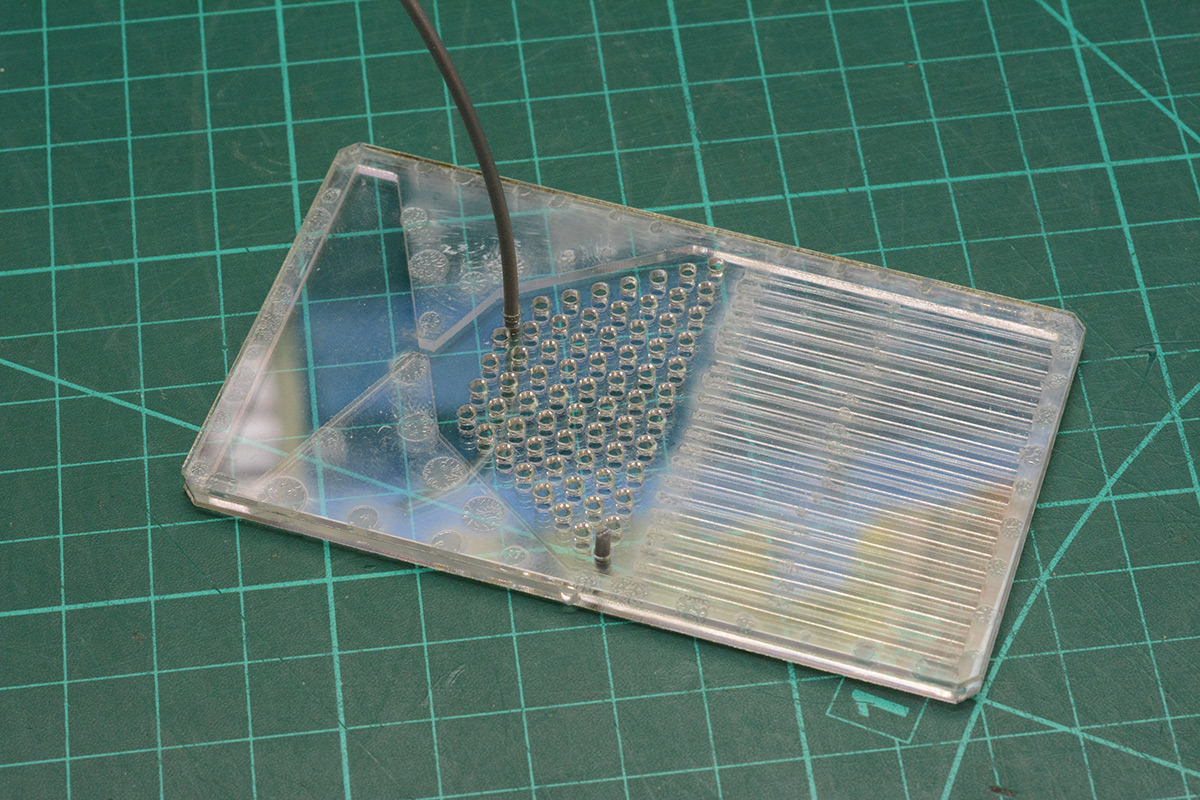
Once all the pegs were positioned, we could finally load up our balls. I'm sure that most of them ended up inside of the device. A nonzero amount may have ended up on the floor.
The sandwich was temporarily sealed with tape.
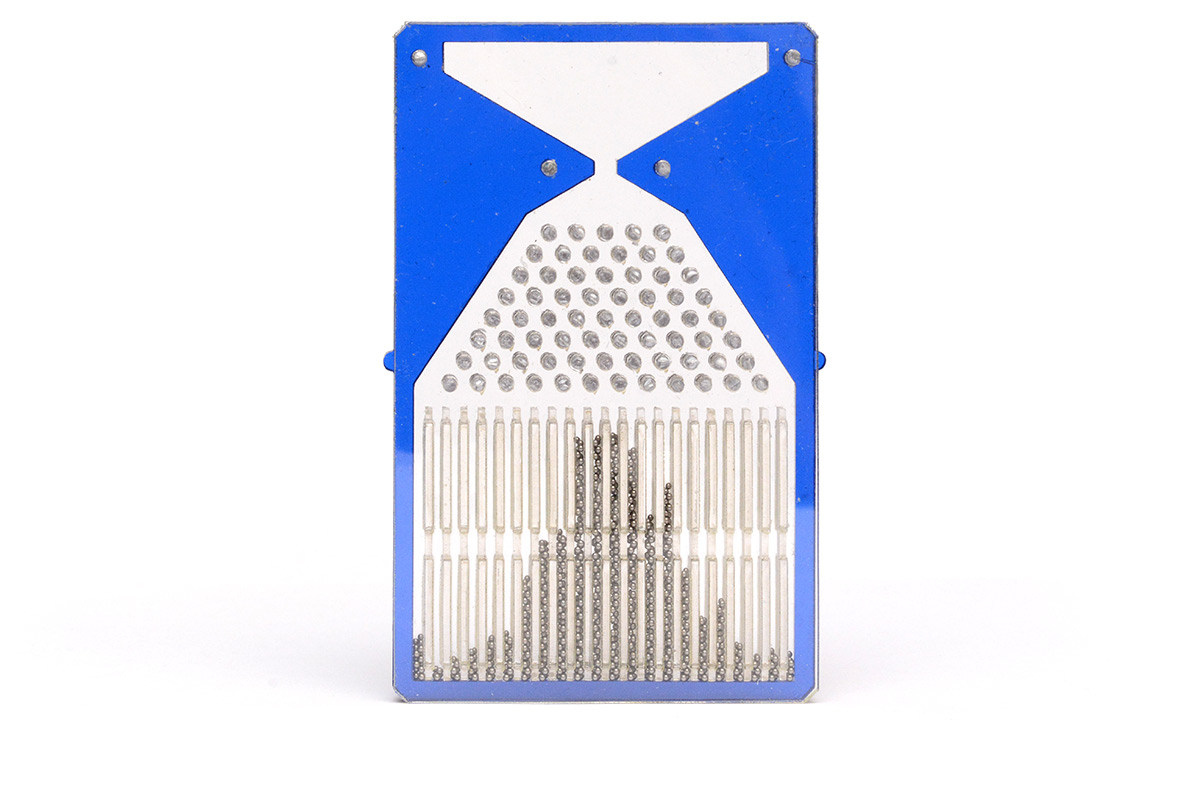
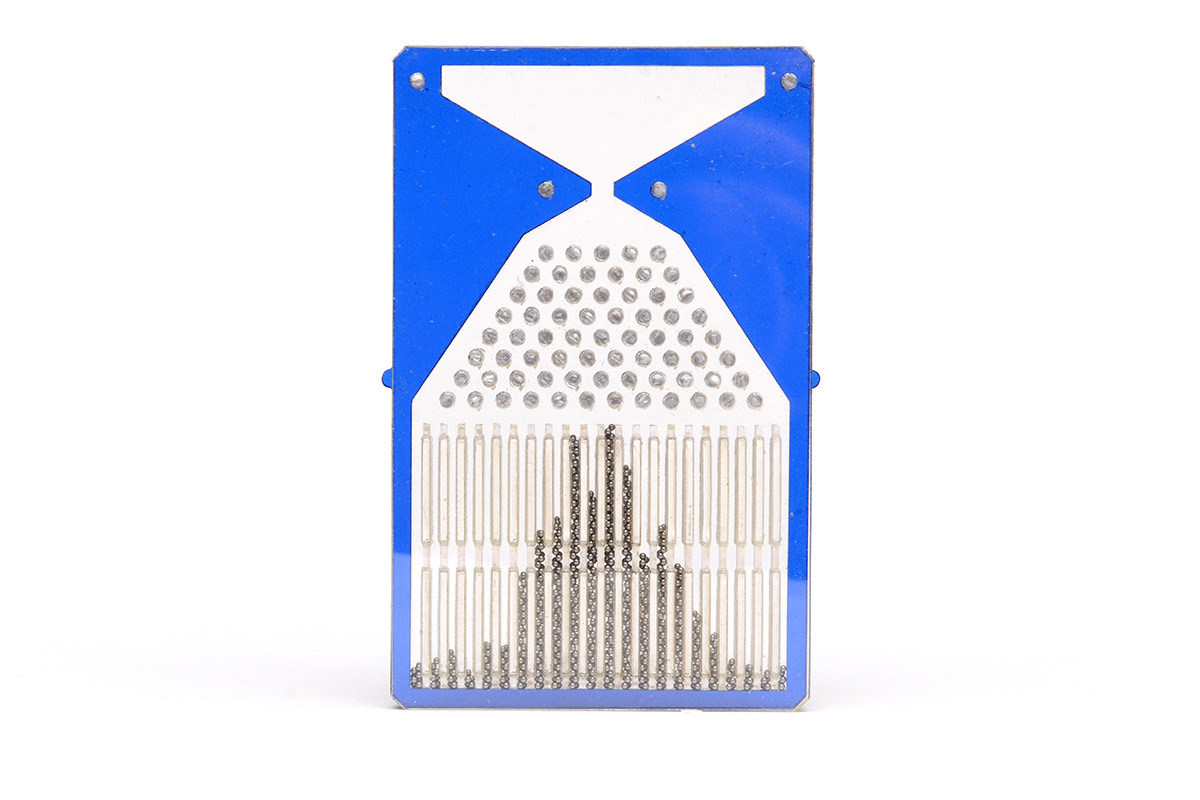
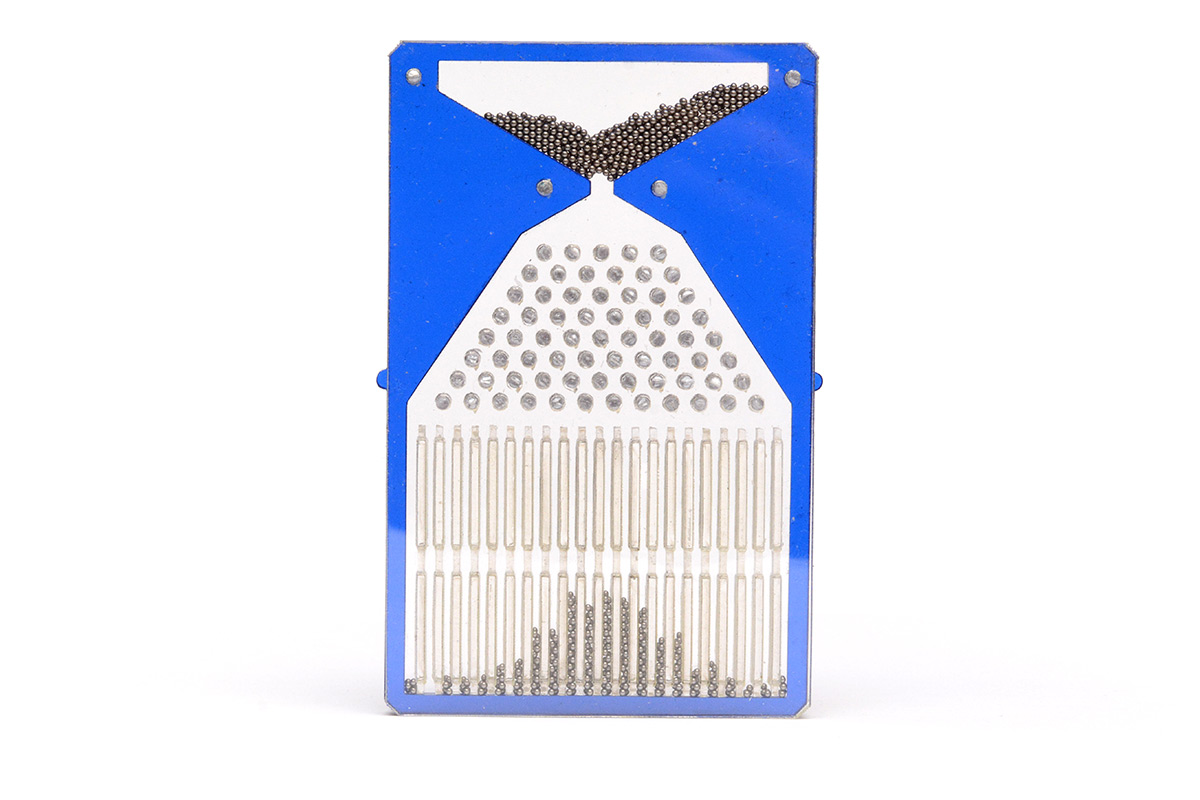
Immediately we clocked that the mechanism worked, with the vague idea of a Gaussian curve appearing but not without a number of issues.
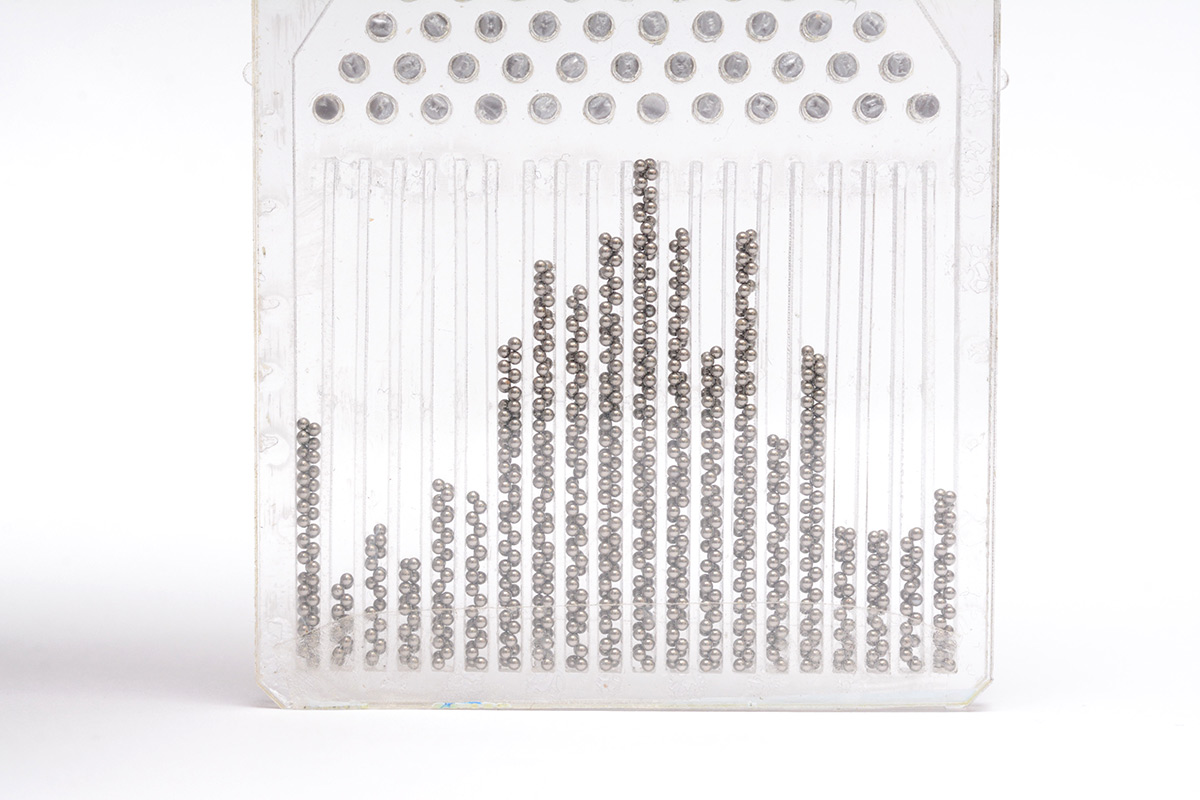
The two end columns obviously catch a lot more than they were meant to. They represent the area under the truncated tails of the curve. The ratio of pachinko to histogram bins might need adjusting.
The unevenness of the columns is also clear. Columns that splay at the top are noticeably more full on average.
But the most significant problem is that the balls get stuck.
You have to keep tapping it to un-stick them and continue the cascade.
I'd carefully calculated the dimensions so that this wouldn't happen, but a close look at the columns shows that the middle layer of the sandwich isn't wide enough.
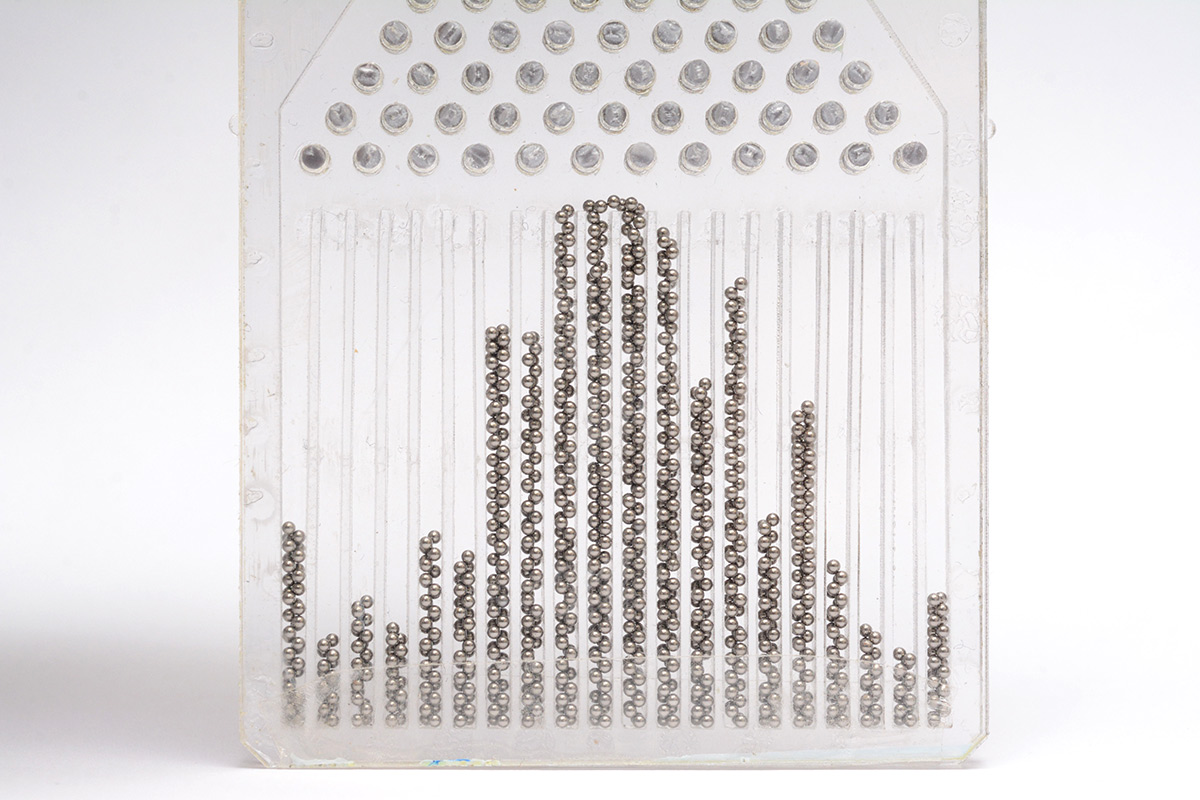
The density of the stacking is uneven. The sandwich was supposed to be a little over two balls thick, clearly it's less than that. We can measure the exact spacing by looking at the cutout, this strange little comb of acrylic waste.
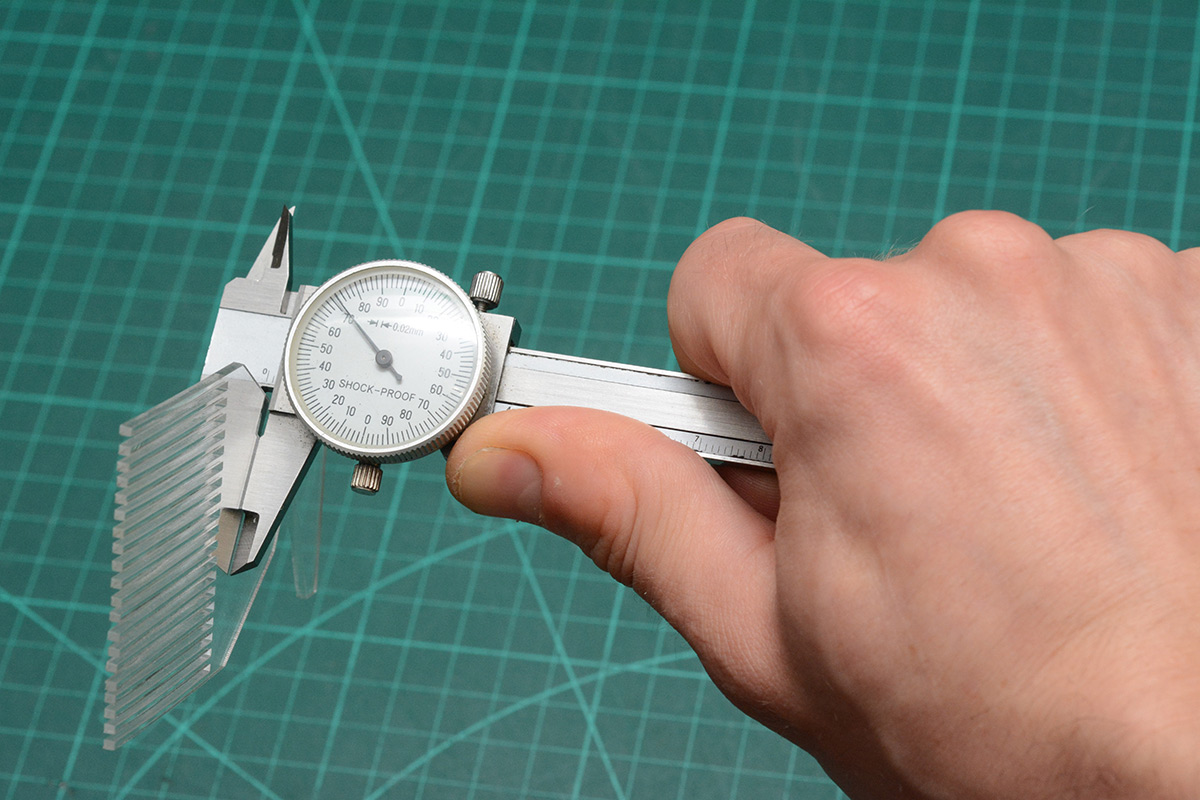
The nominally 2mm acrylic is only 1.7mm thick! It's not the first time I've been caught out by this, but I always forget to check beforehand.
Despite these complaints, the first Portable Probability Panel is still fun to play with, and survived for a few hours until I decided to build Mark II.
Laser me twice
Firstly I swapped out the middle layer for something thicker. I found some nominally 3mm acrylic that measured about 2.8mm, which should be plenty.The glue was a real detriment to the feel of the device, so Mark II needs to keep clear of it. The filament forms such a tight bond that I think it will work nicely as rivets.
In addition to the thicker sandwich, I widened the mouth of the funnel and made the slopes a little steeper. I don't want the panel to stray too far from the dimensions of a credit card though.
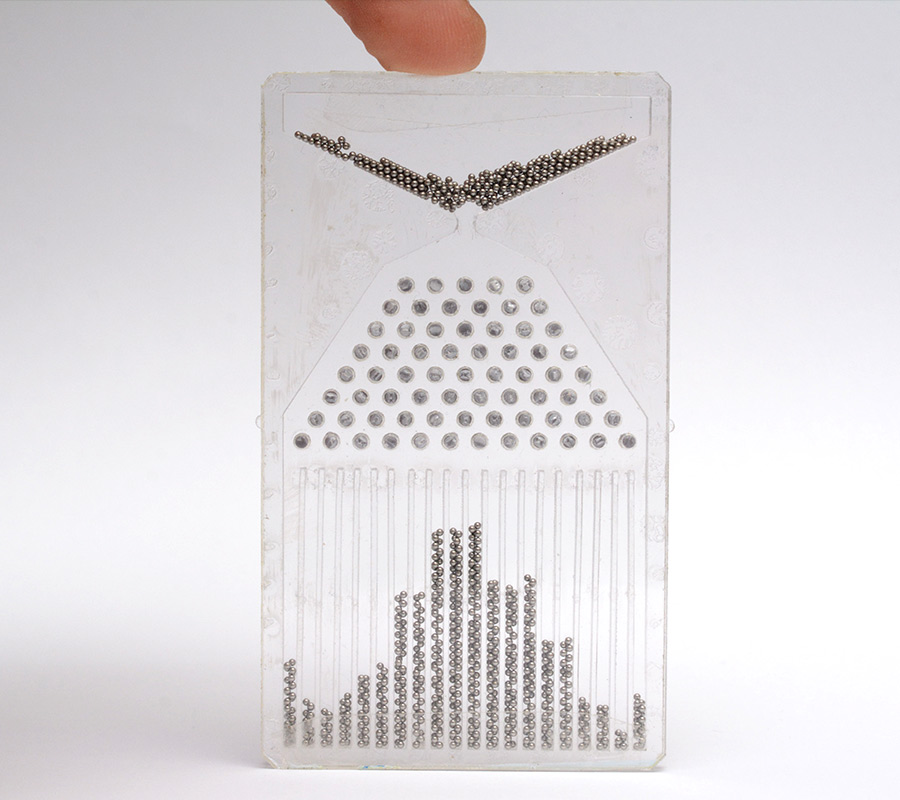
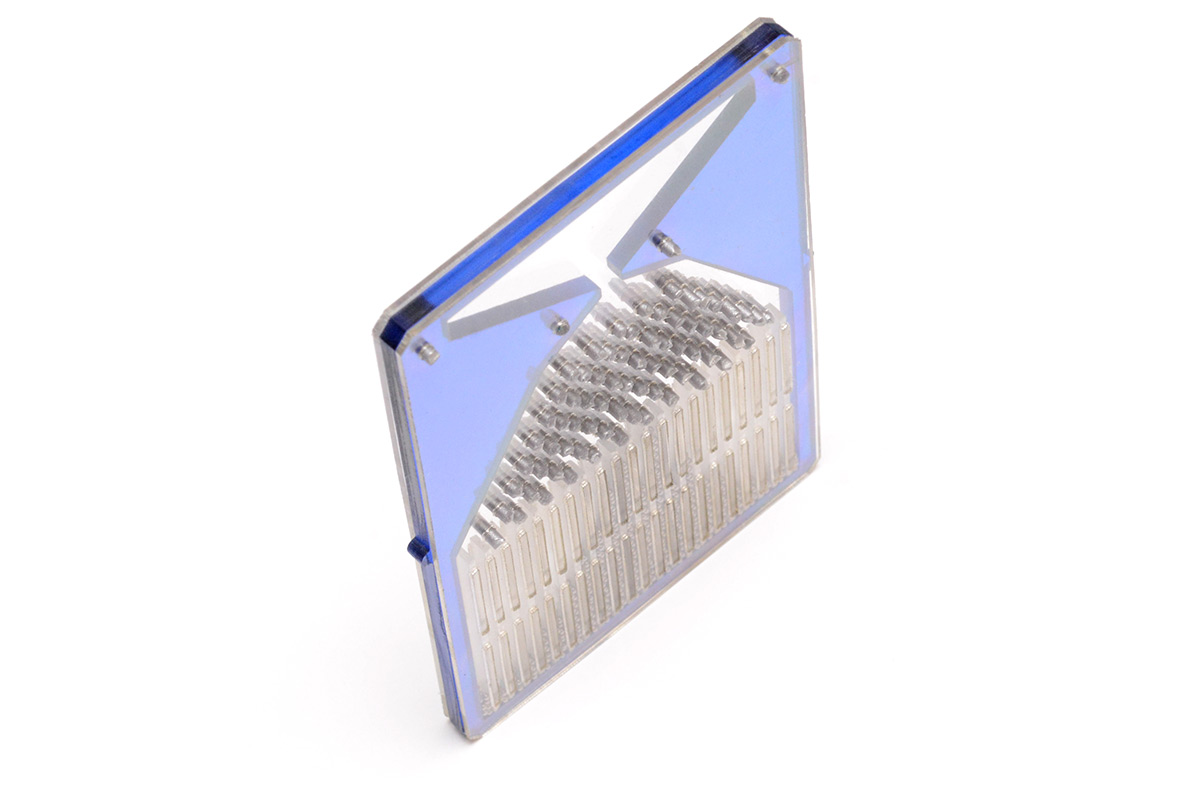
Concerning the folded tails of the curve, the 3D printer filament pachinko itself worked perfectly, so I elected not to change that. Instead I added two more histogram bins onto the ends.
To make the bins more uniform, I abandoned the comb. This time I cut slots into the top and bottom layers, into which 1mm acrylic pieces can press-fit.
This is substantially more effort to assemble than I anticipated. Unfortunately, the laser-cut acrylic develops a melted kerf that usually isn't significant enough to matter, but at this scale dominates the fit of the pieces. You can just glimpse it in the way the light is reflected off of a freshly cut part:
Faced with abandoning the assembly attempt, after a short break to rejuvenate the enthusiasm, I sanded all twenty-one parts so that they would fit. This leaves them with a matt finish. Polishing them to optical clarity again would be disheartening.
The path to enlightenment does often involve a lot of sanding, I've found.
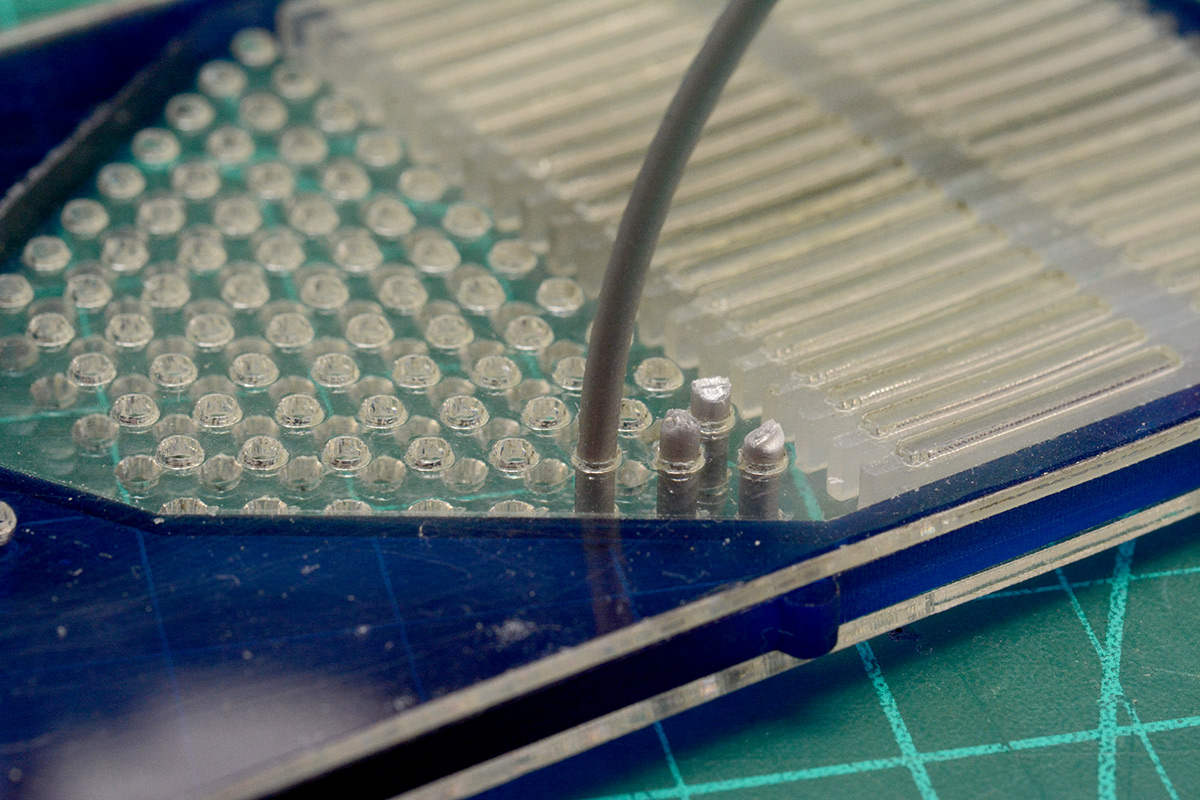
The press fit of the histogram dividers, along with the filament pachinko pins, should hold this all together very tightly. I faced the kerf of the top and bottom layers towards each other. This made it easier to push the histogram section together, but now the pachinko pins are a lot harder to fit. Significant elbow grease was consumed.
Balls were unloaded from the Mark I and reloaded into the Mark II. Transfer efficiency was within tolerance, but again, inevitably, a nonzero number of balls escaped.
The mechanism functions well. The glueless assembly is a vast improvement, and the thickness between panes is sufficient.
However, it does still periodically get stuck. Not nearly as often as the Mark I, and only a gentle tap is needed to resume the flow, but it's still not as swish as we would like.
I think this partly is to do with the square channel through the funnel. If the board is not perfectly vertical, the balls roll down in a two-dimensional fashion and are encouraged to form an arc. We could probably simply make the opening wider.
Another option is replacing the balls with a smaller gauge. I considered that as a fix for the Mark I. That may happen in future (lead time on tiny ball bearings is on the order of weeks).
The protruding filaments will be cut flush at the next available opportunity. They're not particularly distracting, but it subtracts from the overall feel. Maybe I could trim them all at once with a plane.
An additional feature could be an overlay, drawing the expected gaussian curve onto the panel, to make it immediately obvious how much the result has deviated.
Laser me more?
The Mark II Portable Probability Panel meets the spec but there's still room for improvement in the implementation.However, the concept of a probability talisman – a portable reassurance device – has me enthused.
I'm not much of a fan of Christopher Nolan but I will concede that not everything he's done is terrible. One of the ideas in Inception is the concept of a "totem": a little item, in the protagonist's case a spinning top, that behaves in a known way, hinting at if you're really awake or unwittingly still in a dream.
A tiny Galton board is a perfect totem. If anything I should have gone smaller, maybe just one inch high.
I'd like to think that if we're dreaming, if we're in a simulation, if the physics of the universe were to deviate, we'd be the first to detect it.
If you'd like to build one of these yourself, the source files are here:
galton-top.svg,
galton-middle.svg,
galton-divider.svg
though you will need to adjust the design to match the thickness of the material, and the kerf of the laser.