
Melting KiCad
9 Jan 2021Progress: Complete
The Setup
KiCad has improved a lot, but one of the features it's really lacking is the ability to do smooth, rounded traces with teardrops (fillets on pads and vias).A lot of early, hand drawn PCBs had this look, where every connection is smooth and slightly melted.
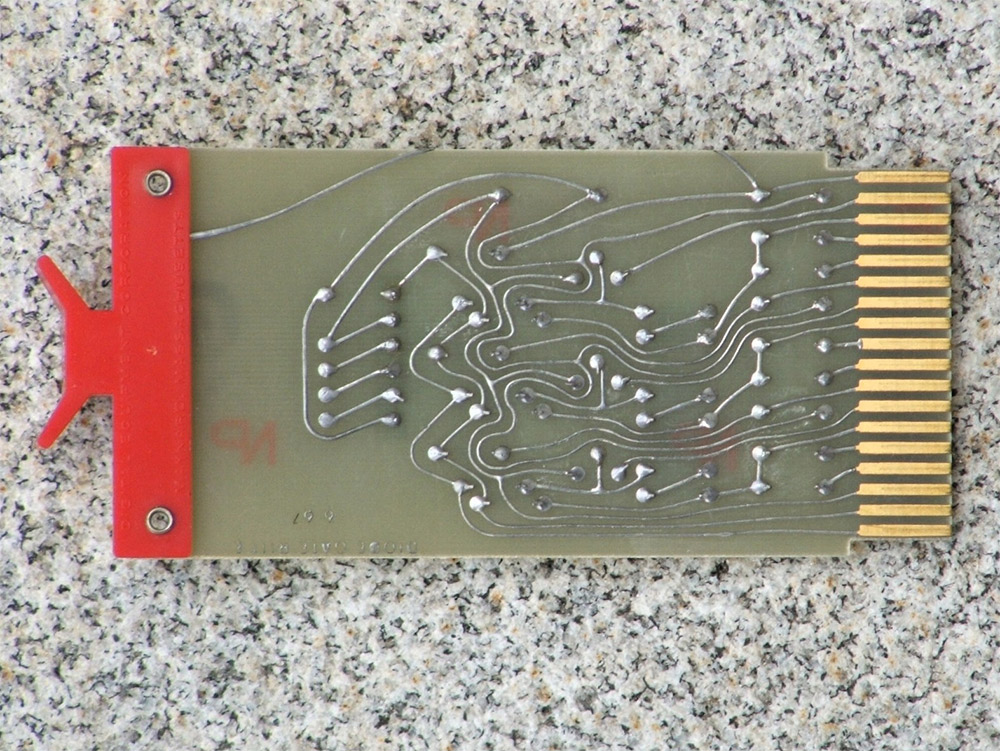

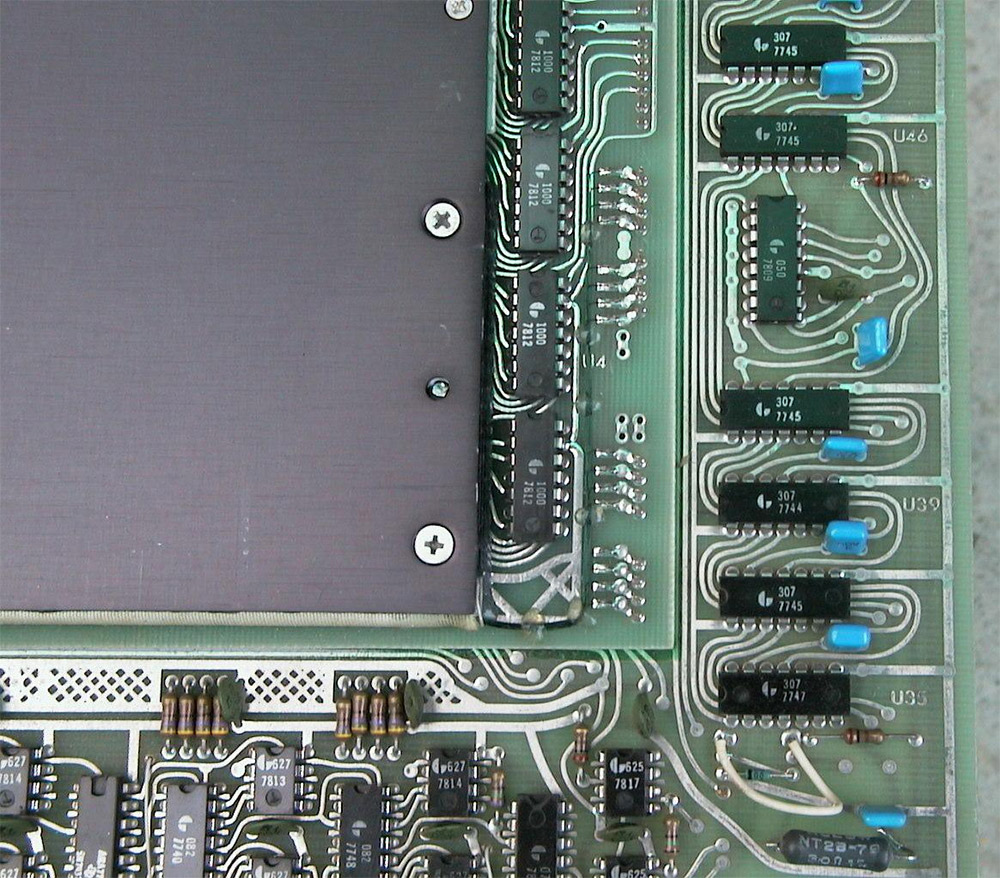
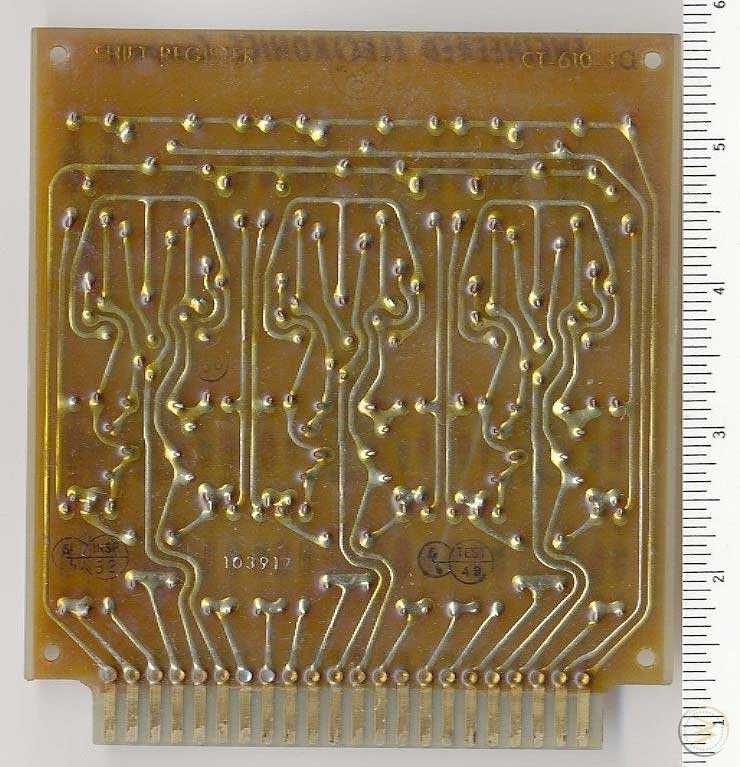
When people first switched to using computers to design circuit boards, the routing options were very limited and traces were forced to have sharp corners. Some people forget that our tendency to restrict traces to 45° angles is mainly a holdover from before there were any other options.
Some of the benefits of teardrops and smooth traces are controversial, but the following can generally be agreed upon:
- Smooth corners are potentially less prone to errors in the etching process
- In the case of drill/pad misalignment, teardrops reduce the chance of a breakout
- For flexible PCBs, sharp corners are stress concentrators, so removing them reduces the chance of cracking
- Denser routing is possible when arbitrary angles are permitted
- There may be some electromagnetic compliance (EMC) benefits, since sharp transitions represent a sudden change in impedance
That last point is the one people tend to dwell on. It's been shown that at sub-GHz frequencies, the difference is negligible. Many developers argue that since there are no EMC benefits, this feature is not needed. The attitude of "only ignorant people who know nothing about EMC would want rounded traces" really irks me.
There are two important points to make here.
- Teardrops and round traces look cool. Some people want them for the aesthetics.
- Not supporting a feature that's implemented in other CAD software is simply driving away users. When I need to design a flex PCB, I do not use KiCad.
A lot of people have attempted to add these missing features into the KiCad source code, but for various reasons the most promising branches never got merged. Curved traces are apparently on the roadmap for KiCad 6, which hopefully isn't too far in the future, but I'm not holding my breath.
Another way to add functionality is via "action plugins" – python scripts. This is in many ways more limited, but has the massive benefit of not needing to recompile the KiCad source code.
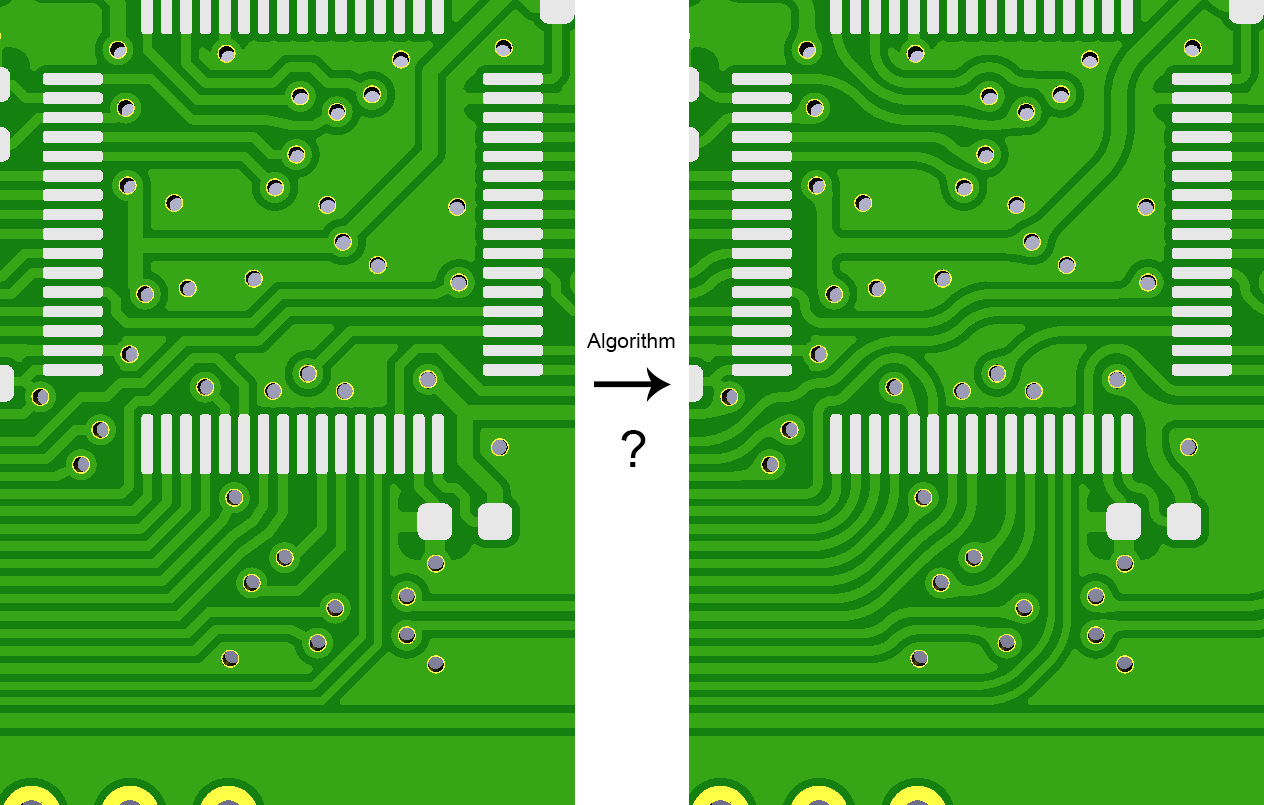
Interactive curved traces are not possible this way, but I had an idea: to draw a PCB with sharp corners, and then "melt" it afterwards, via a plugin. Curves can be approximated with many small straight segments, and by keeping the original file you can still easily modify it, then apply the melting process as a step that renders to a new file.
The existing solutions
It turns out I'm not the first person to think of doing it this way, and I found this repo where someone has attempted it. The script works pretty well!I found another repo which repackages the earlier script as an action plugin, although it doesn't run on Windows builds. Due to a horrible chain of dependencies and problems, Windows KiCad builds are statically bundled with Python 2 and the older wxWidgets API. The problem is trivial and only relates to the GUI dialog box.
However, both versions of the script have a subtle problem which may not be immediately apparent.
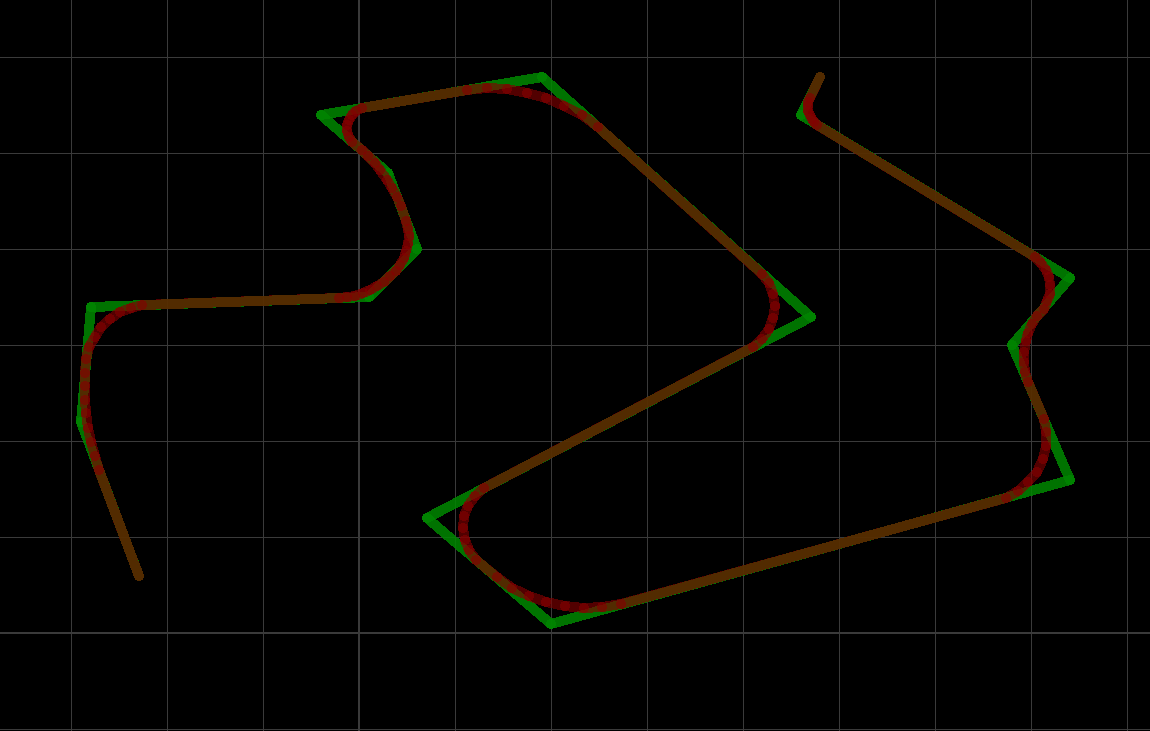
The algorithm progressively chamfers corners, splitting traces on each iteration if their angle is more than a threshold. The split position is based on either a maximum length parameter, or a percentage of the length of the current trace, whichever is smaller. But the algorithm fails to account for the change in length immediately caused by the chamfer in progress – as a result, the rounding is never symmetrical.
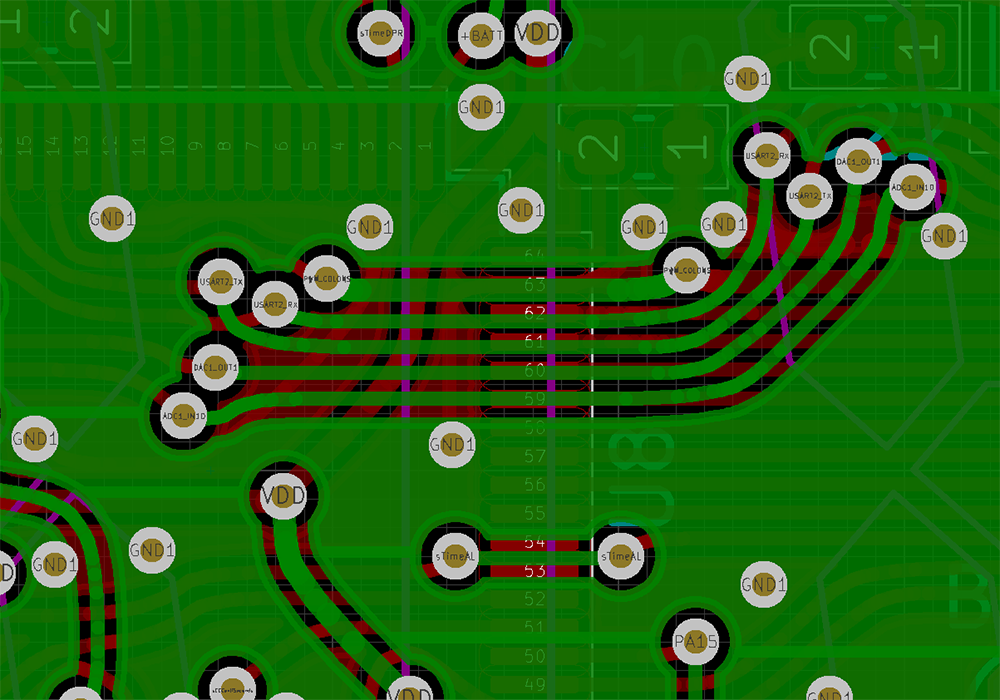
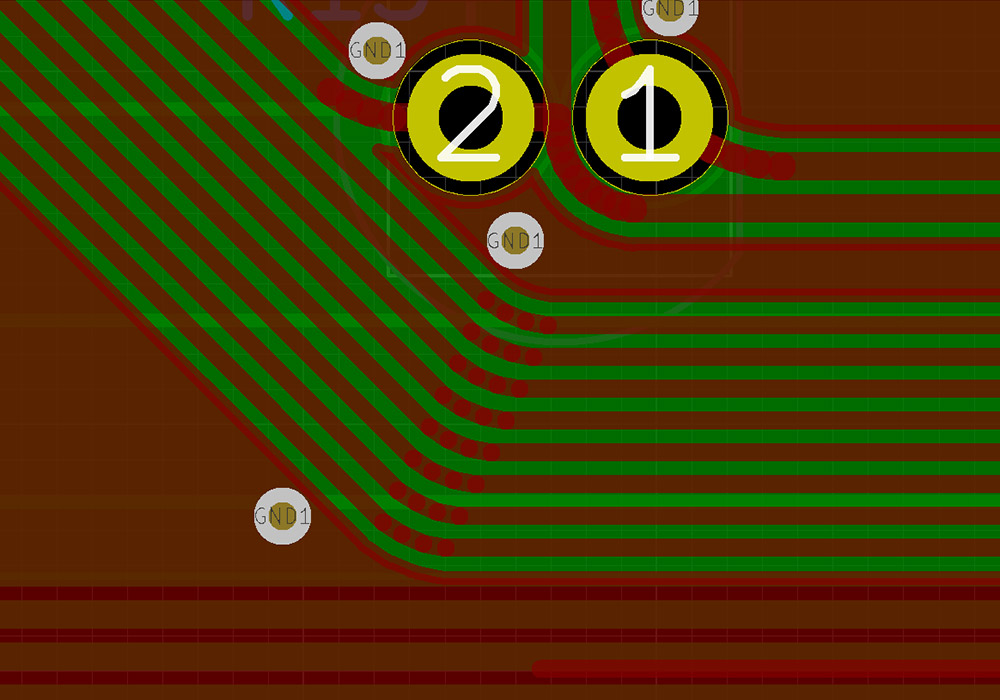
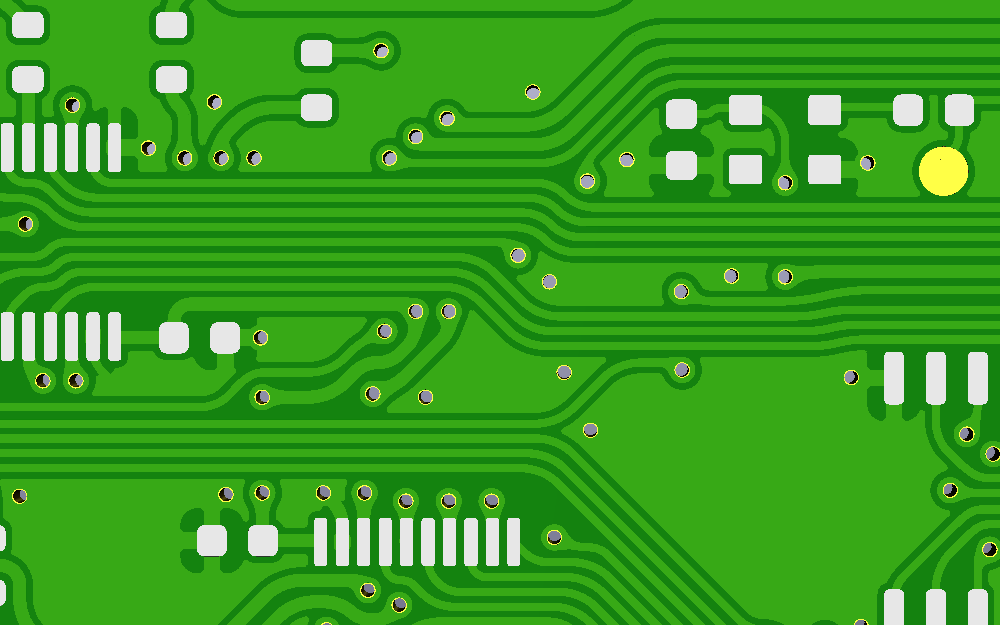
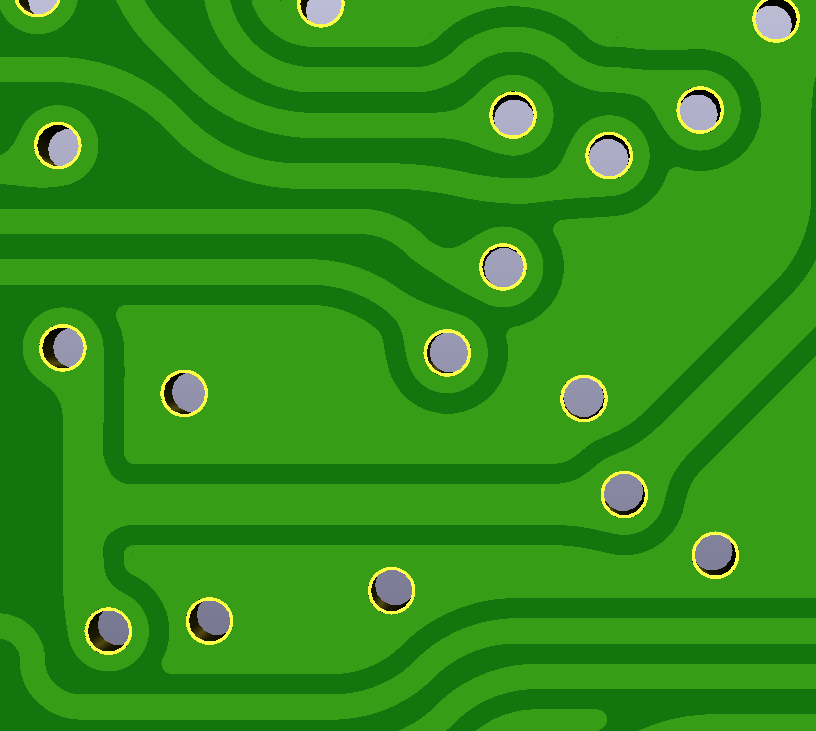
This might not matter for some designs, but is catastrophic when a PCB has a bus of traces all spaced at the minimum clearance, which is very common. The traces are processed in essentially random order, so the uneven curves cause a flood of DRC errors.
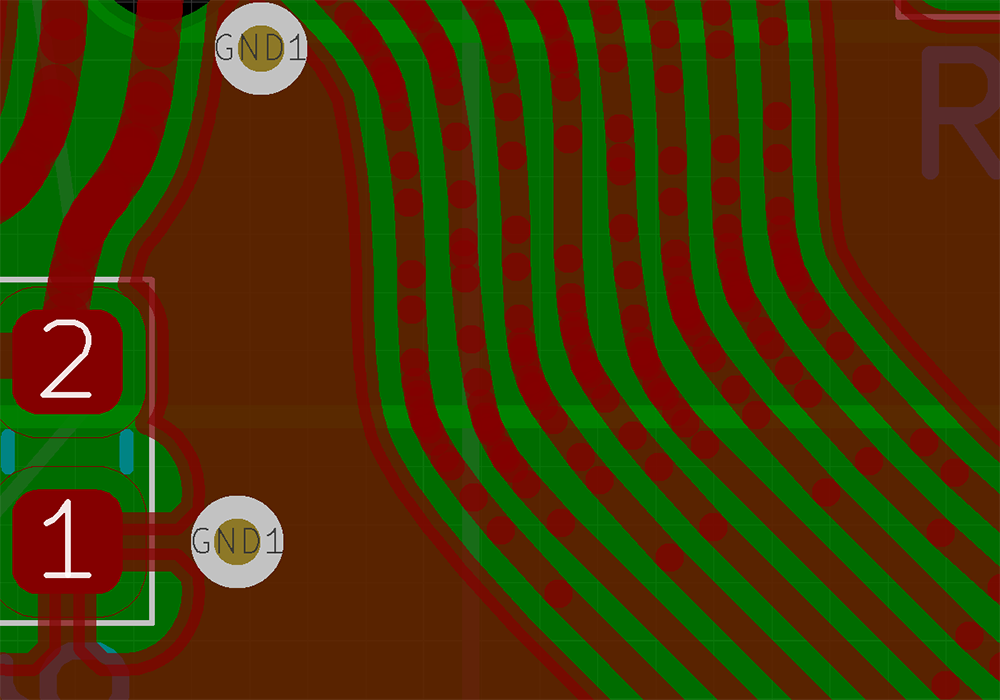
Notice that two of the traces have been processed in the opposite direction, and the uneven curves mess up the clearances. While we could just space the traces out further apart, there is no reason the script shouldn't be able to apply an even rounding, so the clearances remain consistent.
Fixing the Subdivisions
This rounding operation is basically a 2-dimensional version of Subdivision Surface, which can be conveniently demonstrated by Blender (using Catmull–Clark):
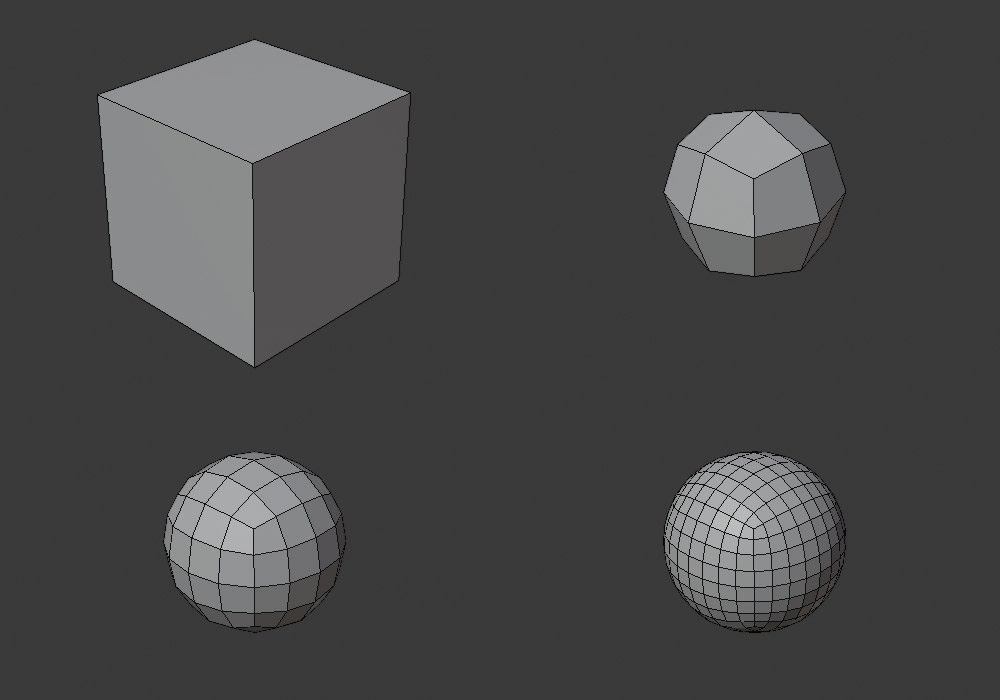
It's worth bearing in mind that the subdivisions are applied evenly, there are no parameters except for the number of iterations. The fact that the action plugin asks for two extra enigmatic parameters ("length %" and "scaling %") already raises some warning flags. We do want to limit the maximum radius of the curves, but that should be a single parameter.
Digging into the source code, "length %" is the shortening amount as a function of the shortest trace at an intersection. It took me a while to get my head around this, but the default value of 50% means that twice as many passes are needed.
To go through the process in detail, consider a single L-shaped trace. If the traces are infinitely long, the first subdivision has to decide where to truncate, and this is where our radius parameter can act.
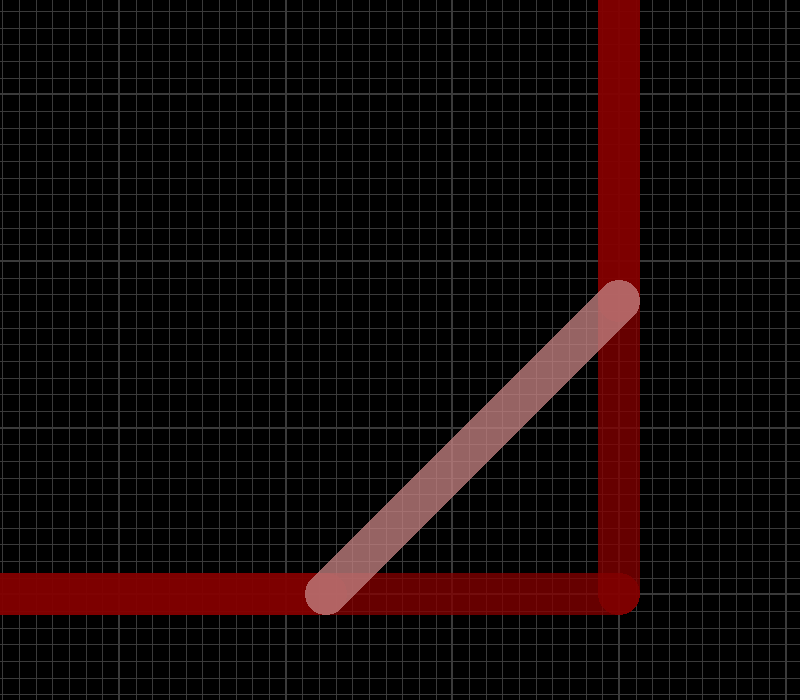
The next chamfer needs to cut the new corners, so the logical place to connect is roughly a quarter of the way along the current chamfer.
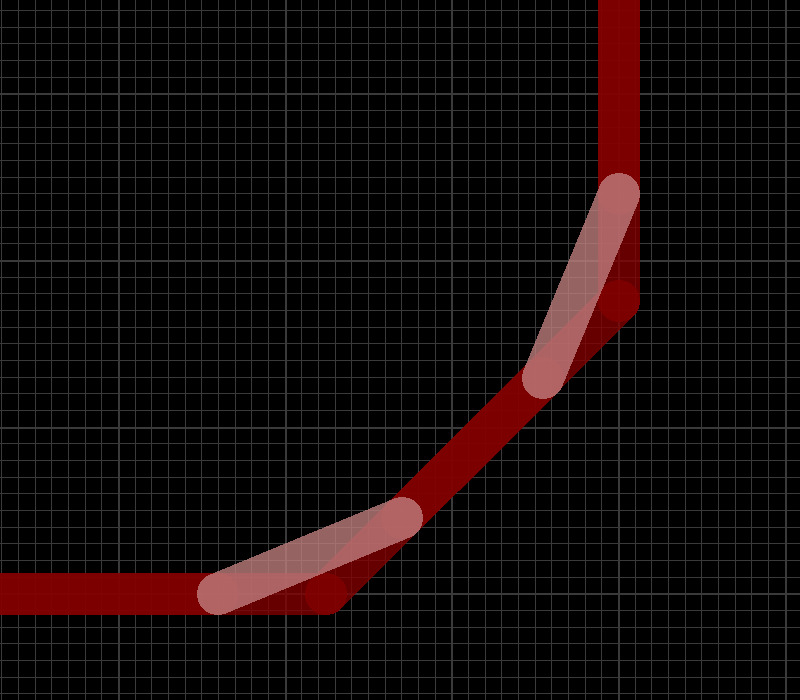
The third pass cuts these corners, and so on. Notice that for a smooth curve, every segment is of the same size.
In the rounding script, setting the "length %" to a quarter should make the segments almost, but not quite equal lengths. It still doesn't account for the strange results we were seeing. In fact, the core problem with the script is that after chamfering one corner, the length of the segment has changed, and the wrong value is used for the adjacent corner.
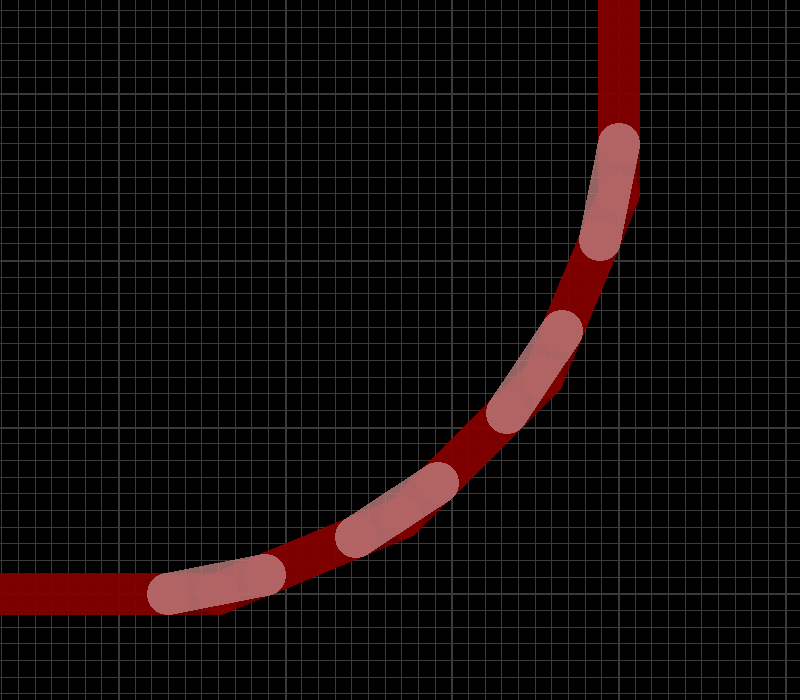
Storing the original segment lengths at each pass in a dictionary is sufficient to fix the problem. At last, the curves are predictably smoothed, and we no longer have a million DRC errors on our bus!
I wasn't quite content to leave it there, however. To ensure a perfect rounding, we need to add a cosine factor. I worked out on paper some triangles and came up with a new formula for the segment length percentage. Plugging this into the script finally lets us pass the most demanding test: a square. If the rounding works correctly, it should turn into a perfect circle.
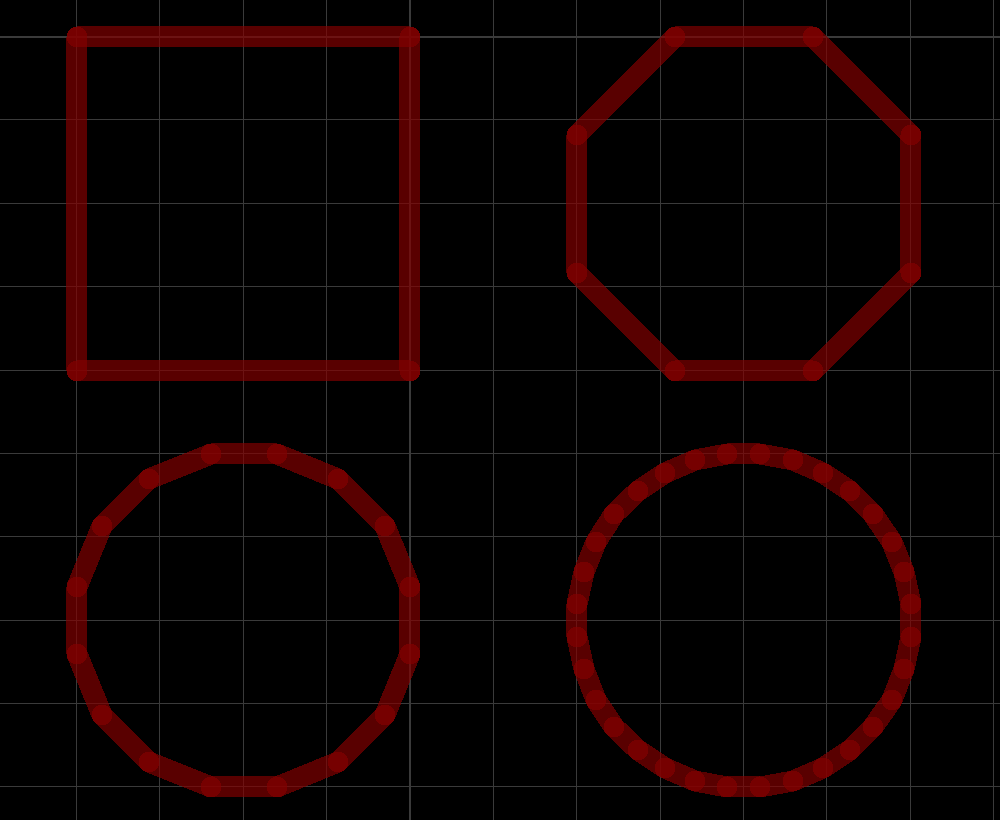
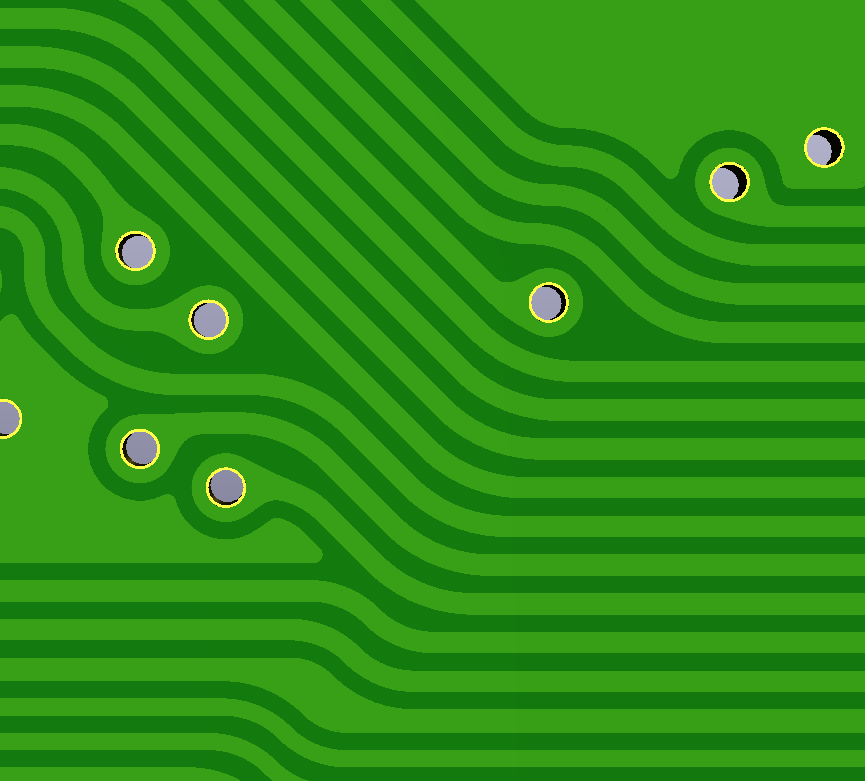
Using even segments ensures that the curve is as smooth as can be for a given number of passes. I found three passes to generally be plenty, there's nothing stopping you from running more but if the segments become smaller than the feature size then it's a bit pointless. Kicad does start to slow down when there are thousands of segments, and DRC errors appear repeatedly for a single violation. However, the updated subdivision routine asymptotically approaches a fixed curve, and is guaranteed to keep at least one segment of each input track. Two passes is enough to spot and fix the majority of DRC problems, then the final board can be made with more.
Marvellous. Now onto the harder part...
Teardrops
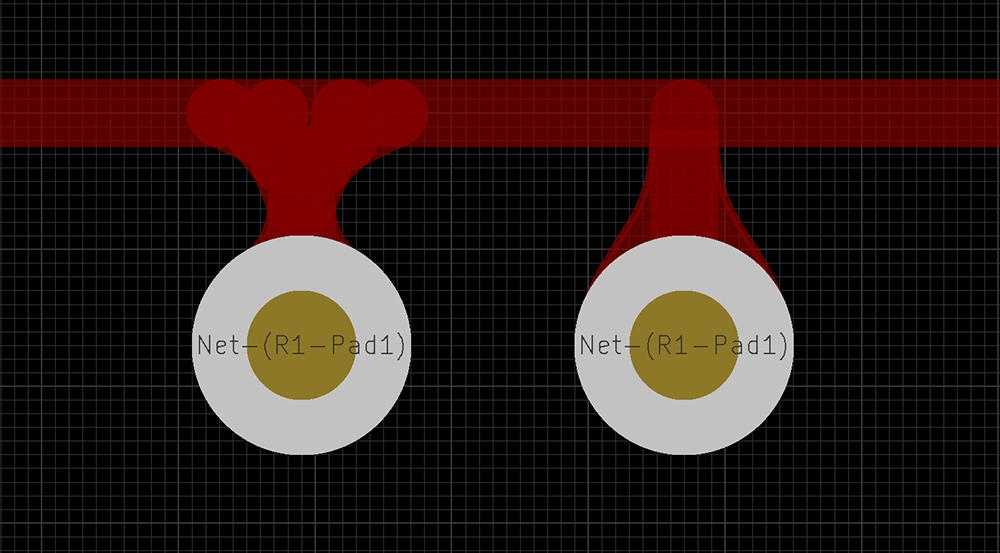
The flexRoundingSuite repo has some support for teardrops, but it's unsatisfactory. Another repo here offers a better approach, using zone fills. This has the excellent benefit of never causing a DRC error, because if there isn't room for the teardrop the copper will automatically recede.However, only a handful of the teardrops were generated correctly for me. The algorithm assumes every track approaches the pad or via directly, never off-axis, which is only true for a small amount of them. Again, we could go through the PCB and manually touch these up, but that really isn't what I had in mind.
A very unsatisfactory teardrop. Ideally, every pad should look like it was dipped in honey, a minimum-energy solution, continuously differentiable. That means the polygon edges must be tangent where they connect to the pad and to the track.
To do this, I upgraded the plugin to use cubic Bezier curves. A cubic curve has four points: a start, an end, and two control points. If we ensure that the control point where the curve connects to the via is tangential, and the control point where the curve connects to the track is tangential, then the curve will always join to them smoothly. The remaining question is how much "weight" to give each control point. The teardrops are controlled by two parameters, essentially a length and a width, but even keeping those dimensions fixed, changing the weight can make a teardrop change from fat to lean.
I found it helpful to draw some curves in Photoshop just to play around.
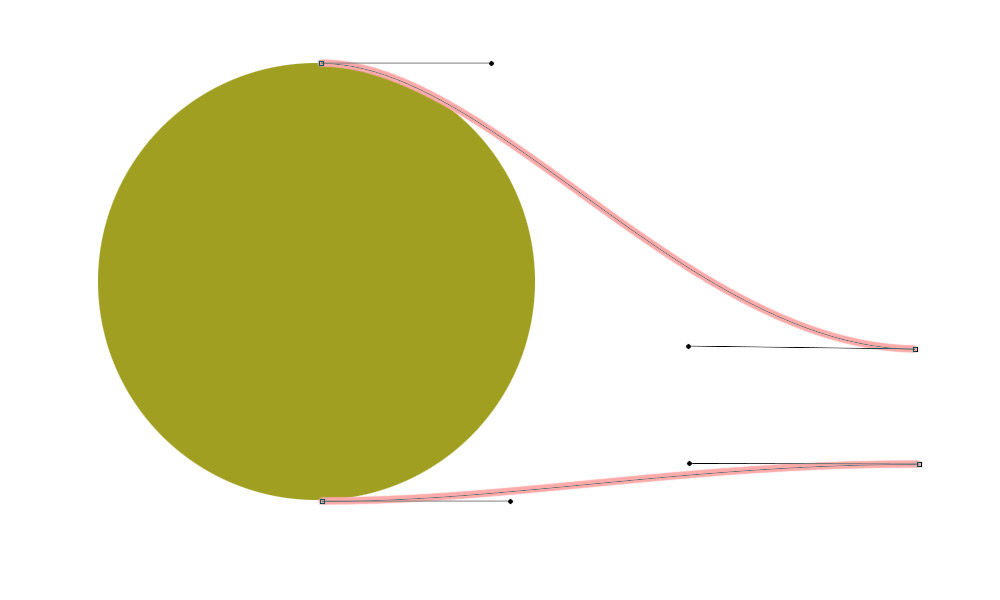
After fiddling with various options, I ended up making the weights functions of the dimension parameters. Deciphering the action plugin took some brain power, but eventually I was generating some very pleasing shapes.
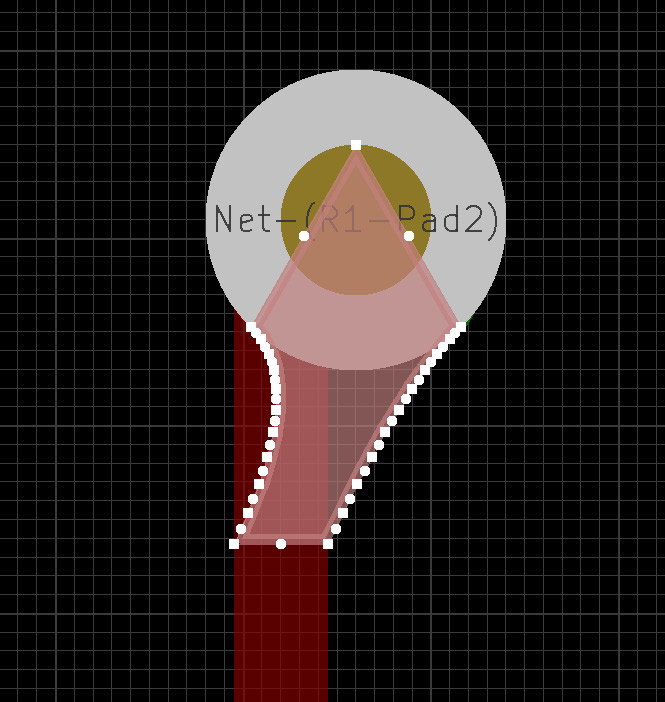
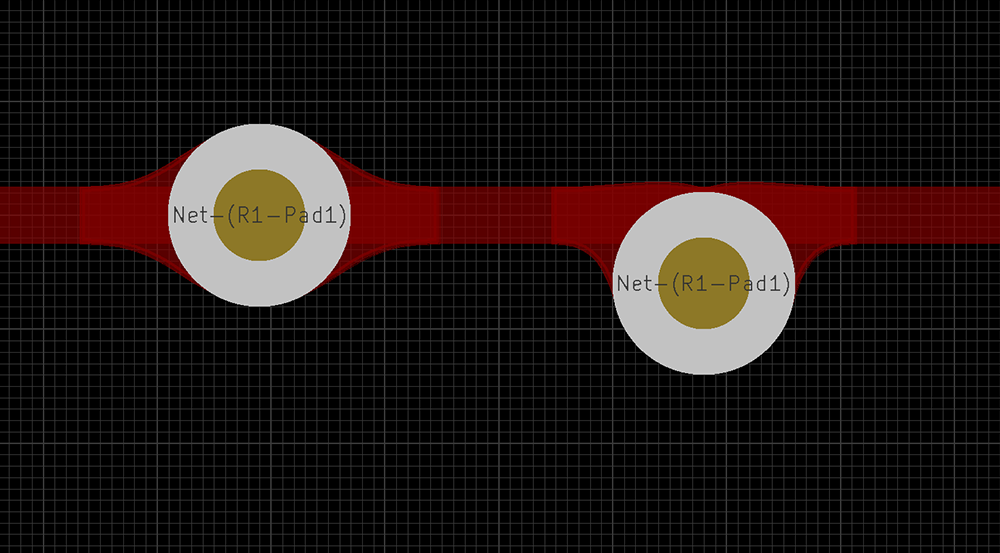
If the teardrop width is less than 100%, the mating point needs to be rotated slightly. The screenshot below isn't exactly a disaster, but it would be unsatisfying to leave this unfixed.
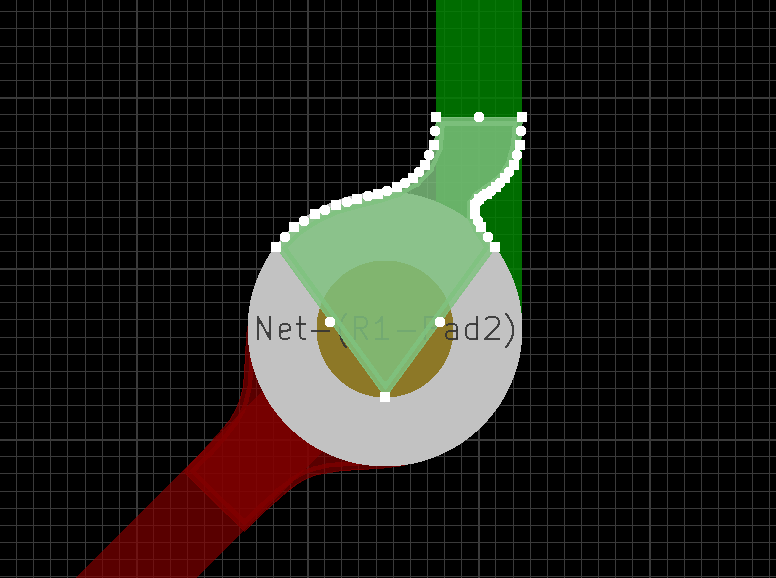
To get this to work properly, I had to rewrite how the length of the teardrop is calculated, finding the intersection of the track with the perimeter of the via. There is probably an elegant mathematical way to determine it, but since the distance is very short I took the simple brute-force approach.
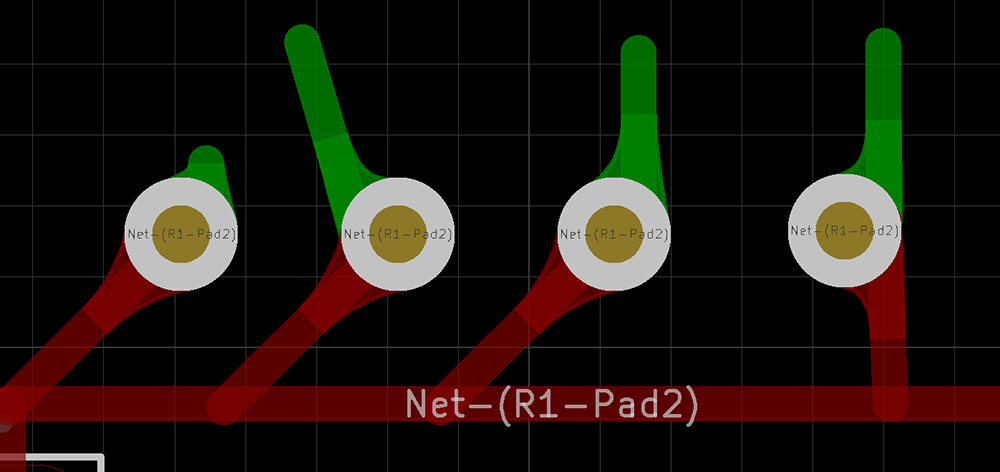
The leftmost teardrop shows a very short trace approaching at an angle. It took a lot of experimentation to come up with Bezier weights that looked good in all situations. Importantly, when a track approaches off-centre, the weighting on one side must be different than the other.
Powers combined
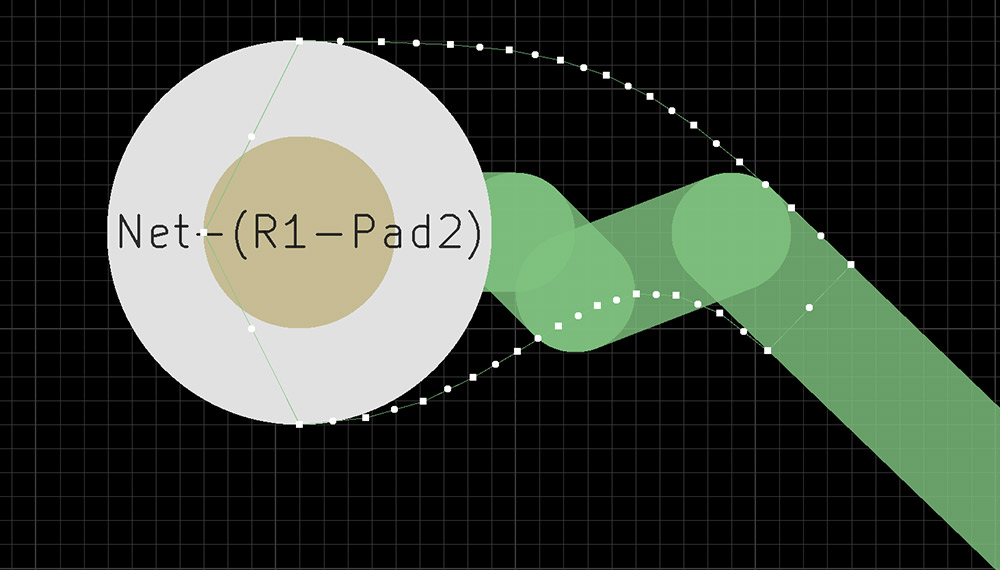
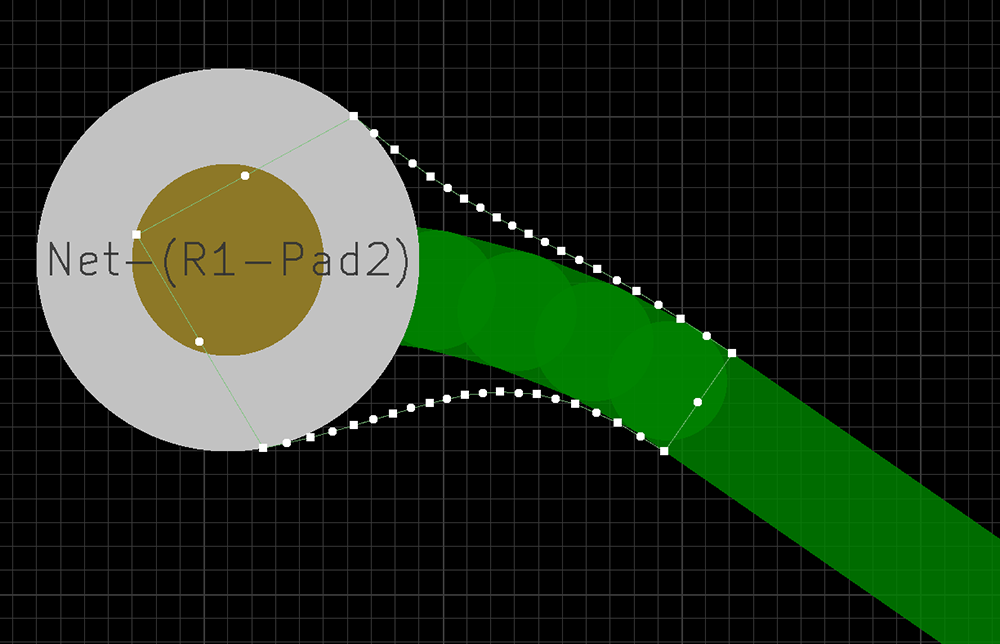
While the teardrops are now beautiful, they fail to function in synergy with the rounded traces plugin. This is because if a pad is approached with a curve, only the first segment of the curve is considered, at best generating a very small teardrop.
I foresaw two courses of action here. One, we could edit the rounding script to hold off segementing traces that are too close to a pad. Two, we could edit the teardrop plugin to read this situation, follow the track along its curve, and start the teardrop from further back. While the first option is probably easier, a common situation is a small 45° bend right before a via, and if that does not get rounded, the teardrop will need to be a very strange shape. So I opted to walk along the track if we can.
I should probably stop and complain about the python scripting process for these action plugins. As mentioned, it's Python 2 on windows and Python 3 on linux. The plugins get cached, so any changes mean re-launching KiCad. Infuriatingly, most error messages are dumped to /dev/null but if you do capture them, they'll probably be wrong as the info relates to the uncached python files. It feels like there's a solution to this problem (simply deleting the .pyc files didn't work) but I couldn't figure it out.
There is also a python scripting console, which has its own problems, but at least if the script is importable, it can be reload()'d without having to restart the application. The teardrop plugin has been specifically written so that it can be invoked from either the scripting console or as an action plugin, which is very nice, compared to the track rounding plugin.
But my main complaint is that things are poorly documented. There's a small amount of doxygen reference material but it doesn't directly correspond with the exposed python API. The best place to look for help seems to be other people's action plugins. Miles McCoo, who is credited in the source of several plugins, has a blog which offers a lot of helpful information.
With that said, the actual algorithm to walk back along the connected track is not as scary as it might seem.
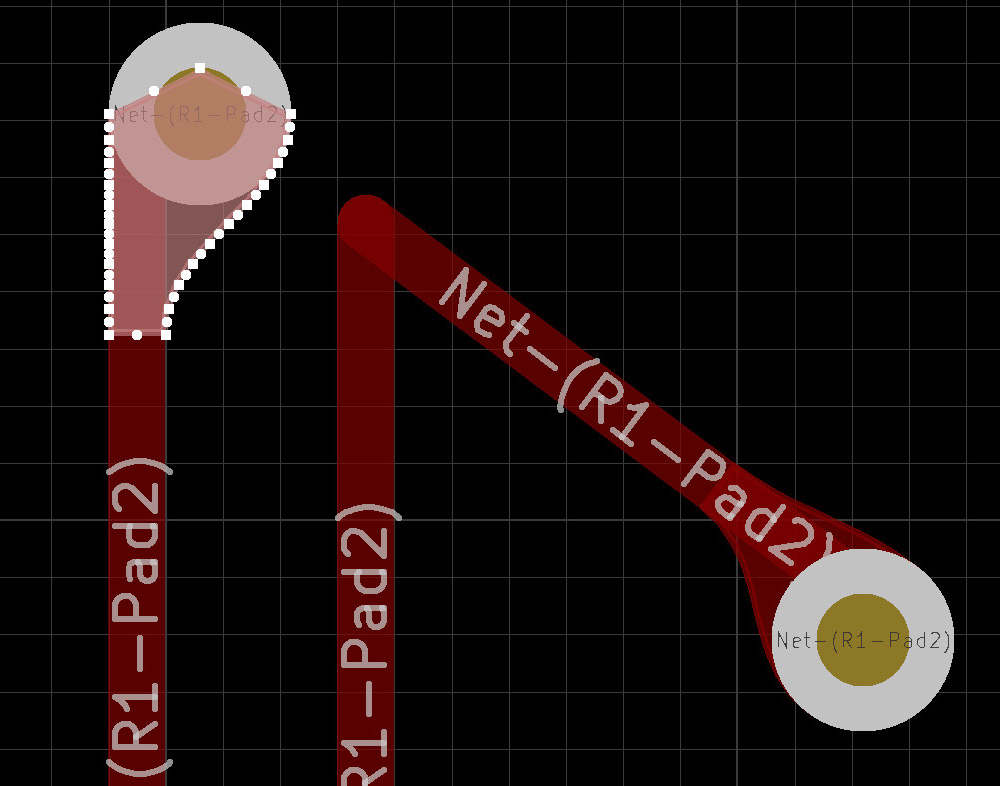
If the connected track is shorter than the target length, then we search for traces with same net, same layer, and the same start or end point. Each one is consumed until we have reached the desired length, or can't find another track. The end position is used as a vector to start the teardrop.
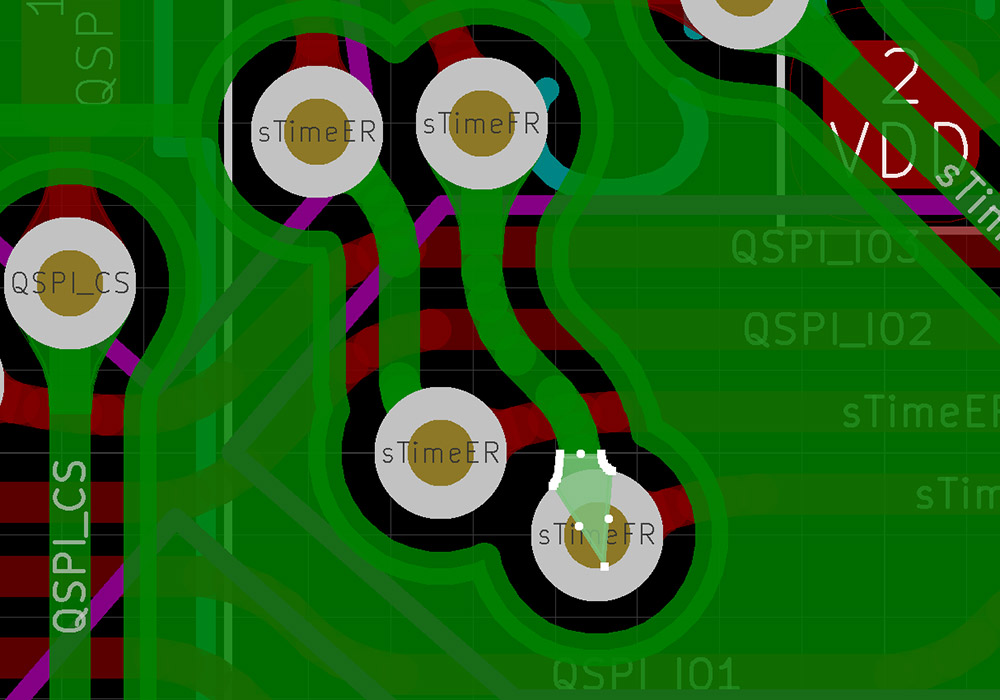
As shown in the shot above, this doesn't give a perfect result for arbitrary, unrealistic angles, but when used with sensible traces, or rounded ones, the results are exactly as good as I'd hoped.
Playing with the parameters gives different results, but all of them are satisfyingly gloopy. If you want really fat teardrops, they're now available!
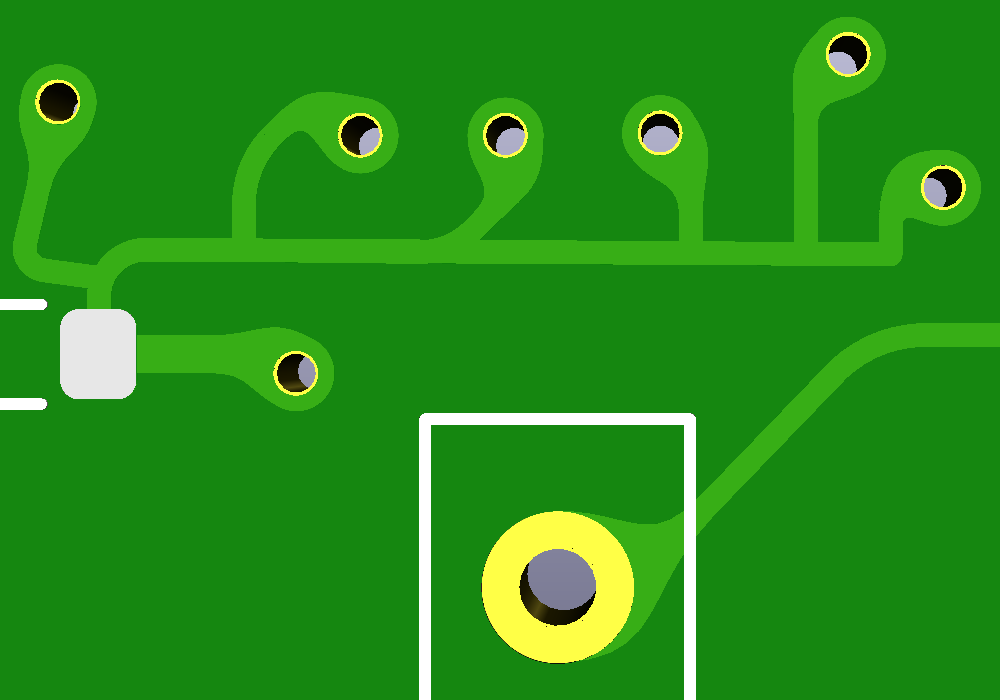
Yum.
An edge case is where following the trace has multiple paths. In the case of a T junction, rounded into a smooth Y, following just one track causes an odd teardrop shape to form. Since there isn't really a good way to fix this, when the code encounters a junction in the trace it stops there and places a smaller teardrop. This generates the least-bad looking result.
Of course, placing the via on the track will create a double-teardrop. You can break the track to ensure this happens.
Conclusion
I fully expect (and hope) these plugins will be made obsolete by the next major KiCad version, which should natively allow traces to be curved. Having used the rounding plugin a fair bit now, I'm starting to actually prefer this approach, of having a "source" PCB file with sharp bends and a rendered "output" PCB that looks delicious. Even in CAD programs that support curved traces, the usual approach is to apply the curves last, since moving things around is a pain otherwise.The main feature missing here is to make the curves automatically DRC compliant. By fixing the subdivision logic, dense traces no longer throw stupid errors, but there are still problems that have to be corrected if the source PCB is laid out incorrectly. The ideal solution would be to detect DRC errors as they happen, the way the "highlight collisions" routing mode does, and choose an appropriate bending radius accordingly. This does imply either a directed approach (doing the innermost traces first) or a more complex iterated approach, since, in the case of the bus of identical tracks, only the innermost one can be curved without initially causing a DRC error. To be able to curve slightly, then come back and curve some more when space is available, is going to be a very difficult process with the subdivision method.
It seems the python API is the limiting factor here, since none of the DRC system is accessible. But, I think the algorithm would go something like this:
- Build a structure of all intersections to be chamfered.
- For each one, record the maxium possible chamfer, based on trace length, and clearances to fixed points, such as vias and pads
- For each one, search for every intersection on the inside radius at maximum chamfer, and build a list of tracks that should be processed before the current one.
- Sort the structure by track dependence
- Work through the structure, chamfering intersections with no dependencies, and removing those intersections from anything that depends on them. Continue through the list, checking for DRC errors as we go
- Repeat for n passes
The script is perfectly useable as-is. I have a few more ideas I want to add, it would be nice to be able to select a group of tracks and subdivide only them. A very useful feature would be to limit the minimum angle between tracks. This would set a termination point, where doing more passes has no effect. The benefit would be that working on the processed output file becomes viable – if you want to edit a track, delete the curve, draw a new one, and re-run the script, and only those new tracks will be affected.
Another possible improvement: I said that using zones for teardrops never causes DRC errors, which is not strictly true. If two teardrops overlap, that will cause a problem. The updates to allow off-centre teardrops means this is more likely, at least if the teardrops are big. An easy way to fix this is to increment or randomize their zone priority, so one always takes precedence. This would remove (or make more difficult) the "remove all teardrops" option since the zone priority is used as an ID, but that isn't an issue when you're rendering to a new file with the track rounding.
How to use these plugins
My improvements to the teardrop plugin have been submitted and merged into Niluje's kicad_scripts repo.The track-rounding script has a bit of an odd history, it seems each contributor has produced a new repo leaving the git history behind. It's a mess, but since I also plan to make more modifications to it, I figured I'd continue the tradition and make a fresh repo myself. I attempted to merge together the git histories of the other two repos, to try and clear things up, although it's still missing some of the beginning. The plugin can be found here.