
LT Earrings
16 Feb 2020Progress: Complete
I'm becoming well-known for my comedy machinist projects. Luxury Timewaster is a typical specimen, equally as bespoke as it is pointless. The gifts seem to alternate between "trinket" and "earrings" so I suppose it was only a matter of time before someone gazed upon the Timewaster (no doubt in awe) and commented, yes, but could you make earrings out of it? Let's find out.
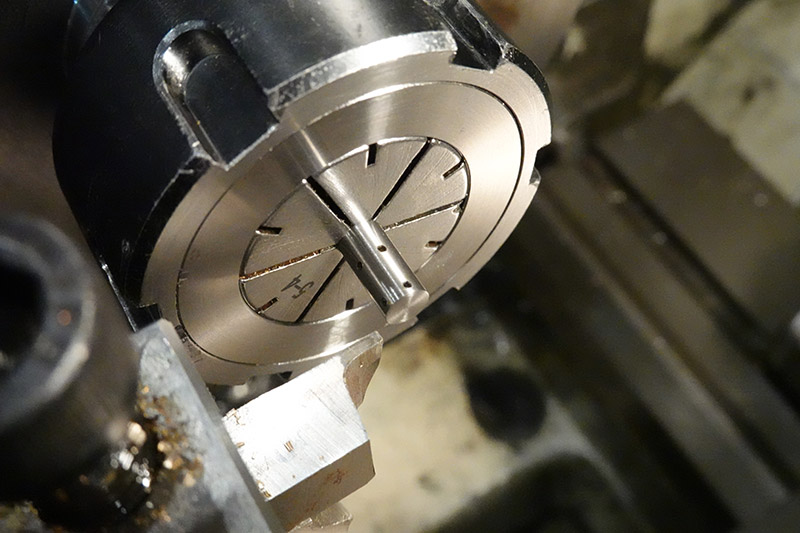
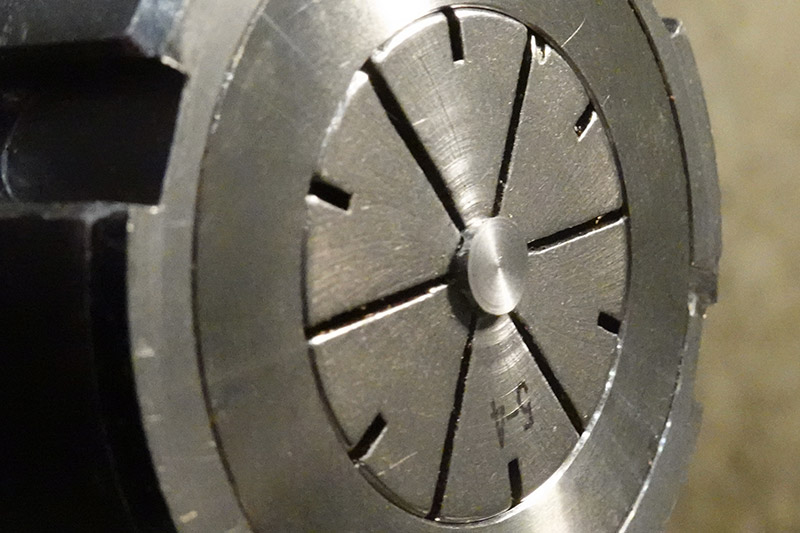
I do own some bearings of about the right size (such as the replacement bearings for my RC helicopter's swashplate) but if it's hanging from someone's ear, I can't think that there's much point in making the central part rotate. So starting with some 5mm ground drill rod, all we need to do is drill some holes in it with 5-fold symmetry.
I've now figured out how to adjust the angle on the dividing head. To loosen the trunnion you first need to undo the two locking bolts, which takes an imperial allen key (in these parts, they're rare as hen's teeth). From there what's needed is a really good whack with a soft hammer. I think on my first rodeo I was just a little too cautious about wrecking stuff.
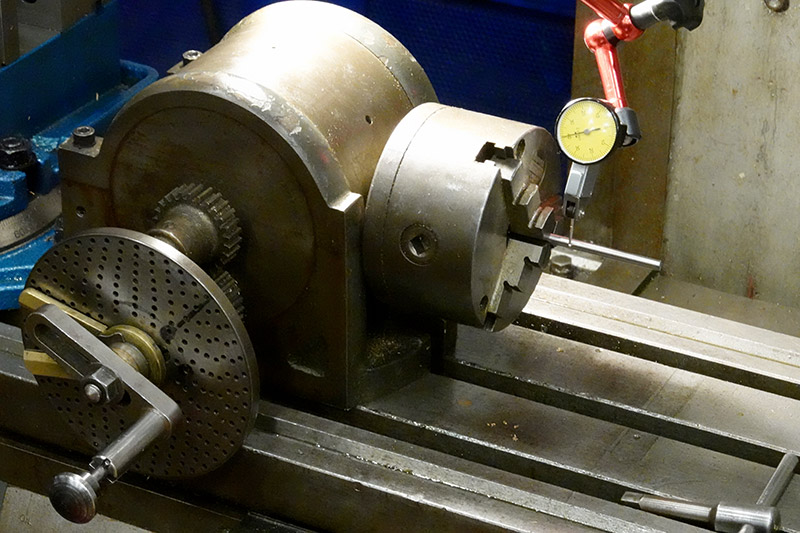
Dialing it in takes several steps, first checking it's true in the chuck, by watching the needle while we wind the handle. We need to check it in at least two places to be sure it's true. Then we use the rod as a test bar to check the dividing head is trammed to the table. This involves a lot of running things back and forth.
The stick-out is partly to have room to snug the (comparatively huge) ER32 collet holder right up to it, but also because while we're at it with the indexing I figured I might as well make a whole series of them. In actuality, the idea of making multiple pairs was quickly abandoned once I'd realized how much effort the brass bits take to make.
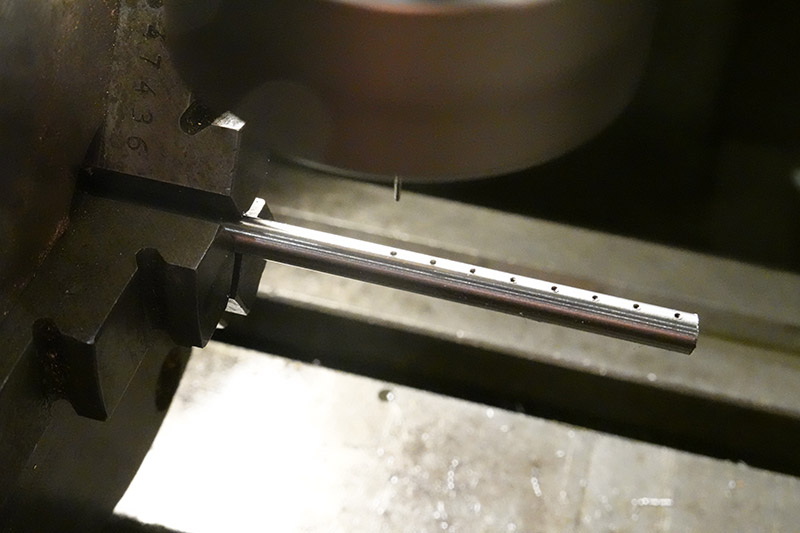
A 0.9mm dremel-style drillbit with a 3mm shank is held in the collet and ploughs through without batting an eyelid. Running at about 1500RPM (I'm scared by the noises the bridgeport makes above there). The quill DRO and fine-feed handle are used to depth each hole to 2mm.
40 turns are needed to perform a complete rotation, so 8 turns gives us our 5-position index. 8 holes were drilled per index, at 5mm apart, so 40 holes in total. Symmetry is pleasing!
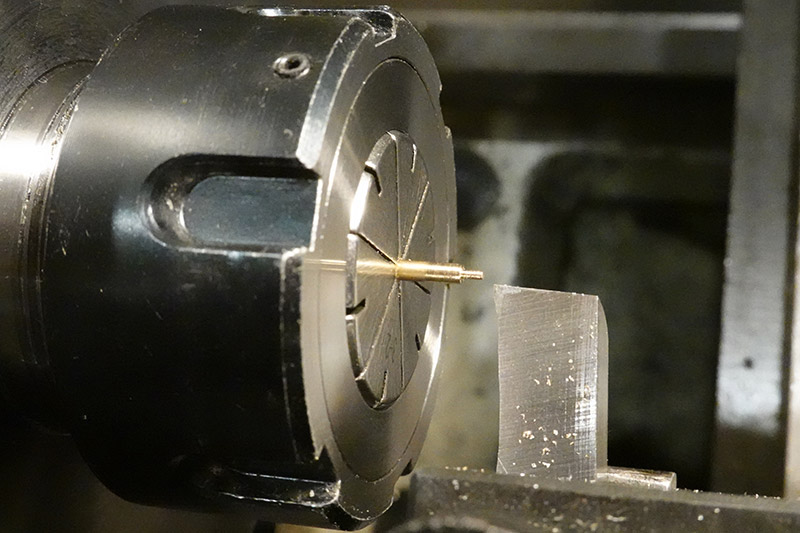
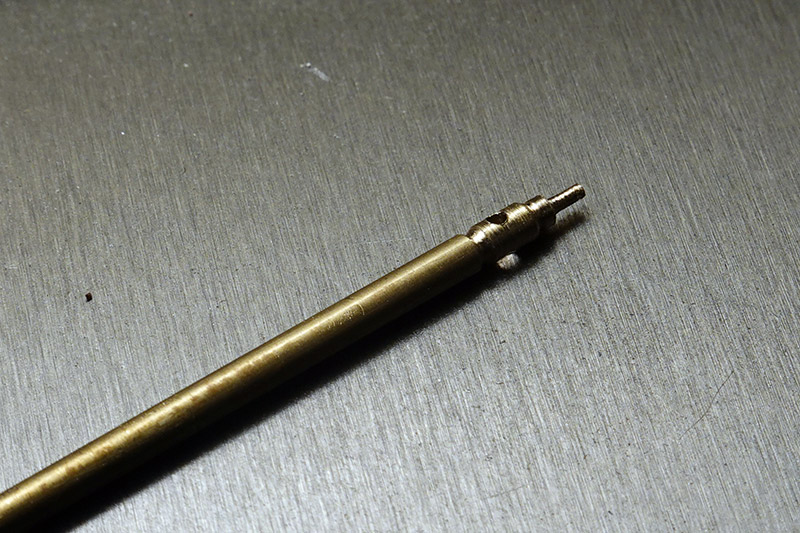
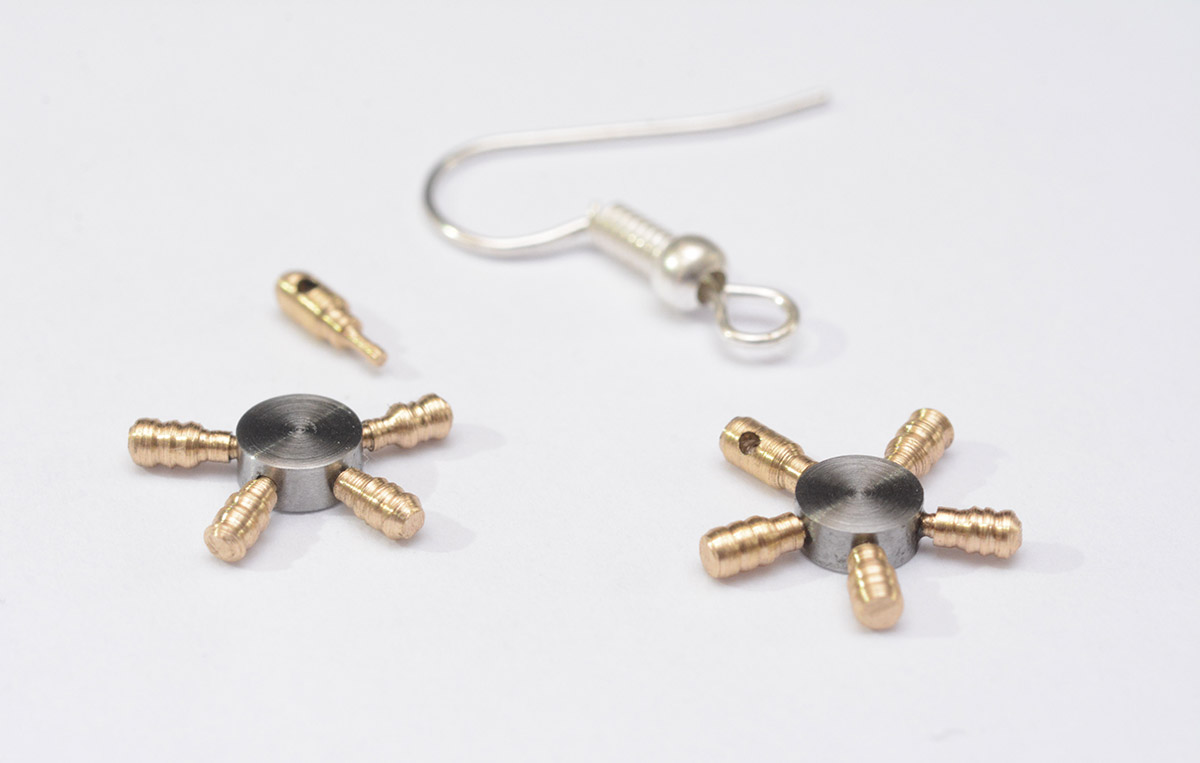
Procuring a 2mm brass rod, it was now time to turn the knobs.
My smallest tap-and-die set reaches M1.0, but with potentially forty parts to make I think a press fit/loctite join gives me more chance of retaining my sanity. The turning tool is HSS, zero rake and made as sharp as we can manage with just the grinding wheel.
The best way of churning out dozens of identical small parts on a manual lathe is to use a form tool. I'm not sure if such a tiny diameter can withstand that kind of cutting pressure, but more importantly, I did not have any of my tiny diamond disks for the rotary tool with me. I tried, very briefly, to use the full size angle grinder to produce a form tool and quickly accepted what a stupid idea that was.
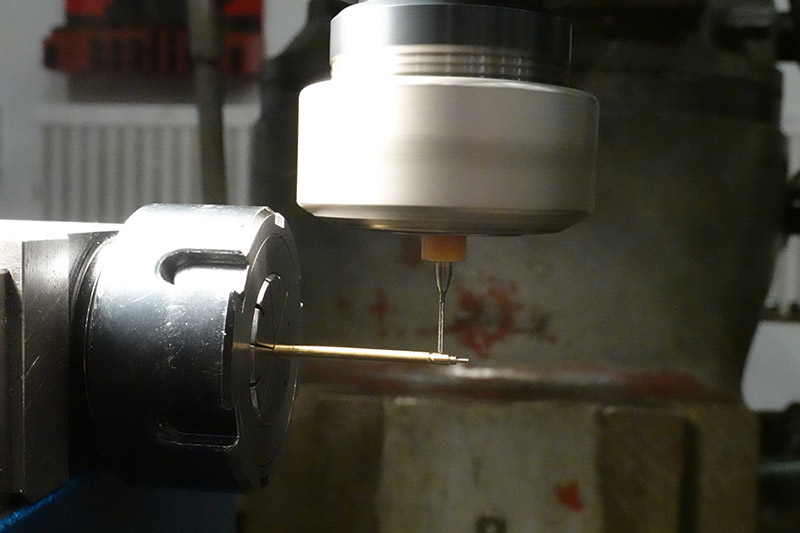
But to make a single set of earrings we only need ten knobs, so I speed-turned the lot by using the DRO, repeatability of the quick-change tool post, and crucially by doing the decorative bits with a needle file. The slowest part is loosening the collet to extend out more stock. The ER32 3-2mm collet is right at the bottom of its range (the stock was just a smidge too large for the 2-1mm collet) so it has to be tediously unwound to un-stick the taper each time.
At least I can claim the unevenness is a sign of its handmade character.
Before moving on, the last two of the knobs need to be cross-drilled for attachment points. Back to the bridgeport for this comical setup:
You know, this isn't the first time I've daydreamed about owning a smaller collet system.
The correct way to deal with such ludicrous stick-out is to support the part underneath, maybe shimming up to it with some sacrificial material. But I'm lazy, and old habits die hard, so I just held the part with my thumb and forefinger as I drilled. The trick is to hold it in such a way that it doesn't stab you when it bursts through the other side.
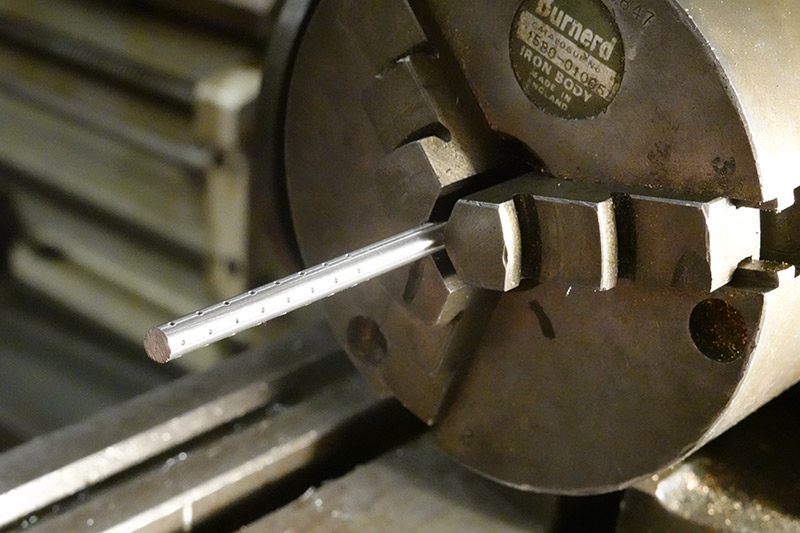
Then back to the lathe to part it off.
Finally we need to part off a couple of disks from that drill rod we perforated. Polishing one face is easy, but the parted-off side needs to be cleaned up as well. I left just enough room between the holes to give me a bit of wiggle.
The part-off tool is narrow enough that we can leave some extra material, mount the teensy part back into the collet, and face it off on the other side. It's a bit scary to hold it on such a small surface, the trick is to ensure it's sitting true in the collet as you tighten it, by spinning the chuck and tapping the part home.
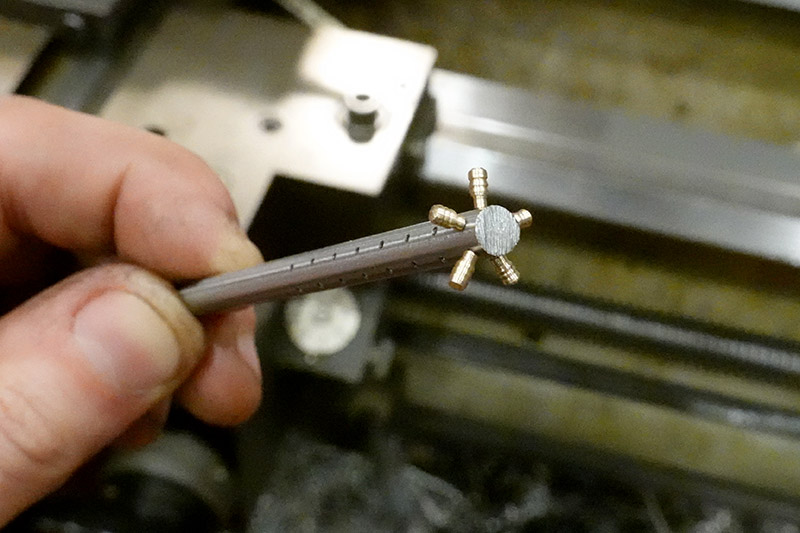
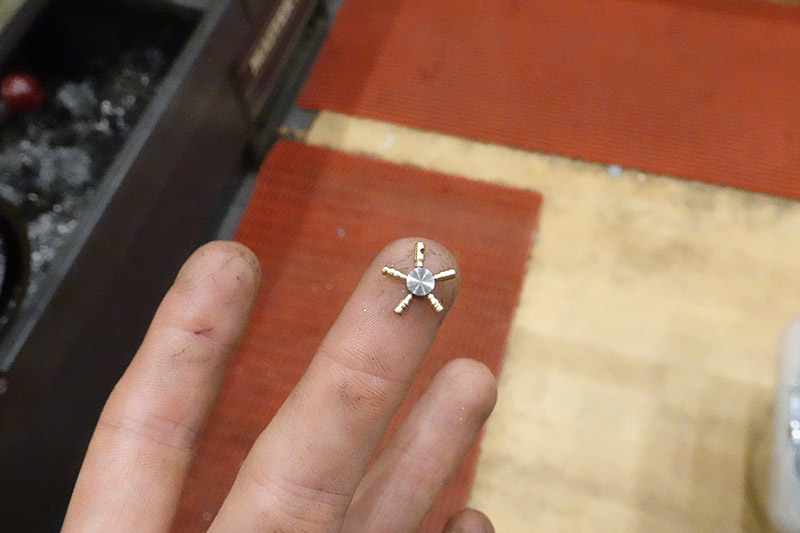
A test fit.
Cute! I spent some time rearranging the brass bits between the earrings to try and find the most symmetric arrangement. Finally, we just need to worry about attaching the ear hooks.
Lacking any better ideas, I tackled this by making a couple of rings out of silver wire.
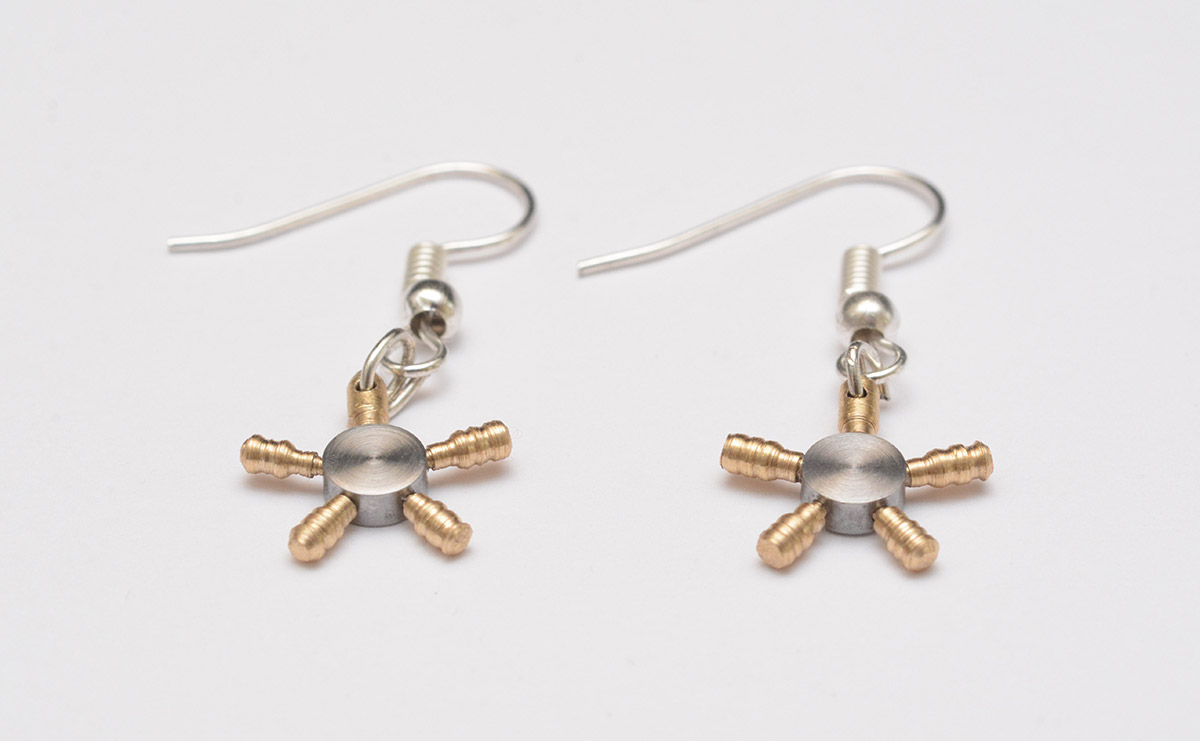
Not the tidiest solution but I was bored by this point.
Total project time: about five hours, including tea breaks. Could have been much quicker if I didn't spend so much time thinking.