Letter Master
26 Sep 2020Progress: Complete
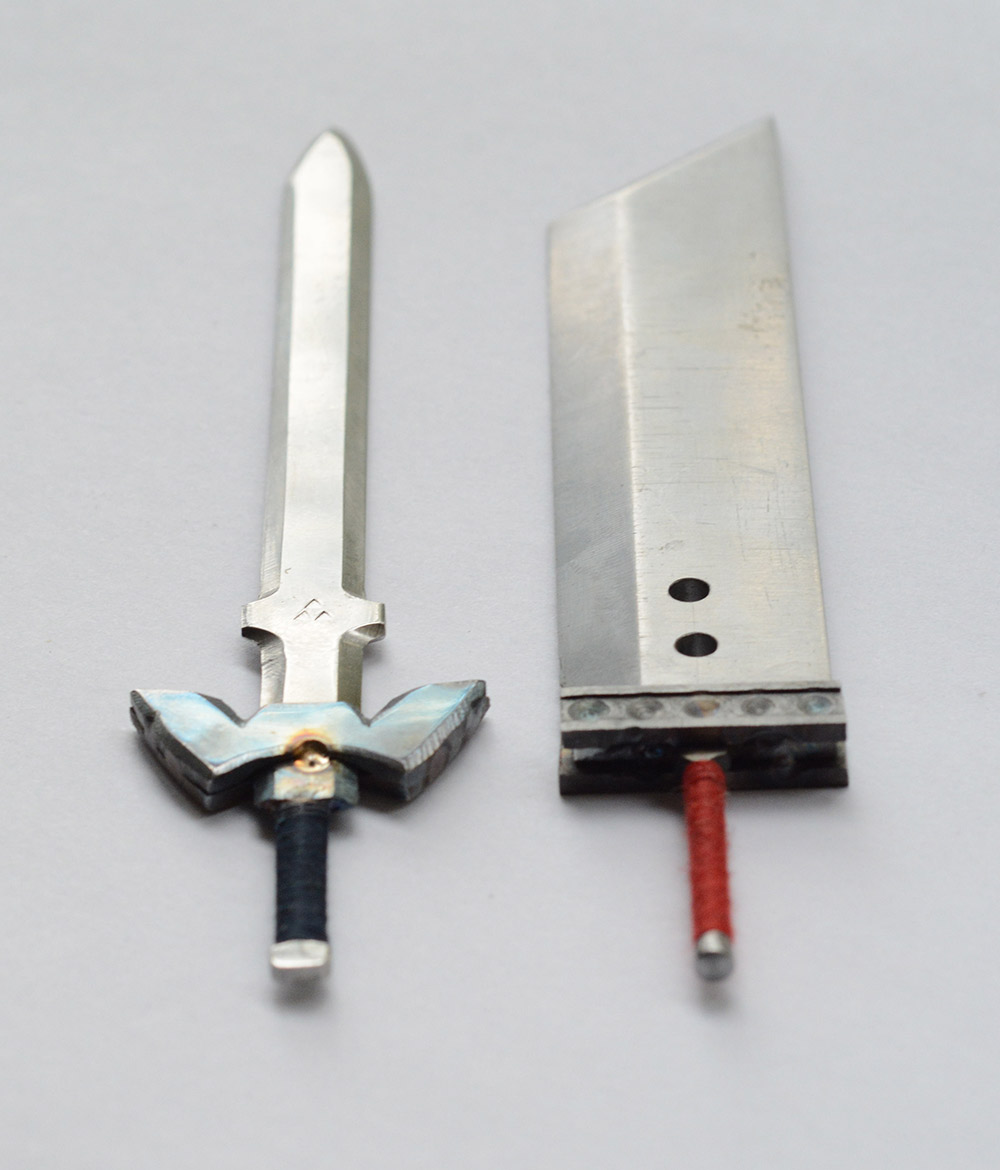
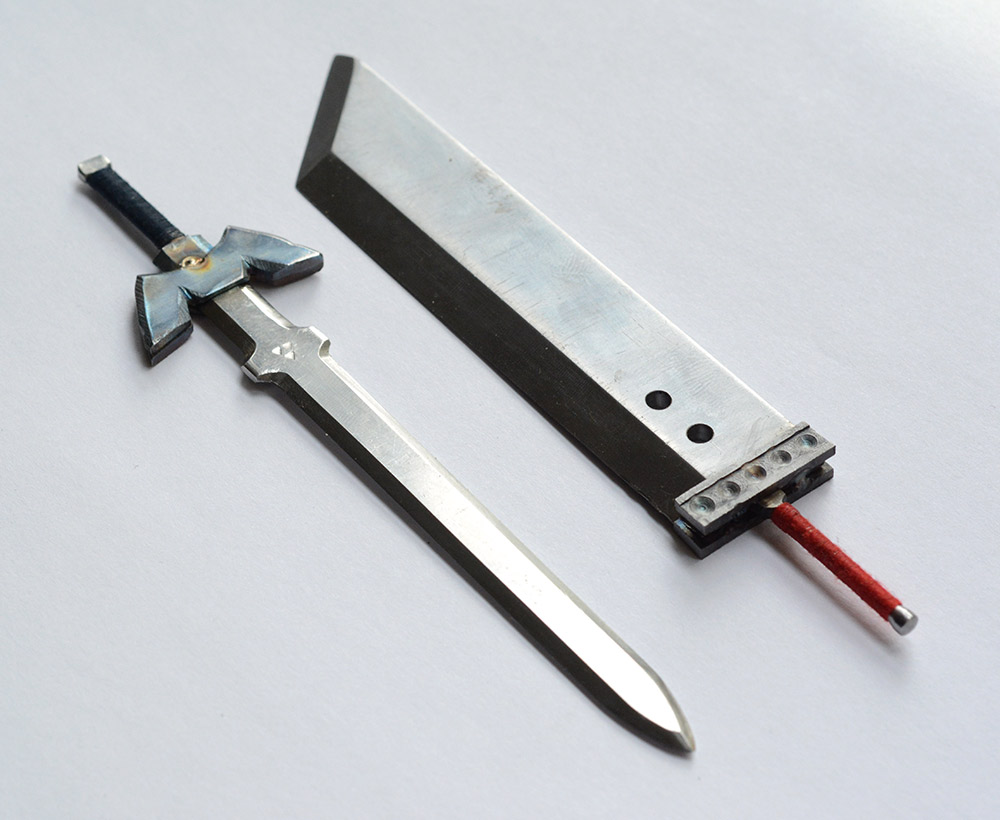
The Letter Buster came out nothing short of excellent. The buster sword is so distinctive even people who've never heard of Final Fantasy can recognise it.
But as I mentioned at the end of it, the blade is just too wide to actually bust open letters. This irked me enough to have a second stab at making a pointy thing.
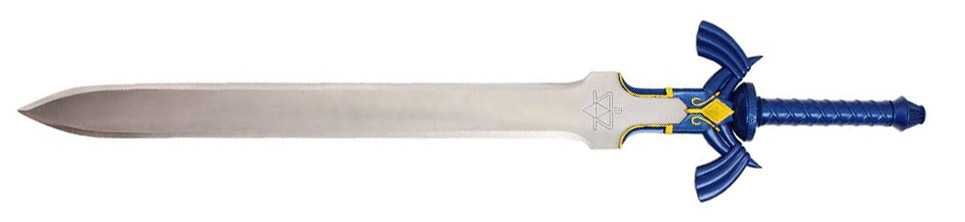
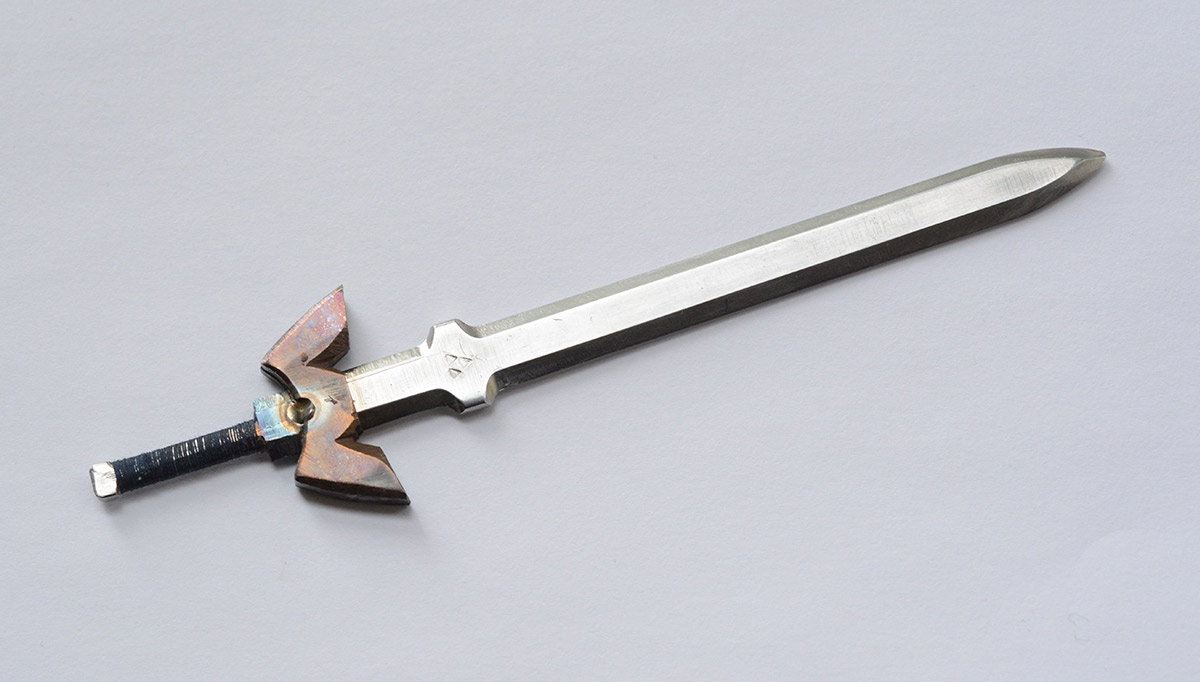
The Master Sword is not quite as distinctive, or as ludicrous, and doesn't have the comedy factor of being a miniature giant sword, just a miniature regular sword, but on the plus side it's the right shape to effectively slice open letters.
Blade
I'm starting with some 2mm sheet stainless steel. Since it's an offcut, I don't know what grade it is or whether it's hardenable. There are so many types of SS and only some of them have the right crystal structure to be hardenable by heating and quenching.I'm not too bothered about the blade holding an edge, but it would be nice to give it a spring temper so the thin blade is less likely to get bent. On the other hand, the stainless is so tough to begin with that it's probably fine as it is.
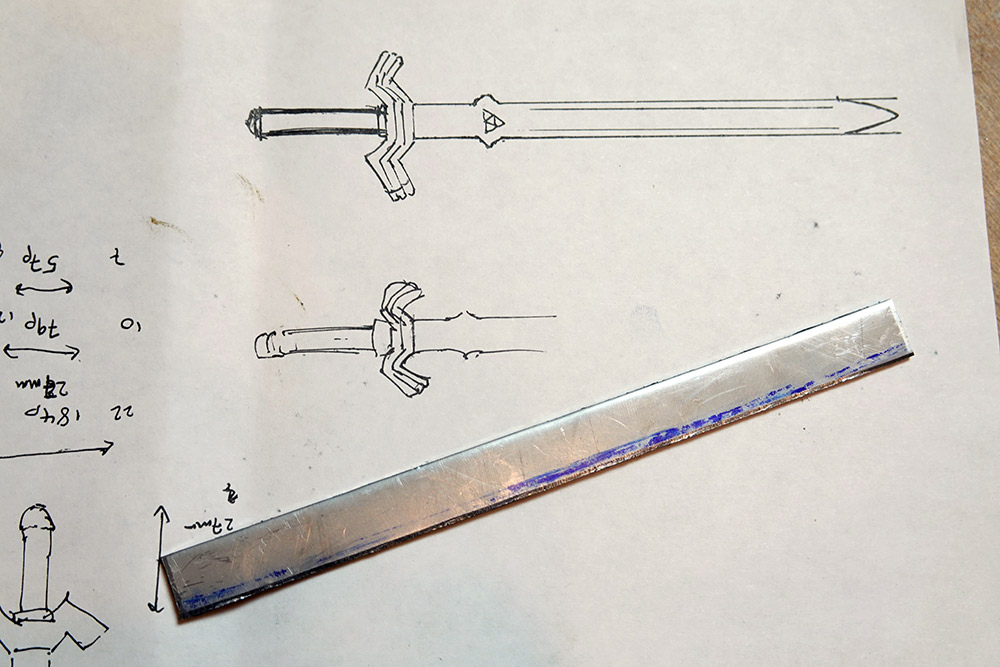
Sharpie as Dykem, rubs off a bit too easily, but paints the picture clearly enough.
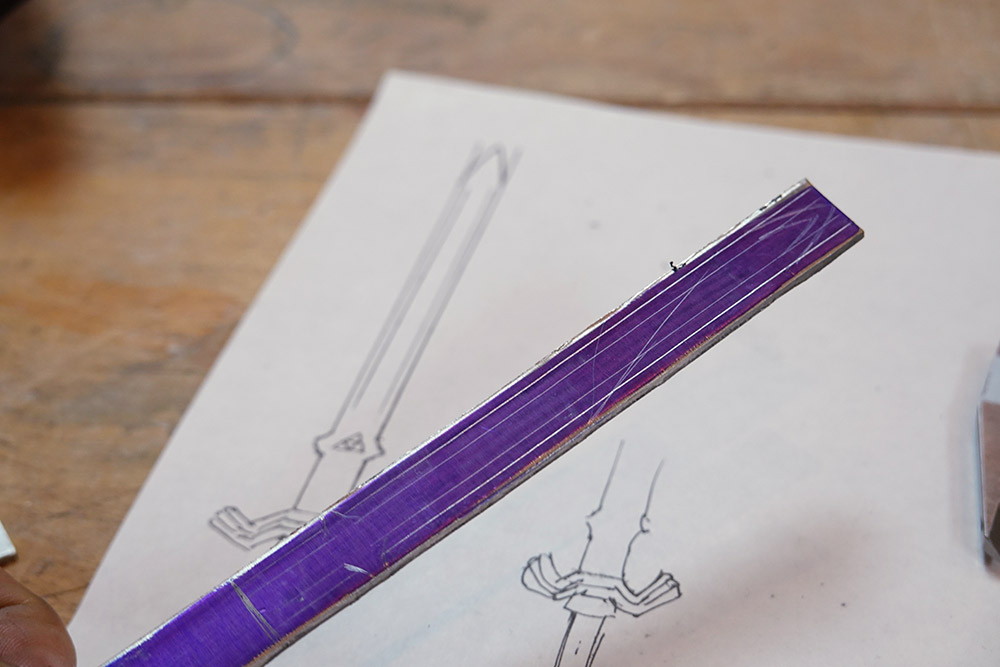
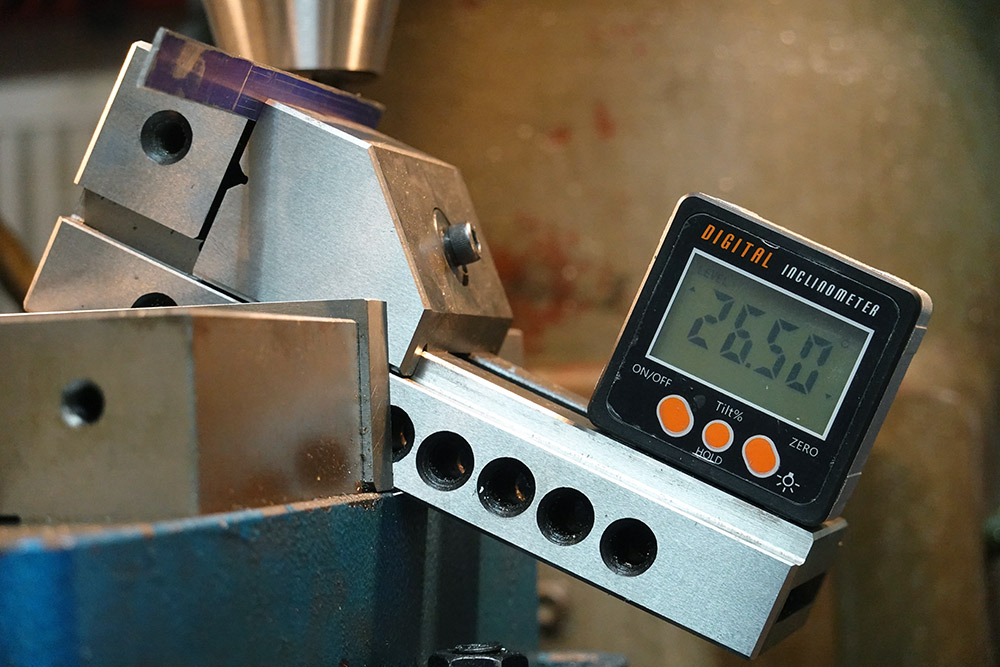
I definitely do not have any parallels thin enough for something like this. I boldly decided to just eyeball it based on the layout lines.
Arctan of half is 26.56 degrees, and this time I set up the vice-in-vice using a digital angle gauge. If you think I care about being a few arcminutes out, you've probably misjudged the precision required to build a letter opener.
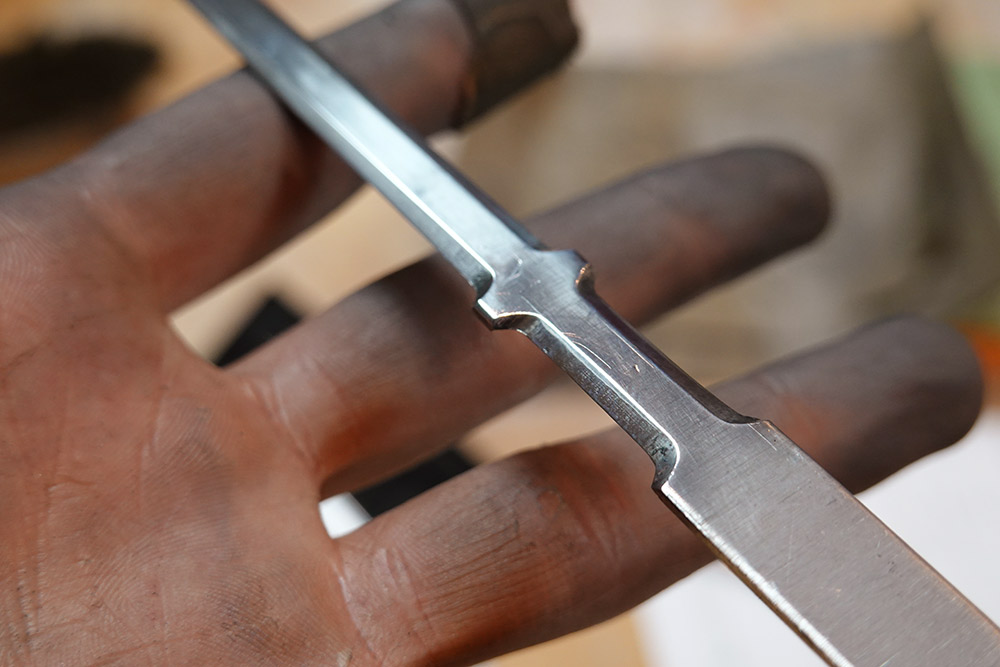
I'm bevelling all of the edges this time, which means four chamfers to mill.
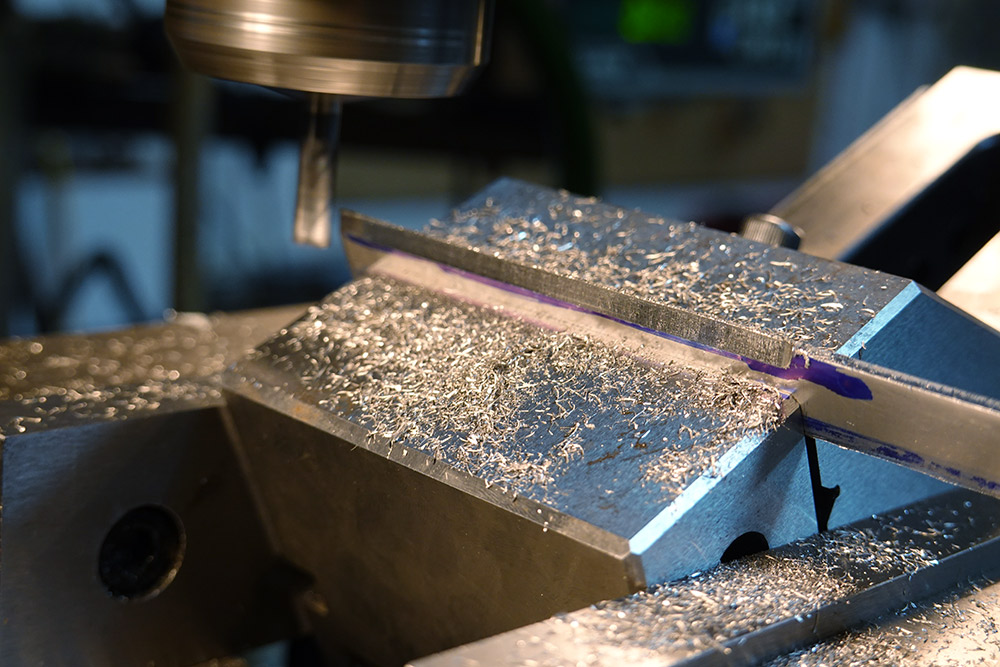
Unhappy as I was about the amount of stick-out for the handle-end, I figured it was best to just roll with it. I held the vibrating piece as it cut to dampen the chatter as much as possible.
I soon realized my eyeball vice positioning was not spot-on, and while this doesn't really matter – the next cuts can be made parallel to the first ones – it did lead me to make one of the bevels marginally smaller than it needed to be, since the scribe lines were no longer accurate.
Another minor mistake, as I cut the handle section of the fourth bevel, I knocked a handwheel in the wrong direction, taking too deep a cut. The only damage is a small nick where the vice jaw dug in.
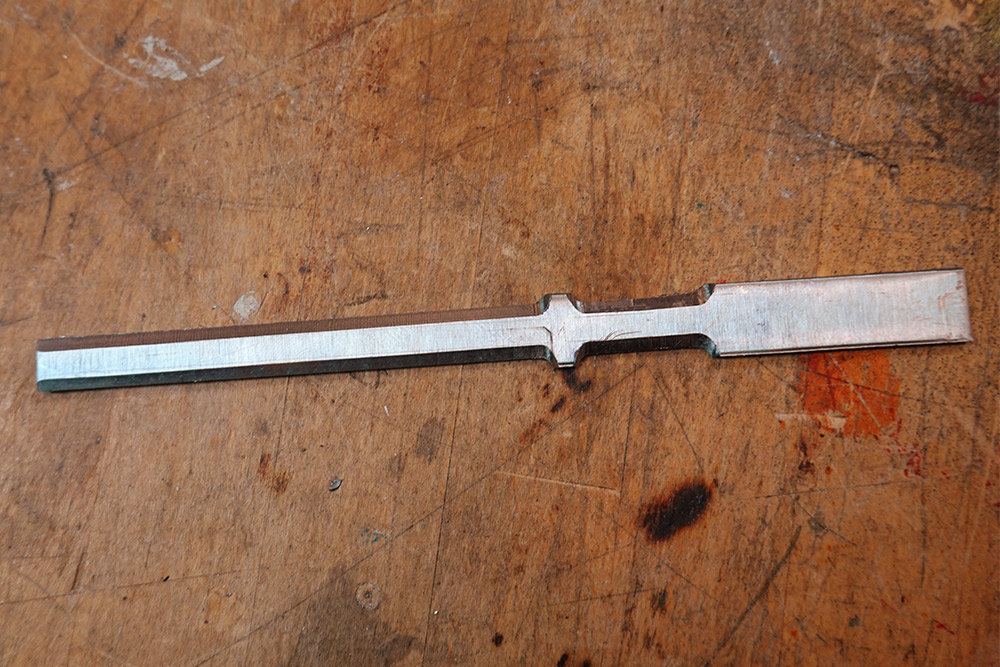
There isn't really a better way of sharpening the point on the end than just forming it with the grinding wheel. This is quite a skillful operation, not least because two of the bevels need to be done left handed. Luckily, I pride myself on my ambidextrousity.
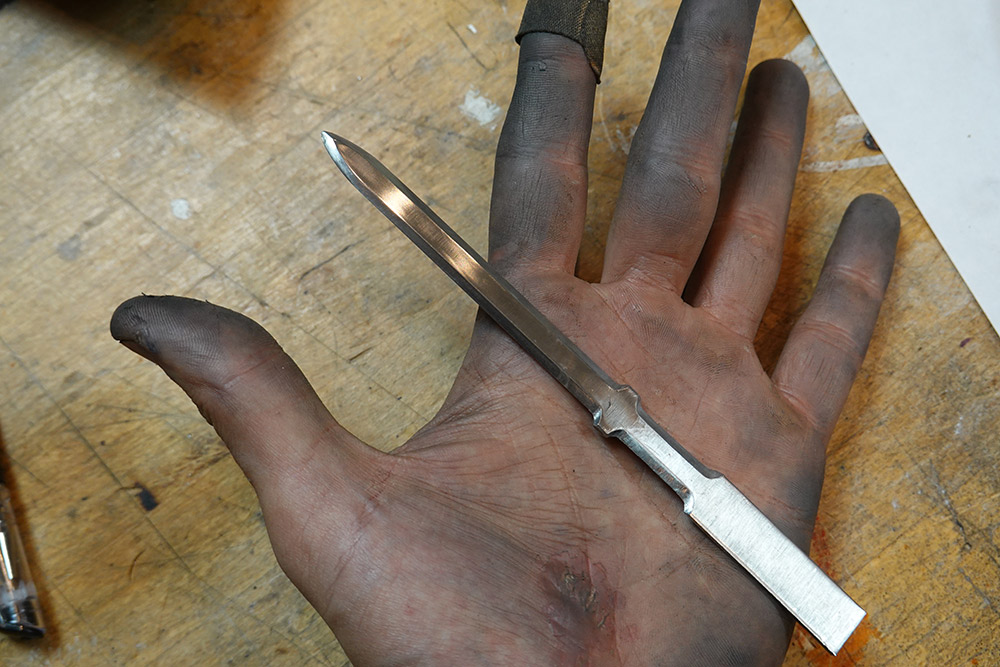
I also made a start on polishing out the toolmarks, hence the black soot all over my hand. The milling left a nasty burr all along the blade edge, which takes very careful removal if we want to keep a sharp edge on it. I found the best way of polishing the bevels was to wrap a small metal block in sandpaper, and with the blade in the vice, draw the sanding block along the blade, letting it follow the angle of the bevel.
When I started to feel happy* with it, I then tried out the buffing wheel. This uses a much, much finer abrasive than my sandpaper but imparts a great shine. The master sword is meant to be shiny, and the stainless should keep the polish for a long time.
(*fed up of sanding)
The buffing imparts an amazing quality to the metal, and especially around the handle area where I didn't bother sanding out the toolmarks and nicks, tilting the part in the light tricks my brain into thinking this is cheap plastic, or nickel plated. But it's real chrome, in real stainless steel.
I'd toyed with the idea of CNC milling a triforce logo into the blade, but with the mismatched bevels, the uneven polish, and the overall handmade look of the thing, I think a funnier and more suitable option would be to punch a hand-drawn triforce.
In my box I have these tiny HSS blanks meant for making gravers for the mini lathe. They're also the right size to fit the toolpost of the teeny weeny microlathe in the modelmaker's workshop at the Hackspace – that entire lathe could fit in a shoebox. HSS is already tool hard, so all we need to do is grind a triangle into it.
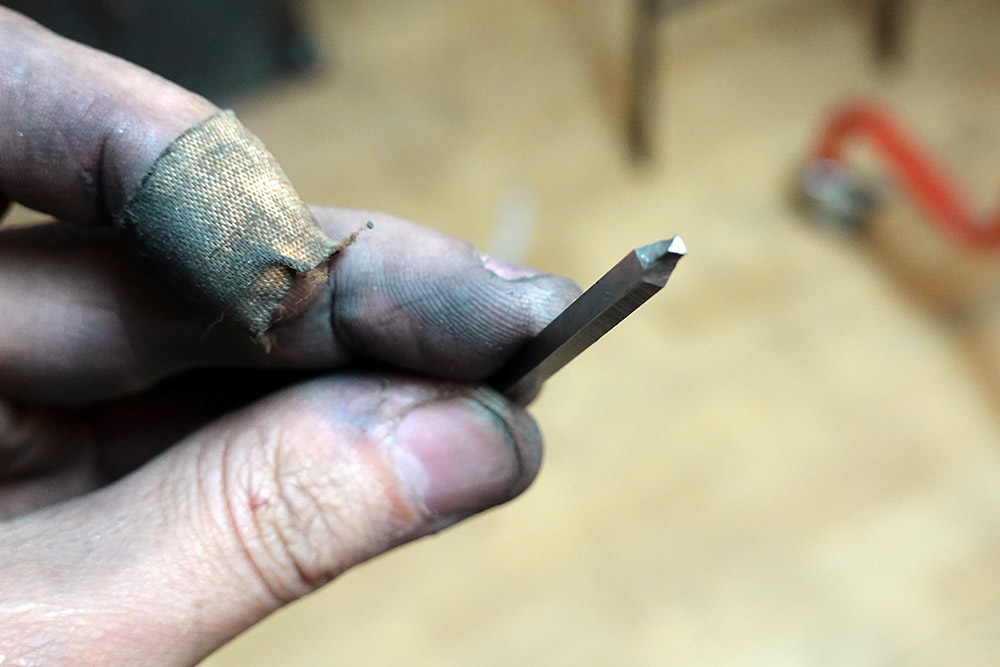
Then comes the fun part. Hold the punch over the sword and whack it with a hammer. What's the worst that could happen? Apart from ruining the progress so far, the punch could shatter and take my eye out. Or both eyes.
I resisted the very strong temptation to place the top triangle directly over the leftmost one...
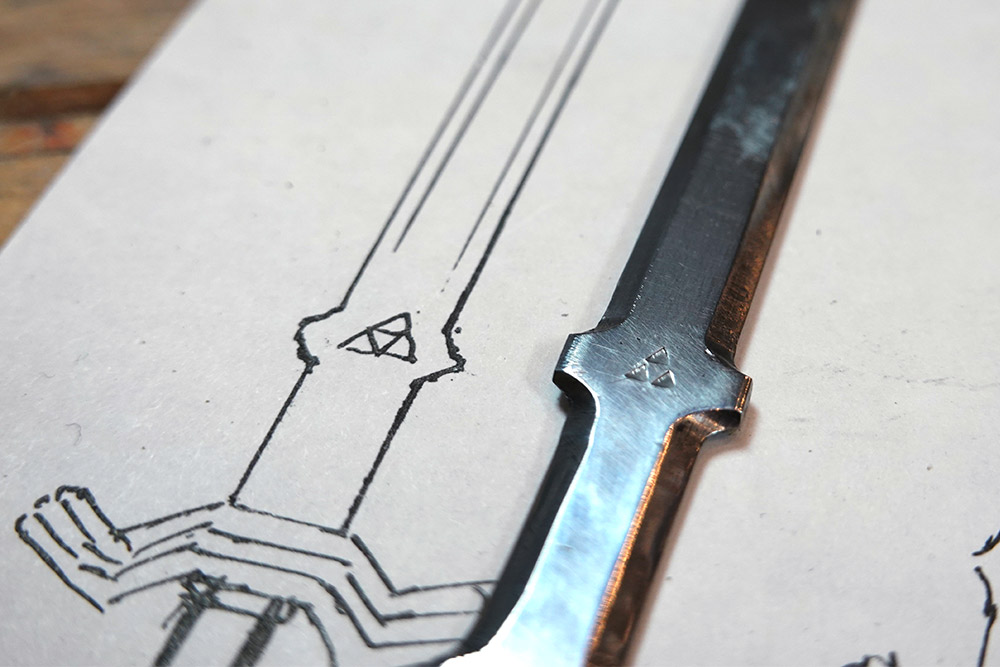
While it's possibly a little on the small side, this is the price we pay for just making stuff up as we go along.
At this point, I couldn't resist but try and open a letter with it. Giddy!
Guard
The reference picture shows an awful lot of ornate detail on the hilt. I'm not above spending days and days hand carving decoration into it with a tiny chisel, but in an attempt to keep this a one-day project I figured a no-frills approximation would be a better bet. Something distinctive enough to make the sword recognisable, but simple enough to finish it before sunrise.Starting from the same 2mm stainless sheet, I cut out two wing shapes that will sandwich the blade.
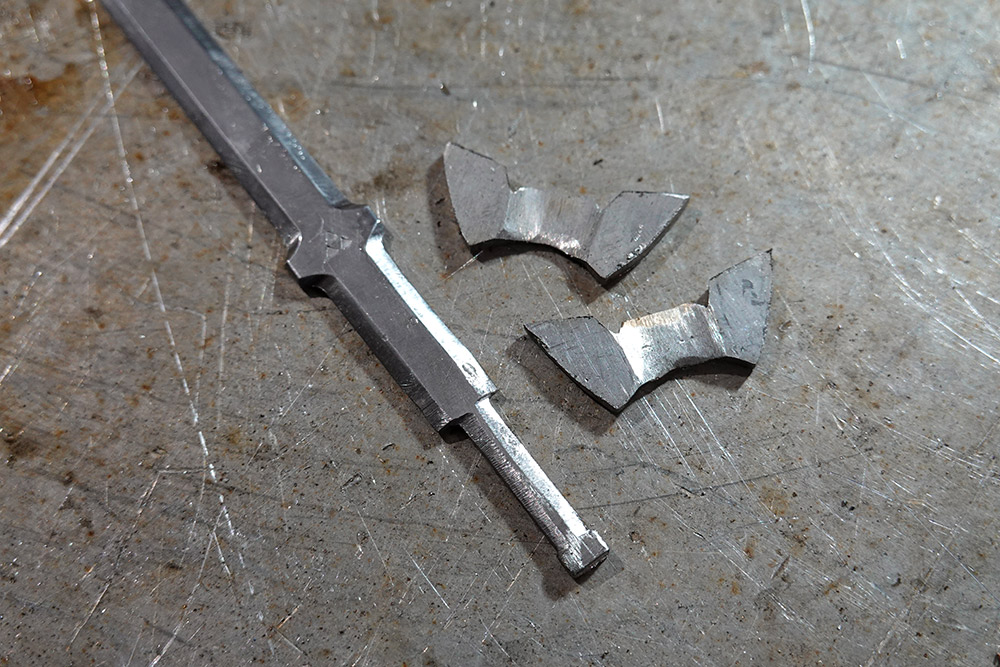
Despite trying to simplify the shape of them, it still took well over an hour to cut those two wing shapes out. The stainless is so tough, and the parts are so small and fiddly, the angle grinder cuts very slowly and the parts quickly become too hot to hold.
The middle sections were thinned out so that the wings can be stuck together, and slid onto the blade over the handle section, which was approximately cut with a hacksaw. It will be tidied up later.
The two halves were gently melted together with the TIG.
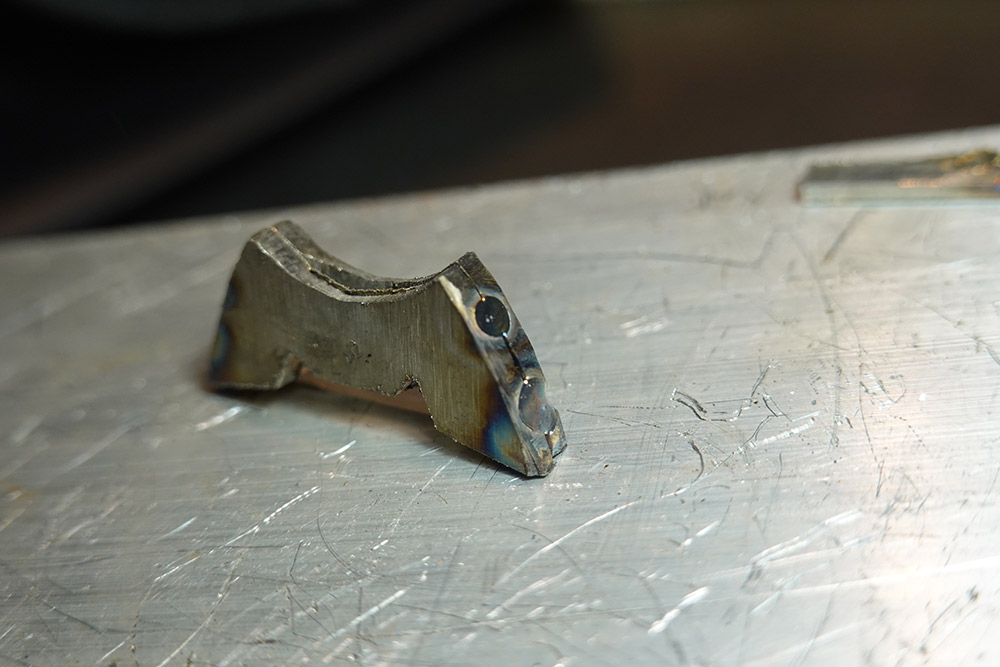
It's tight, but it still slides over the tang of the blade, so the next step is to give it a bit more shape and polish the surface. Yay, more sanding!
The guard is supposed to be blue. Painting it is simply out of the question, since that would defeat the point of making it from stainless. It would also look rubbish.
My plan was to hit it with a blowtorch for just the right amount, stopping when the oxide layer gives it a bluish tinge.

The colour change is over a very narrow range of temperatures, so to heat it slowly I held the blowtorch fairly far away at first. If it heats unevenly, the colours will be uneven, too.
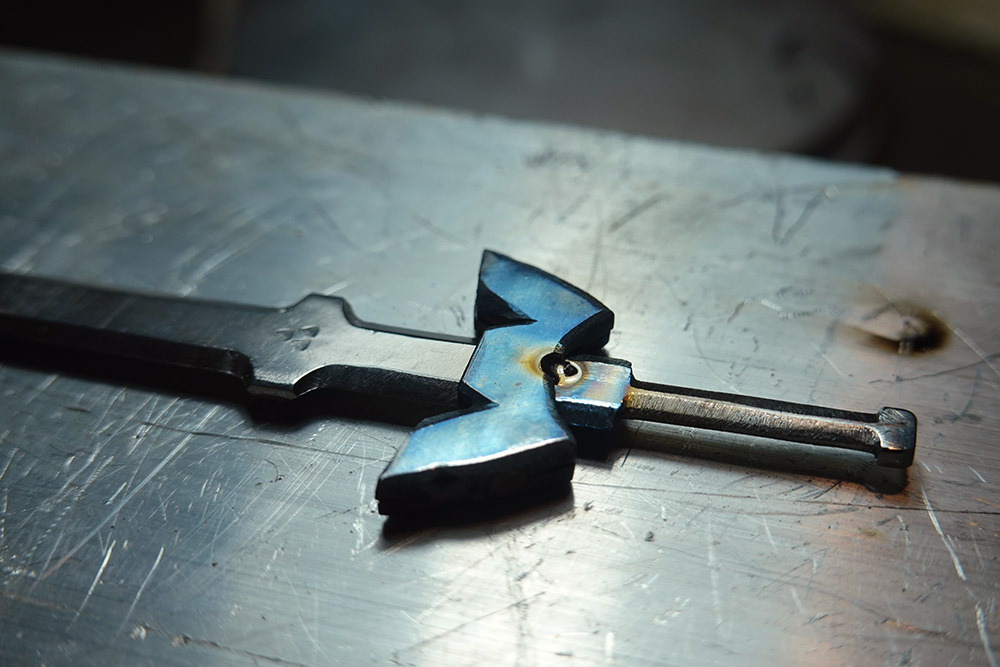
It starts by turning yellow, then reddish brown, then dark blue, light blue and finally grey. We want to stop at dark blue. As soon as it hit, I tipped it off the asbestos tile onto the cold metal table.
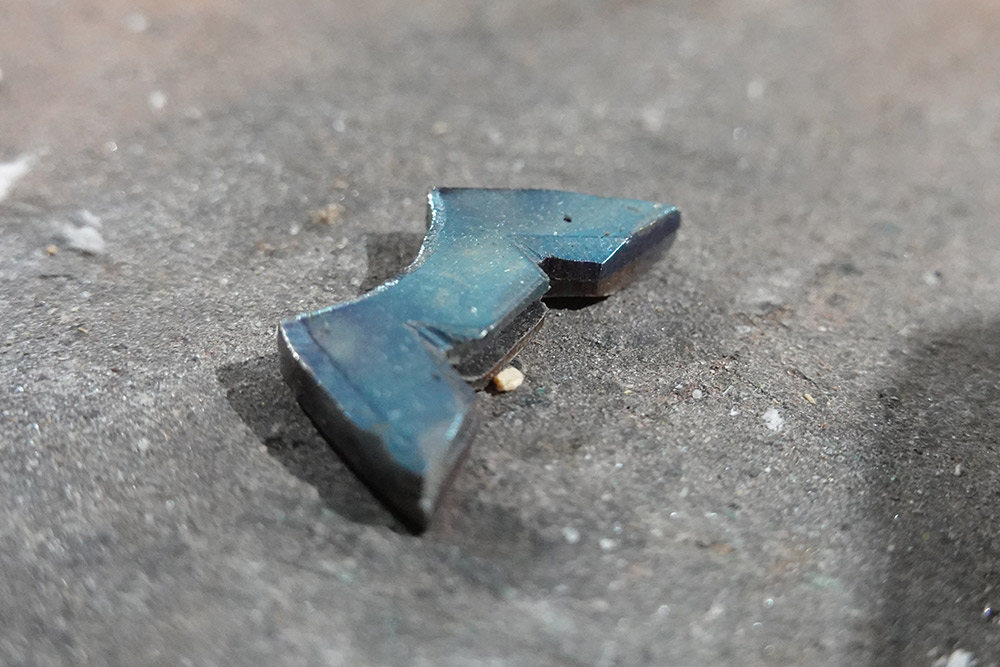
Predictably, I slightly overshot the dark blue I wanted, while the other side didn't get hot enough, and remained a reddish purple.
I was tempted to try and polish the colour away and have another go. If we stood it up on end, and heated from above, that'd make sure both sides blued evenly.
I don't really have any time pressure (this is a gift for someone whose birthday was back when the hackspace was closed for lockdown) but on the other hand the prospect of more sanding and polishing is really unappealing. So, uneven colours it shall stay.

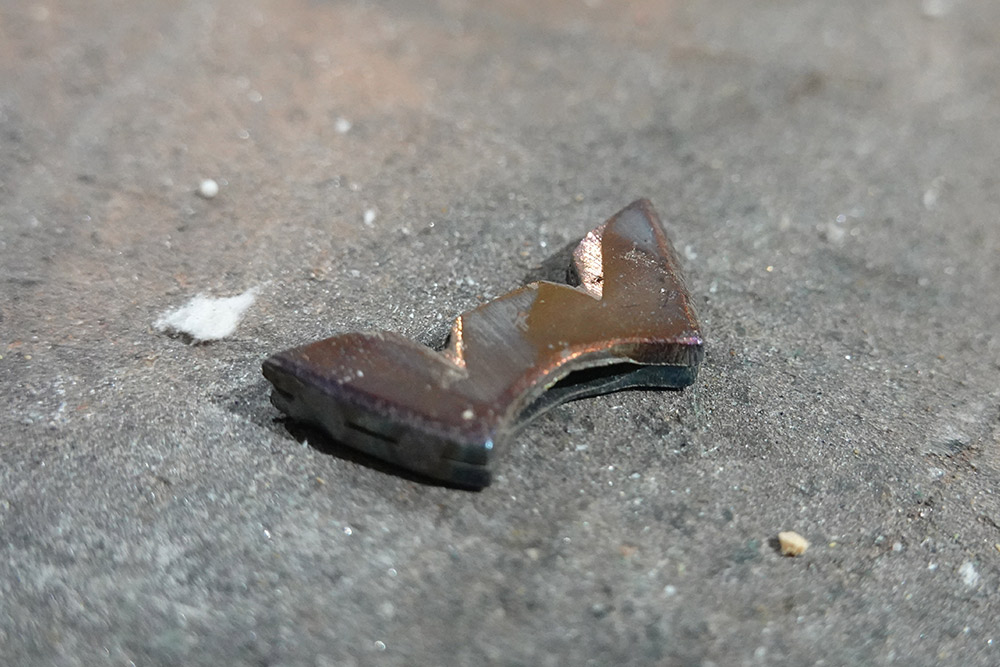
This test fit reminded me I need to finish filing the handle. But once that was done, we tack the guard in place with the TIG.
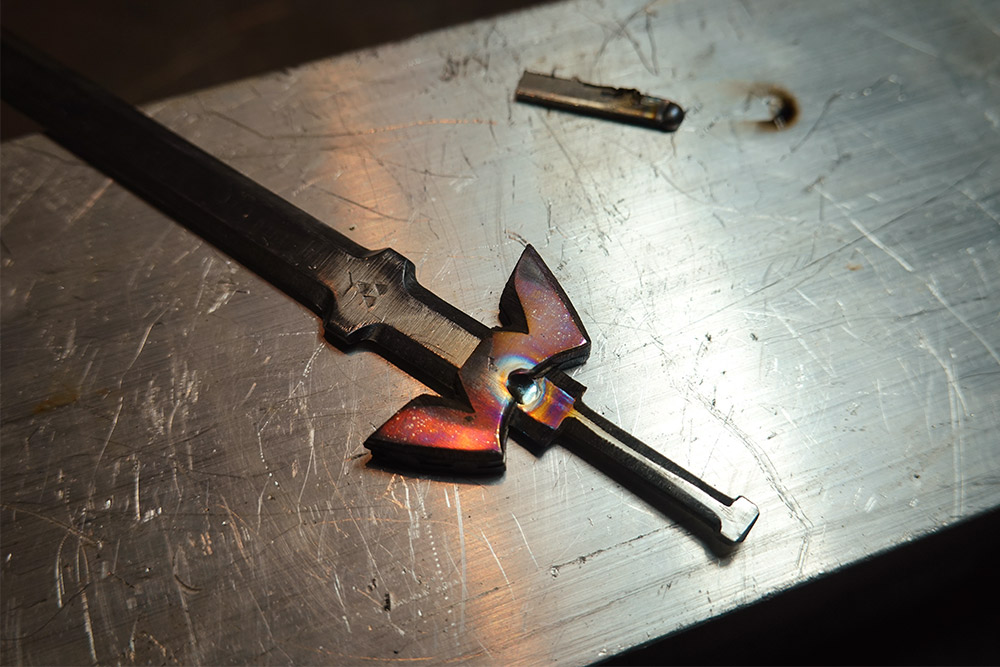
And the other side too, trying not to wreck too much of the colour.
The tack weld is off-centre. This bugs me because it should be easy to get it centred. The problem is that my welding mask, even on its weakest setting, goes too dark for such tiny amperages, and I can't see what I'm doing. All I get is black with a faint orange dot. I think next time I do something this small, I'll try it with the acetylene goggles.
Finish line
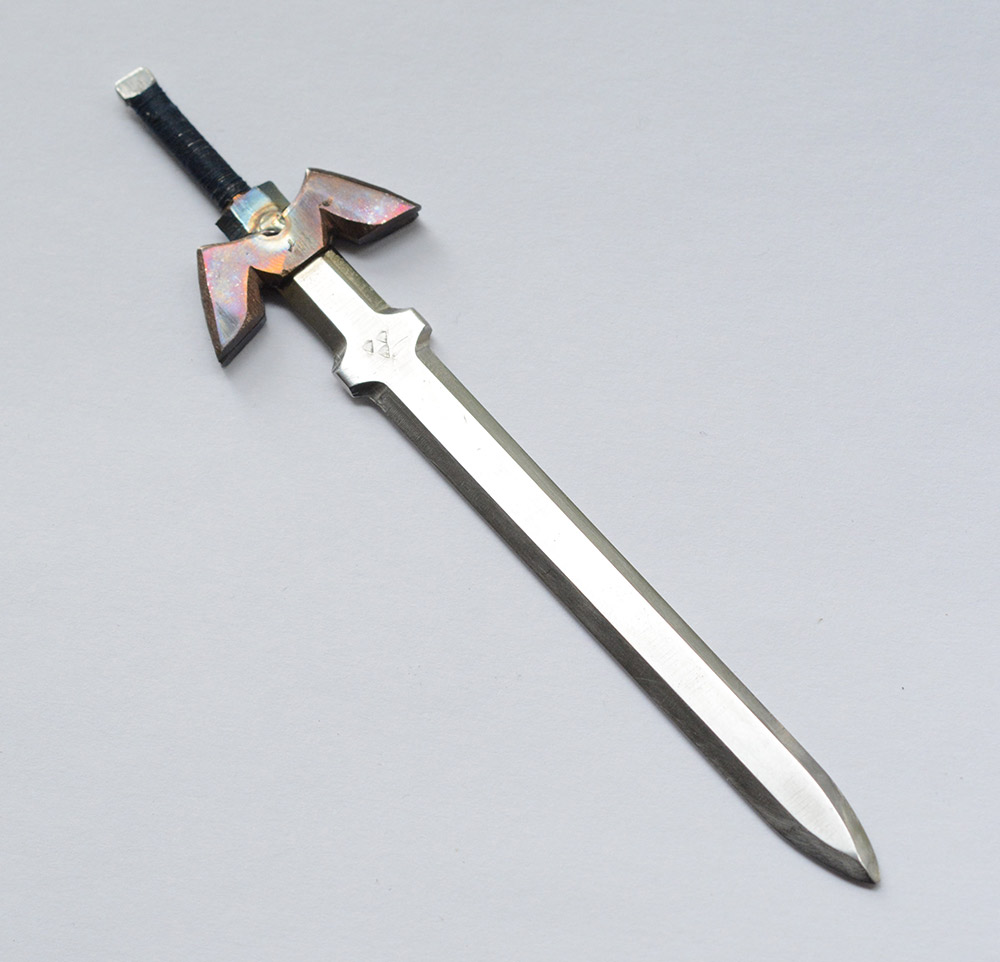
All that's left is to wrap the handle in navy thread and take some vanity shots.
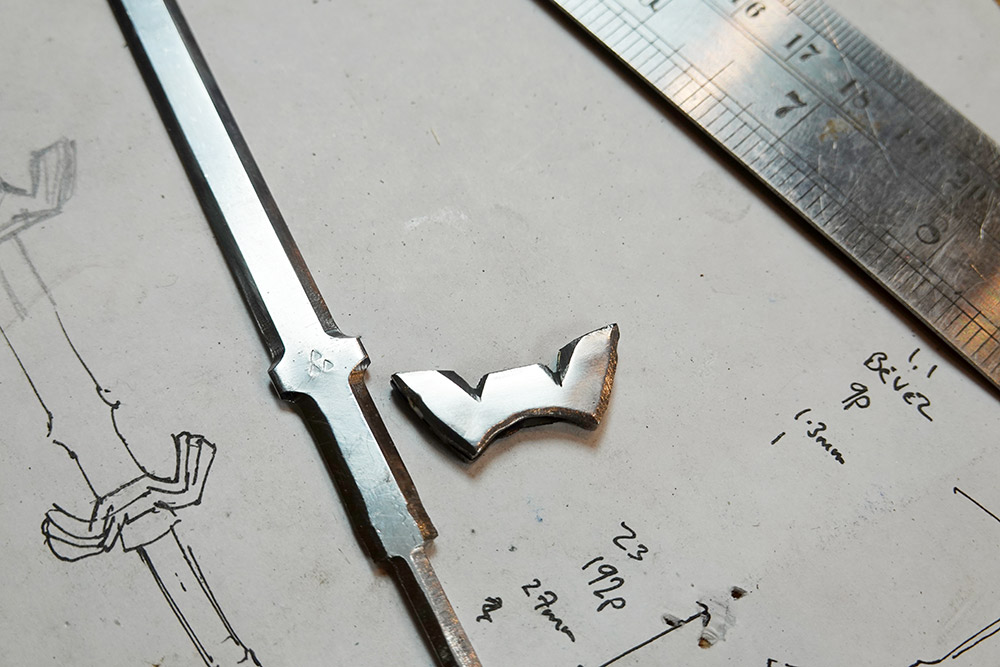
Also, by the magic of time travel, we can compare letter openers one and two...
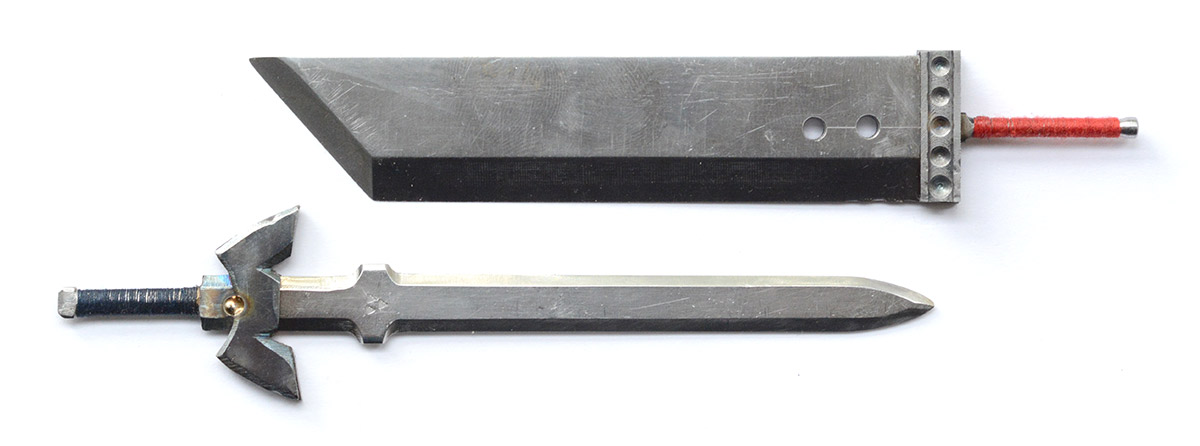
Naturally they're totally different scales, the buster sword is supposed to be six feet long.
The blade of envelopes' bane?
Honestly I'm not that happy with the hilt. Do not be surprised if I have another attempt at a master sword letter opener in future.