
MIDI Keyboard Repair
26 Oct 2014Progress: Complete
I decided to start posting some of the repairs that I do. These aren't very creative, although there is some scope for creativity. Let's start with Episode 1: a Yamaha KX5.
This was listed as 'used' condition but it turned out to have not one but six(!) broken keys. The chance of finding replacements on a thirty-year-old keyboard without paying through the nose were bleak. A complete repair using only what I had to hand was the perfect way to recover my pride. Disassembly was very straightforward, all M3 bolts. All the broken keys were black notes and they had all failed in the same way; the pivot point had snapped. Four of them had the broken piece still jammed in the mechanism.
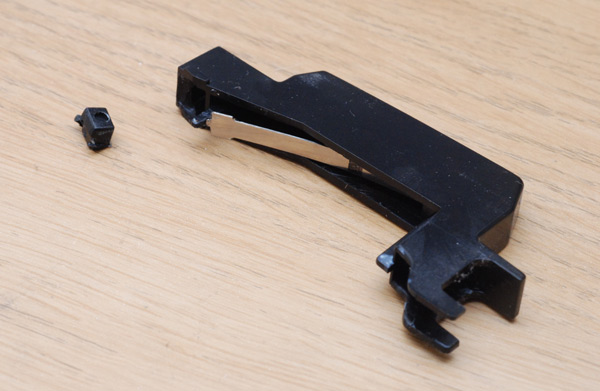
The snapped part mated perfectly with where it had broken, which is a clear indicator that superglue (cyanoacrylate) is the best option. It is usually a good idea to supplement this with a mechanical bond too. The usual route is to drill through both parts, and glue a pin in place.
I actually dread drilling this kind of plastic. Unless you have a very sharp drill bit at a slow cutting speed, it'll start to melt and when it melts you have all kinds of problems. So I did some simple strength tests and decided that superglue alone would be enough for those keys which had broken cleanly. The pivot is mostly suscepted to shearing forces, and superglue is pretty good for that.
Another key was missing parts which had ended up rattling around the case, and the last key was missing the bits entirely. This is where the repair really begins. A new pivot needed to be formed out of aluminium.
I chose 6060 aluminium which is easy to shape but stiff enough for the task at hand. I got some samples of it at a model engineering fair. Don't be tempted to use those aluminium extrusions you find at B&Q, it's soft, sticky, gummy, useless stuff that's infuriating to work with.
The plastic needs to be filed out to accept the new part. The two things I wanted to be sure of were a good, large mating surface between the parts and mechanical strength that doesn't depend on glue. The aluminium was jammed into the hole in the plastic in such a way that it held firmly without any glue at all, but I dribbled superglue into the join anyway as it approached the final shape.
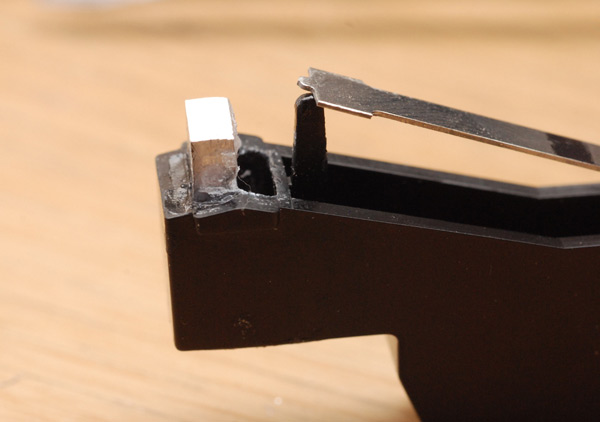
Shaping was done with a file and a piercing saw. With enough patience, a file, and a vice, pretty much any shape can be recreated. I had an unbroken key out on the desk next to it to keep checking progress. The piercing saw was invaluable when it came to making the final slot. Here's the above view, where the metal is tightly supported all round. (It's quite hard to get a good picture of the shiny aluminium against the black plastic.)
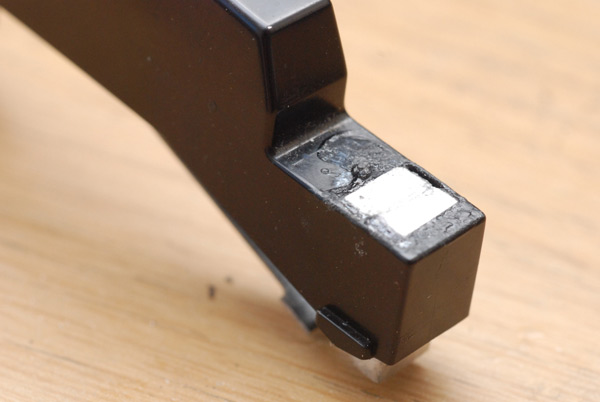
And then a test run. Velocity and aftertouch all working fine.
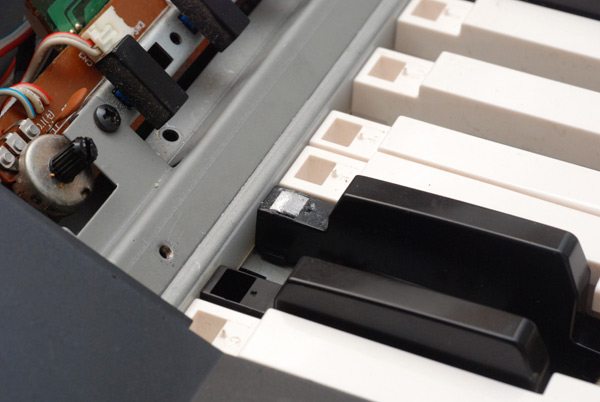
At this point, all six keys were fixed and I was only about an hour in. Reassembly was not so smooth. The key-depress mechanism has a kind of buckling-spring motion to it, which gives a great positive feeling, but that leafspring is very fiddly to slot into place, and in the process of reconstruction I went and snapped a plastic tab which supports the side-to-side motion.
Although I had the broken piece, superglue would be no good in this situation as the small surface area and long leverage would quickly lead to failure. I tried to drill the part, with pinning it in place in mind, but as I expected the thing just started to melt. No, the only course of action would be to make another aluminium replacement.
I followed the same routine as before, hollow out the plastic to accept it with a good mating surface, and jam the metal in place securely enough that it can be filed to shape while in place. It took a while to get the shape just right, obvoiusly if you overshoot you have to start over. The result, with an unbroken key on the left to compare:
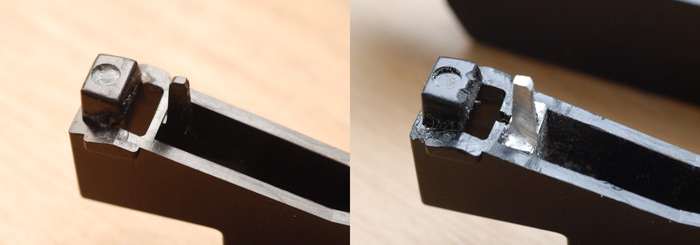
Not too shabby - we're not trying to win a beauty contest here, we just want something that works.
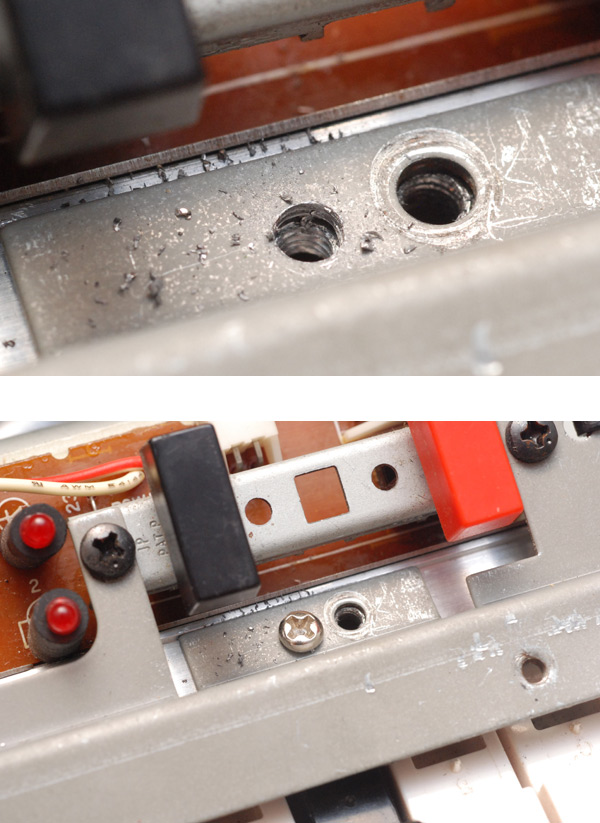
On the whole the build quality of this keyboard is in another league compared to the cheap crap that I'm used to. The only explanation I can fathom for the breakage is if something heavy was dropped on or bashed against it. There were a couple of other minor problems with it, the batteries had leaked a lot. One of the screw threads on the aluminium chassis had stripped out, it was a simple case of drilling and tapping another hole next to it, there was bags of clearance behind (remember to clear up all that metal swarf before you turn it on).
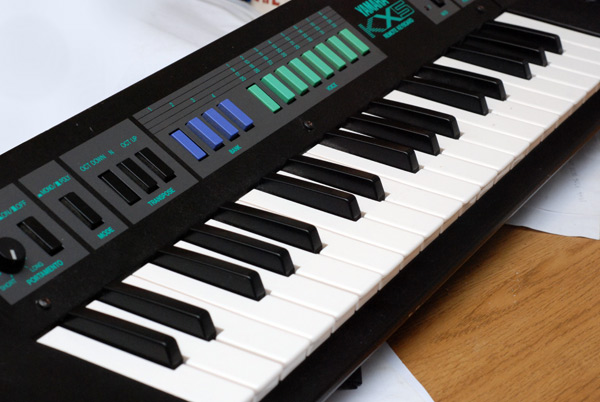
Aaaand... a completely functioning keyboard. Marvellous.
This is by no means the only way to do it, and it may not be the best way to do it, but if I share my repairs then maybe someday somebody might learn something. I've repaired quite a few cameras so I might post one of those next.
Update
Having repaired the keyboard I went on to make a few modifications.Although there is a sustain switch on the neck, there's no jack input for a sustain pedal. This is a very simple, and in my opinion essential, thing to add. Obviously check whether the switch is a push-to-make or push-to-break and wire the socket in parallel / series accordingly (in this case it's the former). I located the socket next to the midi lead, which seemed as good a place as any.
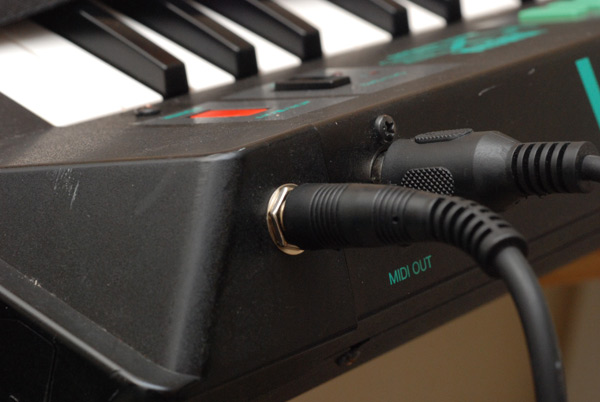
I mentioned the battery clip was ruined - in fact running the keyboard on batteries is a complete hassle and there is no DC input option. One 9V battery lasts maybe ten hours. Quite disappointing really. I decided to see if I could power it over the midi cable.
The midi connector is actually a mechanical switch as well, that disconnects the battery when unplugged, which is quite cool. Luckily, the two unused wires in a midi cable terminated quite obviously on the board connected to the socket. It was very easy to solder to these.
Some questions to ask are: will we want to run it on batteries again? Do we want it to work with other midi gear? Yes, to both of those, so there needs to be some way of switching the power source. I don't particularly want to blemish the case any more than I have to, so for now I decided to route the midi cable's unused wires into another battery connector. Inside the battery compartment, you now have a choice of connecting to the power-over-midi or straight to the battery.
The next part is to supply power to these extra wires. A quick note on the "ground" of a midi cable: given the function of the on/off switch, which cuts the negative line to the battery clip, we want to make sure that the 0V to the battery is completely separate to the ground on the midi line. As I've mentioned previously, my USB-to-Midi converter only connects the two data wires and nothing else. Since I'll primarily be using this with that USB-to-Midi converter, an idea popped into my head - could we run the keyboard from 5V? Only way to find out is to try it.
Some testing later, and after some initial sputtering, it turns out the keyboard works great on 4.5V. One problem is that it permanently flashes the 'low battery' warning (it pulses the channel select LED) but this does not interfere with any other operation.
The wiring, and the use of power-over-midi, naturally had to be different to my previous power-over-midi mod, as the Evolution MK-149 used a separate, unbalanced data line when powered over the cable. Since neither the connectors it came with, nor the evolution's cables, had all five pins linked up, the only option was to sacrifice a new cable. I had a 2 meter midi lead lying around and continuity tested all its pins - yup. Then I chopped one end off and wired it to the same adapter as before. It is getting pretty tight inside that plastic casing now. There are now five leads coming out of it: USB, Midi Out, Midi In, Midi In with 5v power on the unused wires, and Midi In unbalanced with power on the specific pins to work with the evolution keyboard.
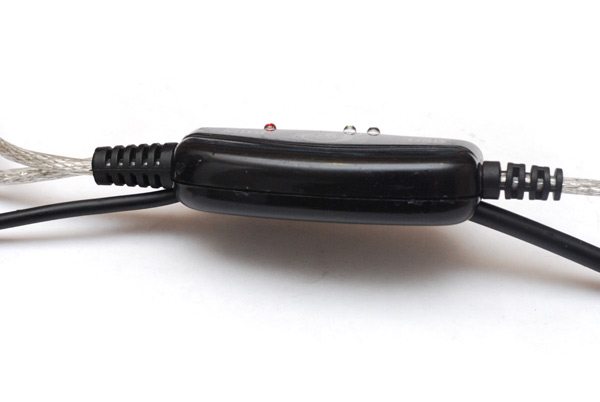
It's been a couple of months since I did this and I've had no problems at all, running the keyboard on <5V. The only thing that may have been affected is the input connector for a Yamaha BC3 breath controller. I say this because I believe the breath controller requires 9V to work, which the keyboard obviously can't provide from the USB power. But in my investigations into the breath controller (incidentally, they're ridiculously expensive) I noticed that the output signal of the controller is supposed to lie in the range 0V to 5V. And, our power line is now 5V. Which means that all we need to send midi CC data is a potentiometer on the connector. That connector is a 3.5mm TRS jack, with signal on the ring. By a delightful coincidence, the 6.35mm jack on my M-audio expression pedal also has the signal on the ring. So with no wiring needed at all, a simple 1/4 inch to 1/8th inch audio adapter lets you plug the expression pedal straight in. Wonderful.
It does give the full range, as I say, due to running the keyboard on 5V. I have not tried it on 9V with the pedal. One slight problem is the controller applies a pretty heavy correction curve to the signal which means that most of the sensitivity is all at one end of the range. But it's far from useless. I shall not deny, however, that next on the agenda is to build a replacement breath controller.