
Flag Steam Engine
23 Sep 2014Progress: Completed
I wanted to pick up the pace with the engine building. The first wobbler took me about three days to build. This one took one day to get to a working engine, but another full day to make and test the boiler. Eventually I'm hoping to be able to kick a working engine out within a couple of hours.
One of the longest parts of building the first one was trying to lap the inside bore of the cylinder to be smooth. Well, this time, I splashed out on a 4mm reamer. It is, however, a hand reamer and has a significant taper. I decided to drill and ream all the way through, then plug the hole at one end. This worked perfectly well, and took a fraction of the time to make, although press-fitting the plug did slightly distort the outside and I had to take another skim cut to true it up again. To be honest the piston/bore is not as good a seal as the previous wobbler, but is about 70% of the way there for 10% of the effort.
I had tried to make a tiny boring bar, ground out of a square hss blank. But no matter what I did, it kept deflecting and giving a tapered finish. Perhaps it needed to be sharper, or perhaps working at this scale just requires a million passes.
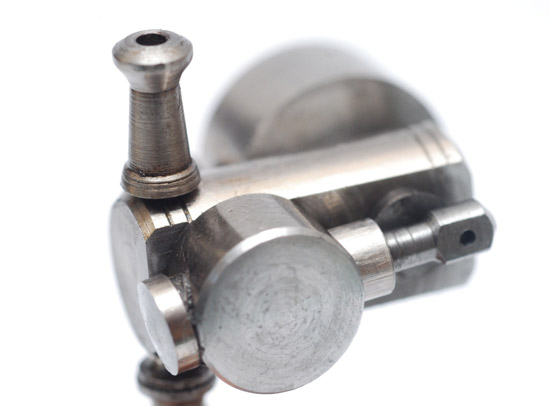
Cylinder, piston, crankshaft; flywheel in the background. The chimney was a decorative afterthought.
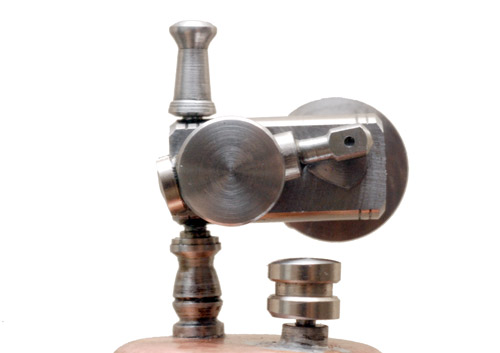
The pivot pin is turned out of the same piece as the cylinder, avoiding the problem we had last time. The whole thing is about half the size of the previous engine, mainly because I was trying to get it small enough to use a slice of that 13mm rod as the flywheel. I also did away with the locknuts, by just putting a cotter pin through the pivot and threading the spring around it. This stays put nicely and is very easy to adjust.
The steam ports were drilled 0.4mm. This was not easy.
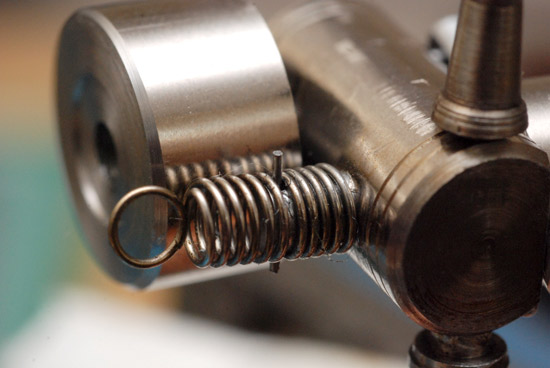
Here's a closeup of the tensioning mechanism. The OD of the spring is about 3.5mm, it started life as a smaller extension spring which was given the pliers-and-blowtorch treatment. The cotter pin is a broken 0.4mm drillbit.
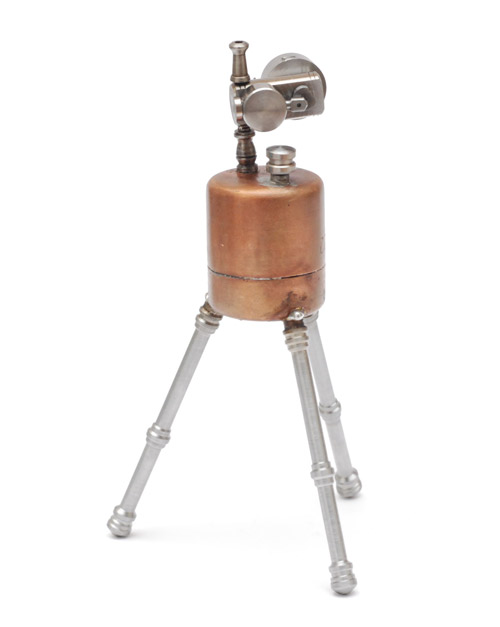
The boiler is constructed from two 22mm copper end caps. I didn't have any 22mm pipe so a ring was cut from one cap which I then split and soldered to a smaller diameter. This then provided the mechanical link inside both halves as I soldered it all together - but drilling the fill port first, of course. The cap for the fill port is just a pin with a slight taper, it seals well and functions as a pressure-relief valve. Depending on how firmly you push it in, it blows at about 20 to 30psi.
Soldering copper to steel is not as straight-forward as all that, but this printer stuff does behave better than I expected. To ensure a good seal I went over the steel parts with flux and solder continuously until I was absolutely certain it had wetted the surface. Then just apply heat as you press the parts together.
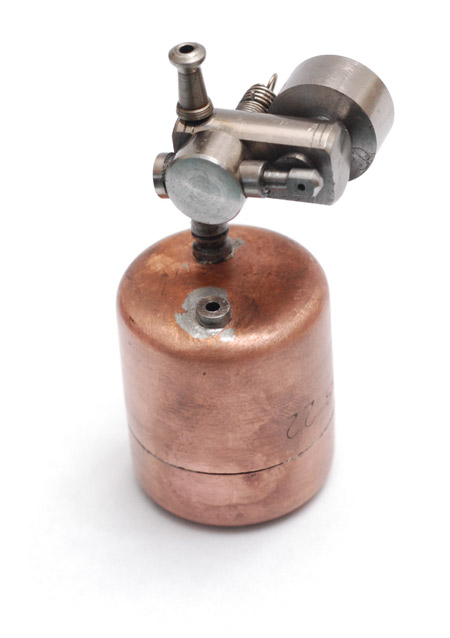
See, the engine mounts to the boiler sideways. Kinda flag-shaped, hence the name. The column is also the steam inlet, which like the chimney was drilled 0.8mm all the way through, then 1.5mm for most of the length where the material is thicker.
With the fillport/relief valve cap in place. The weight of the cap, with the small size of pin, is supposed to set the point at which it blows.
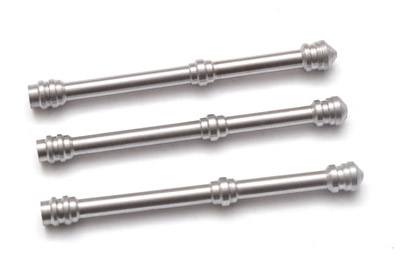
It's evident that my soldering is not all that square. Perhaps I should have named this the Wonky Steam Engine. The plan was to have this mount over a tealight candle, and for that it would need legs. I boldly decided to solder these on too, but to try and get them a little more accurately positioned I constructed a jig out of several clamps and mole grips. I turned some decorations into the legs, trying to make them identical by eye.
Success, although I do need to shave off that excess solder. I knew the engine would run at this point, it's quite easy to plug an air hose over the boiler fill port (or the chimney), but would it run on steam?
Yes, yes it runs on steam. I have lost my steam virginity!
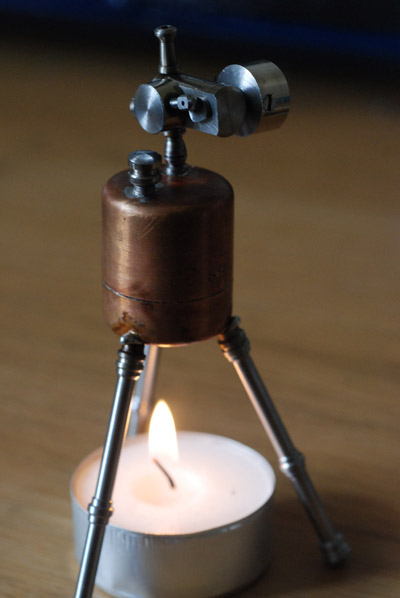
But unfortunately that picture above is only during the warm up. I didn't get a photo or video of it running just yet, partly because it tends to walk over the desk as it runs, and partly because a slight problem has arisen. It was only the third time I had run it on steam, and the boiler ran dry. The solder won't melt if there's water in the tank, but as soon as it's dry... the legs fall off. I guess I didn't realise how quickly the water would boil away - the tank only holds about 8ml after all. Hmmmm.
I shall probably stick the legs back on soon, and maybe try and get a video of it. But it's probably more fun to spend my time building more engines. What's next? I think I'd like to build something double-acting, maybe with actual valves.
We are on our way. We are nearly there. It is only a matter of time before the glorious mullah rolls in.