Nikon D3200 IR Conversion
11 Mar 2019Progress: Complete
Story
In front of the sensor in a DSLR camera is an IR-Cut filter, which blocks infrared light from hitting the sensor. Most of the time you don't want it, but if you're trying to do infrared photography, that filter has to be removed. Some people call this a "full spectrum" modification, although a bare sensor is hardly full-spectrum. You'd think this is the best solution, because you can stick IR filters on the front of lenses if you want to block visible light, but the fact is it's incredibly inconvenient to do that. For one, you need a different filter for each size of lens you have, but more importantly, if you're blocking infrared light from entering the lens, the viewfinder is no longer usable. That basically defeats the point of an SLR.So the best thing to do for digital infrared photography is to replace the IR-Cut filter with an IR-Pass filter. I have done this in the past: when I upgraded from a D80 to a D7100 I turned the old D80 into an IR camera. That was such a relatively simple task that I didn't write up anything about it. Disassembling the D80 to get to the sensor took maybe 20 minutes. Unfortunately the reason I had upgraded to a new camera is that the D80 was reaching the end of its life, the shutter mechanism kept jamming, and despite a perfect modification I only got a few days of use out of it before the shutter gave up entirely.
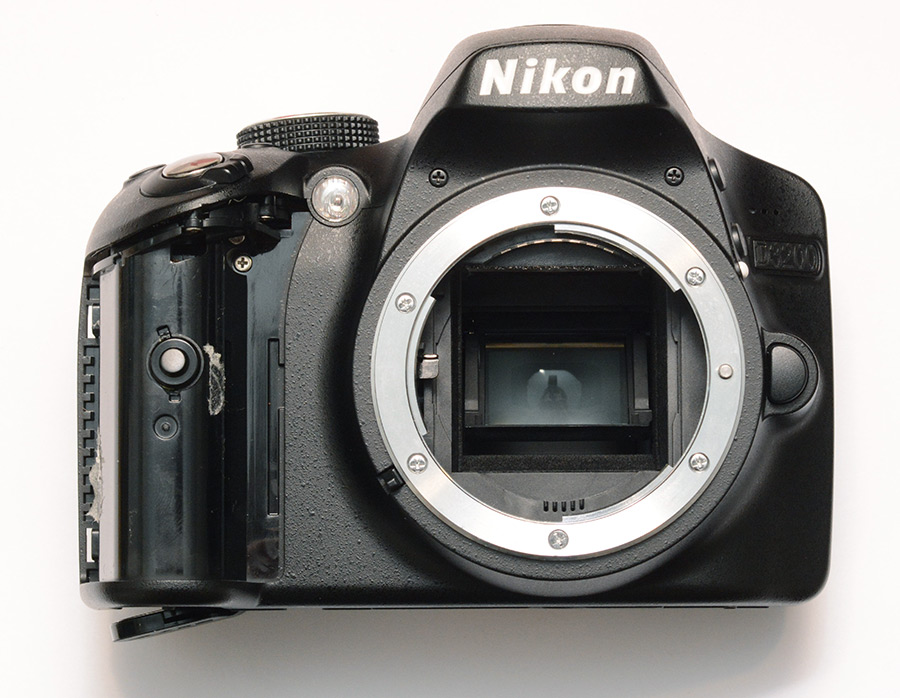
I made a note to buy a second-hand camera, something good but old, that I could sacrifice into a new IR camera. As fate would have it, someone gave me a "spare" Nikon D3200. This is an entry-level DSLR, which had been bought and basically never used. It doesn't support autofocus for older lenses (which makes up most of my collection) but autofocus isn't important (or specifically, never works) for infrared. However it is new enough to have Live-view, which should be a godsend to infrared photography. Getting things in focus is always the challenge when shooting infrared, which normally involves looking at the marks on the lens and doing a lot of guessing. With Live-view we can see the actual infrared light as it appears at the sensor, and even its contrast-detect focusing should work without needing to be calibrated.
Anyway the reason I'm writing this is that I strongly recommend nobody does this to a D3200. I was taken aback by the insides of it. Compared to all the other (read: more expensive) DSLRs I've taken apart, the D3200 is most definitely not repair-friendly. To get to the sensor requires peeling off the rubber, undoing stickers, desoldering wires and pulling the front and top off the camera just to be able to unscrew the sensor mount. During re-assembly I figured it might be worth documenting this to prevent others from facing the same troubles.
Steps
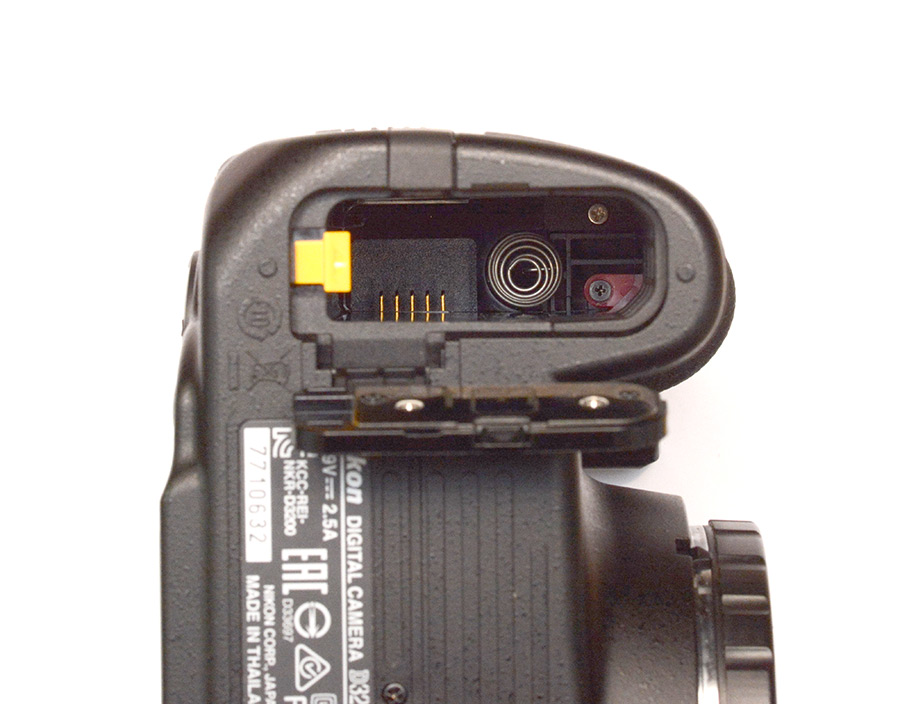
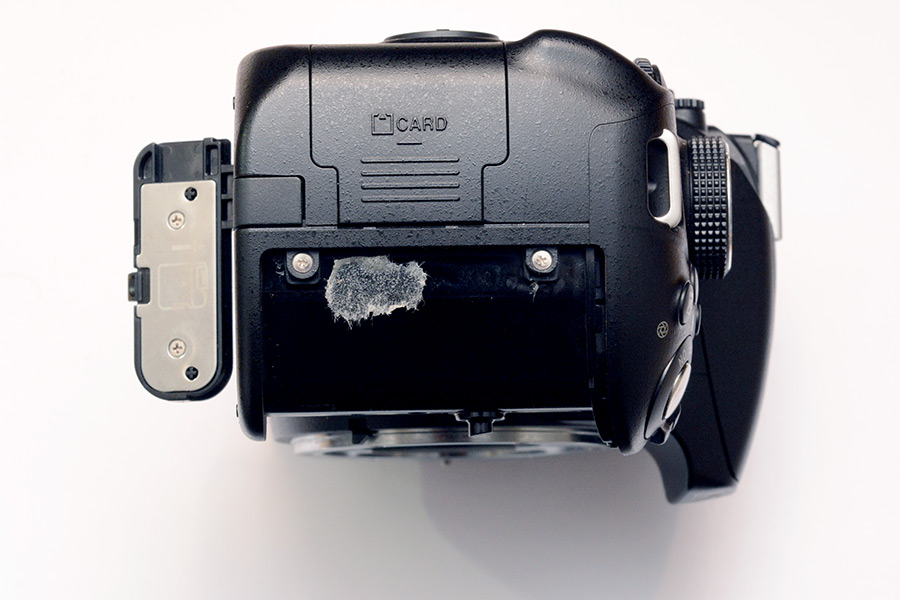
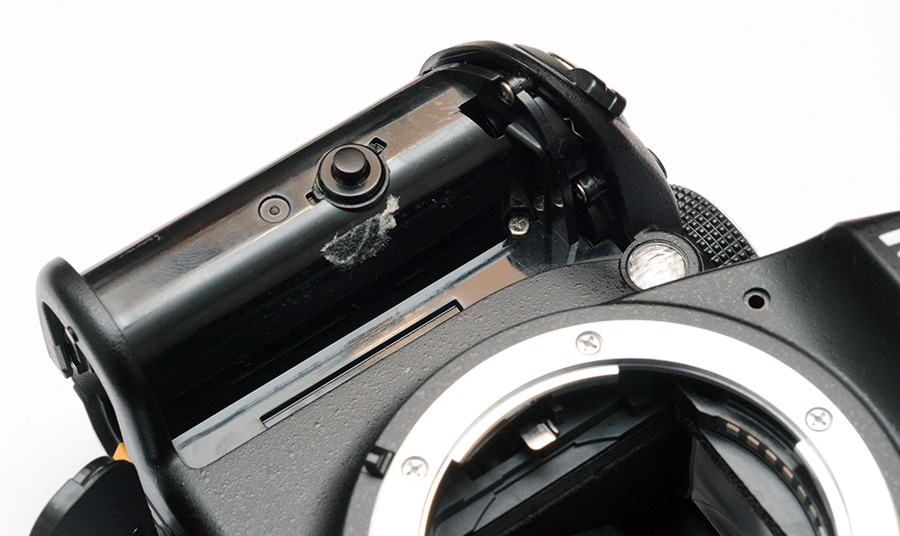
Remove the two screws inside the battery compartment. One of them retains the red plastic that holds the rubber grip in place.
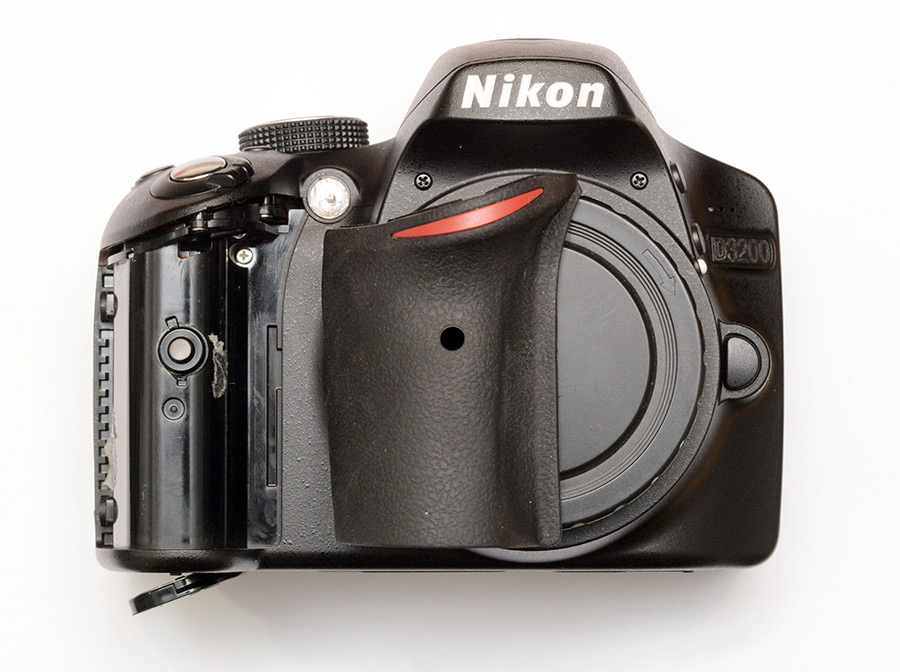
Peel off the rubber grip. Start by levering it up in one corner on the side of the camera. It is held in place with double-sided tape, but also there are tabs in some places, which could get damaged if you yank too hard.
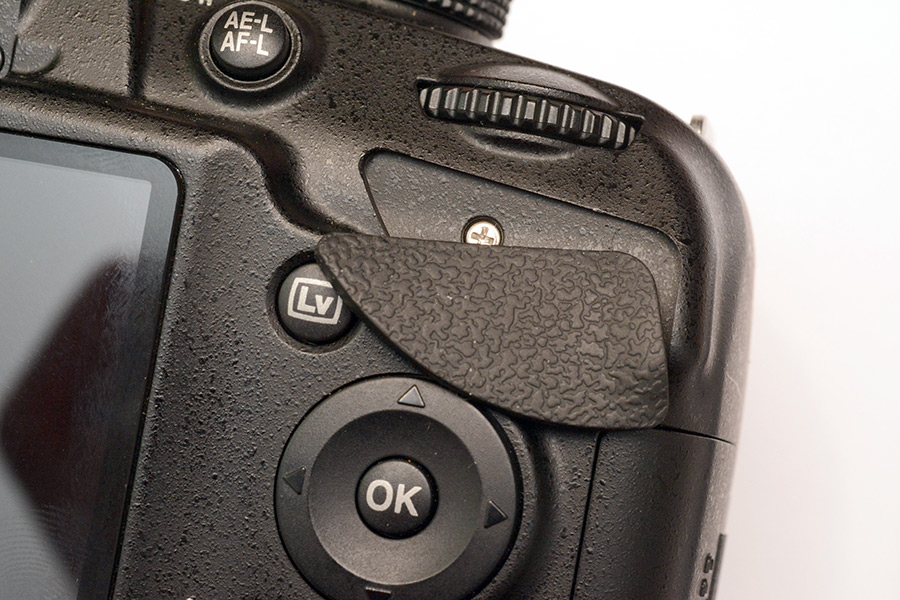
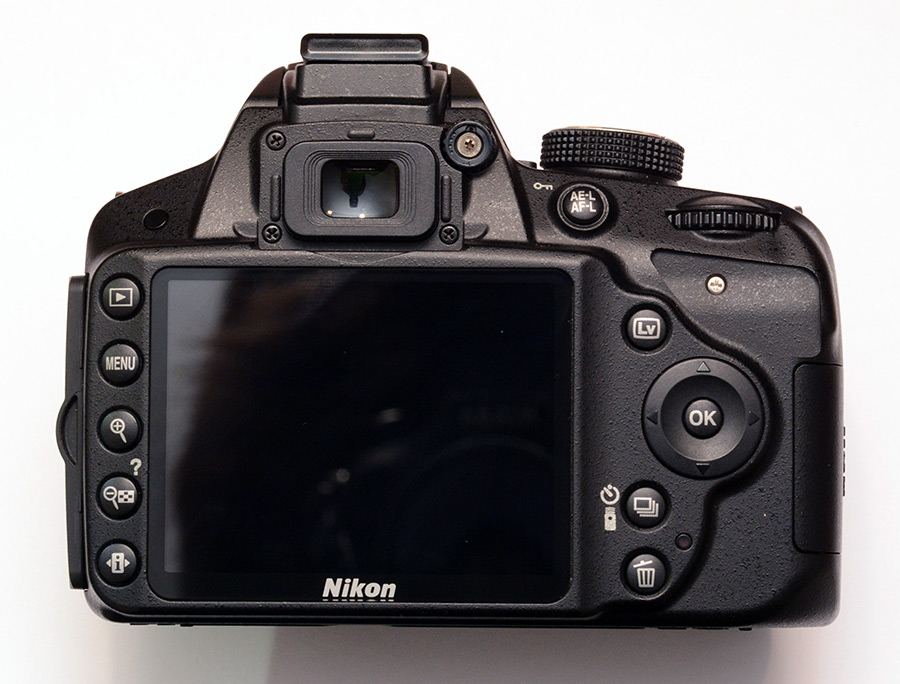
Also remove the small triangle of grip material on the back.
Remove the six screws on the base of the camera.
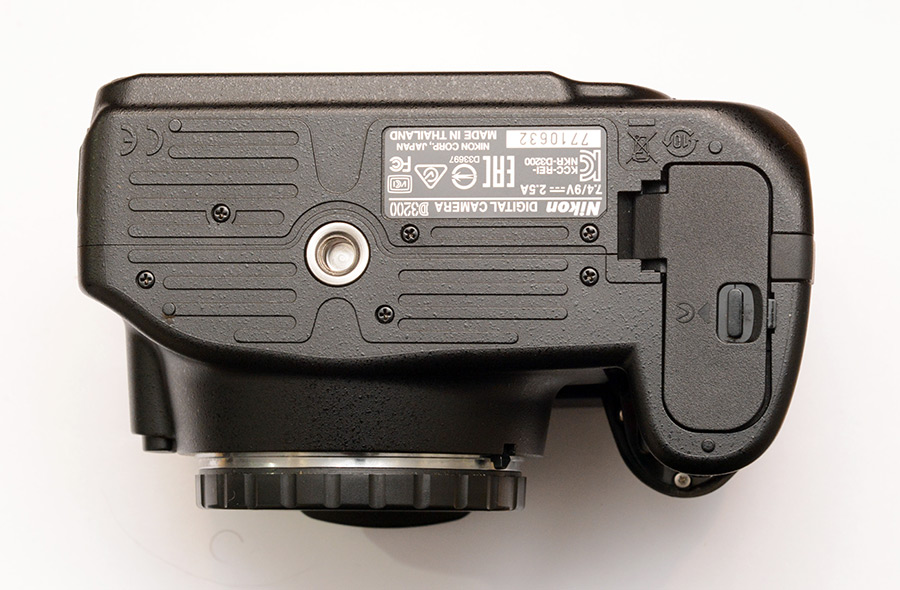
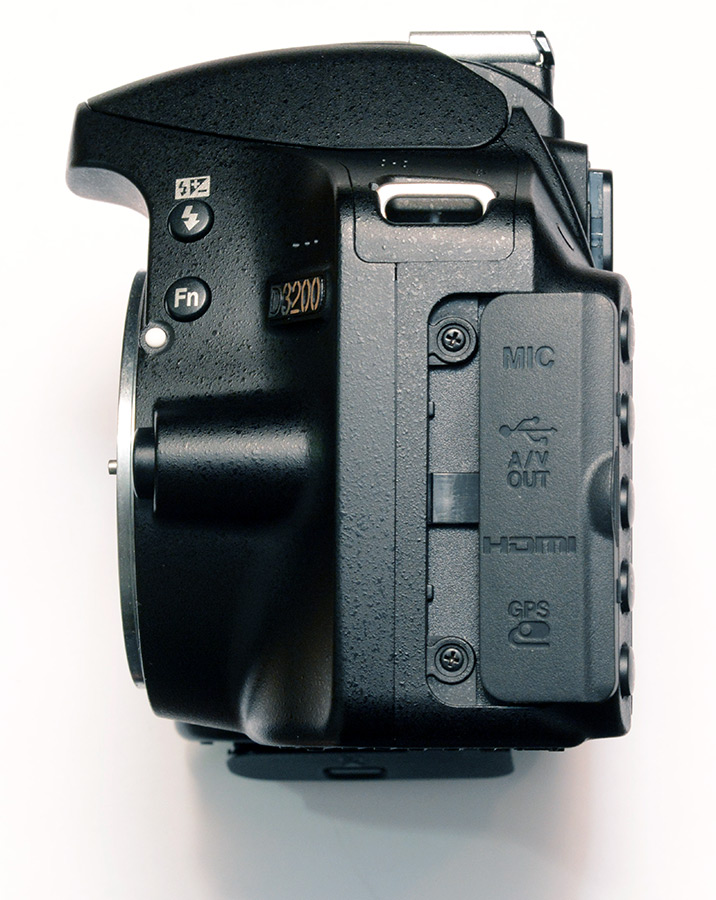
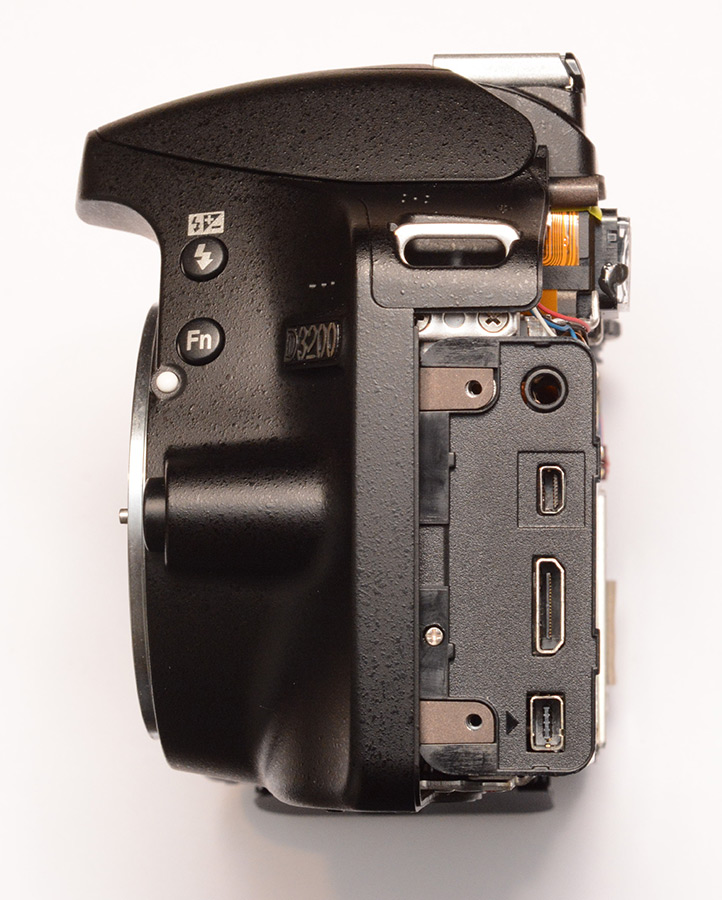
Remove the two screws under the port cover.
Remove the two screws that were revealed under the edge of the rubber grip.
Slide off the rubber eyepiece, carefully lift off the sticker on the diopter adjustment dial. Remove the four screws around the viewfinder and the screw that was under the grip triangle.
It should now be possible to lift off the back of the camera. The display and controls are connected with a large board-to-FPC connector which is disconnected by simply lifting it.
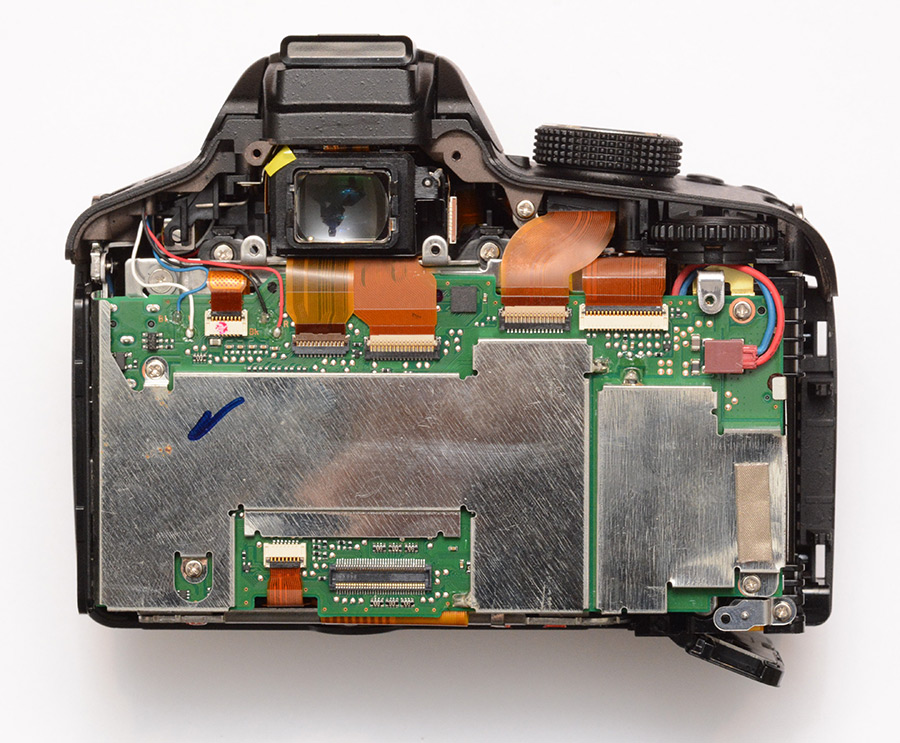
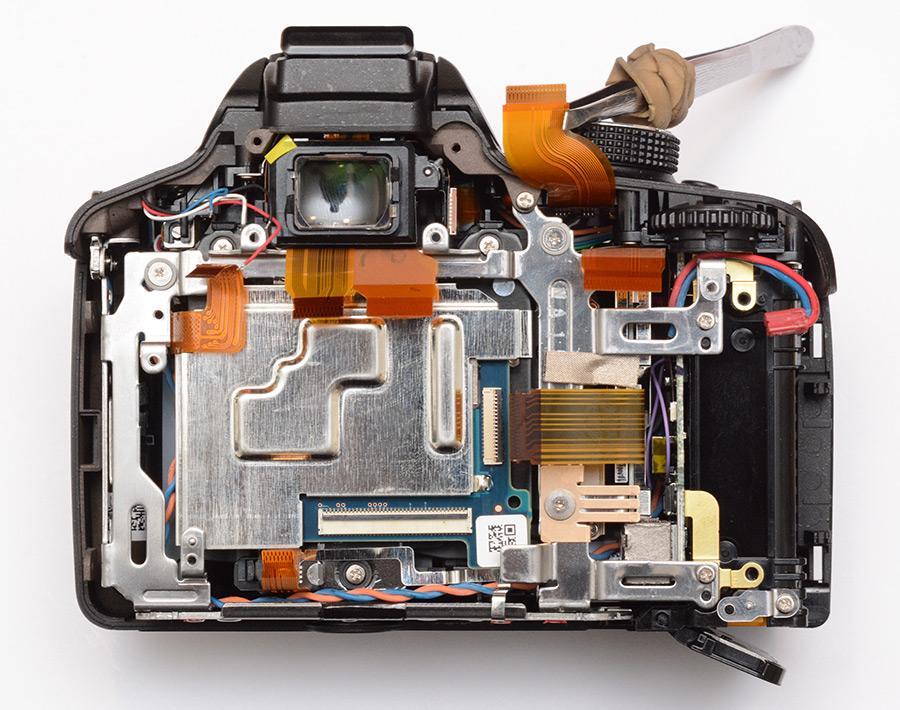
Undo all of the remaining FPC connectors, which are all of the type with a locking hinge that needs to be lifted. Pull out the battery connector on the right. Desolder the four wires at the top left. There are four screws that hold this main board in place – remove them.
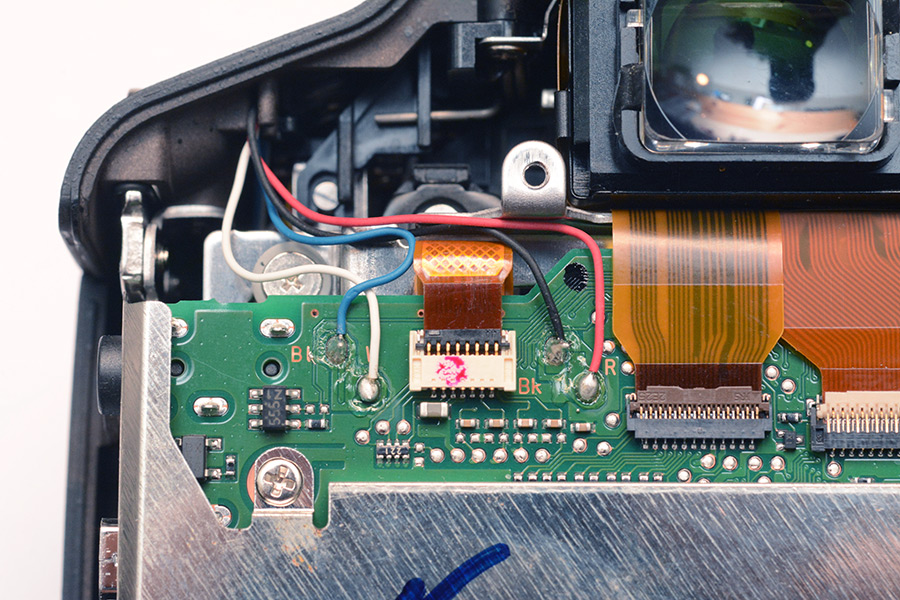
Notice that the wire colours are nicely labelled Bl, W, Bk, R. This picture is of course after I re-attached the wires during reassembly.
There is one more screw to remove before the main board should be removable, inside of the ports area.
It should now be possible to remove the main board, along with the plastic part that surrounds the ports.
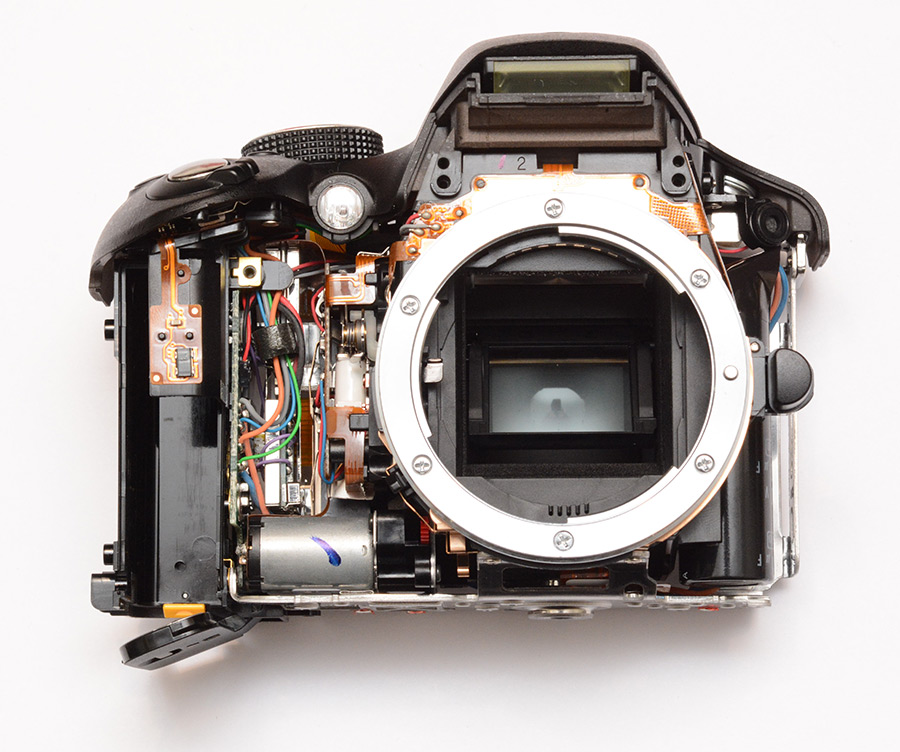
Now for the front cover. Remove the two black screws above the lens mount. The screws on the mount itself do not need to be removed.
Where the grip was removed, there are two more screws to take out. The third screw is partially covered, and does not need to be removed.
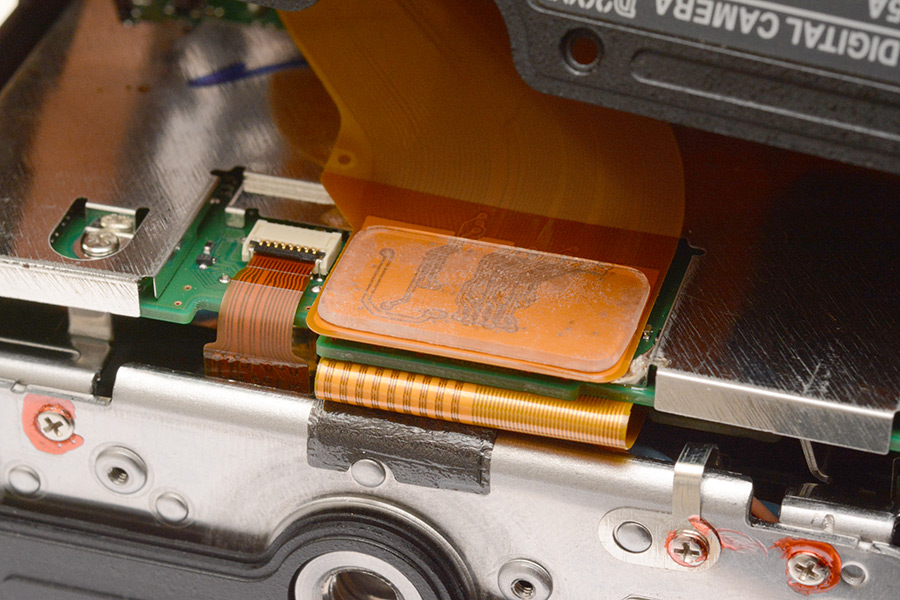
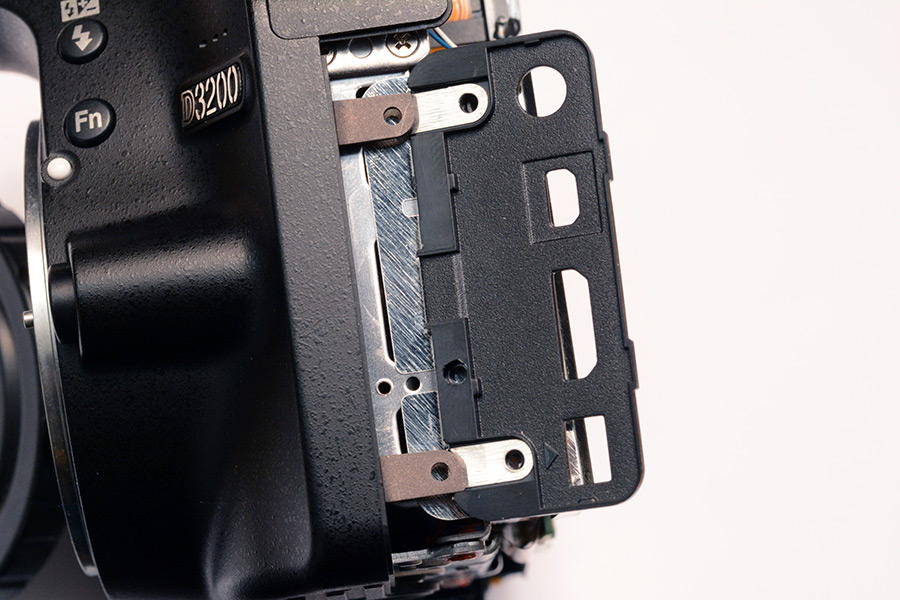
There are a few screws in the frame that need to be taken out before the front will come off. In the photo below I'm using a pair of tweezers and a rubber band ("improv locking tweezers") to lift up one of the flexible boards to show two of the screws that need to come out. The three screws holding the sensor in place can be ignored for the moment, and the screw holding a bronze brush contact in place can probably be ignored, but the rest need to come out. Also undo the remaining FPC connector.
The front can be removed now. You have to lift up the plastic ring around the tripod mount to get it to come off.
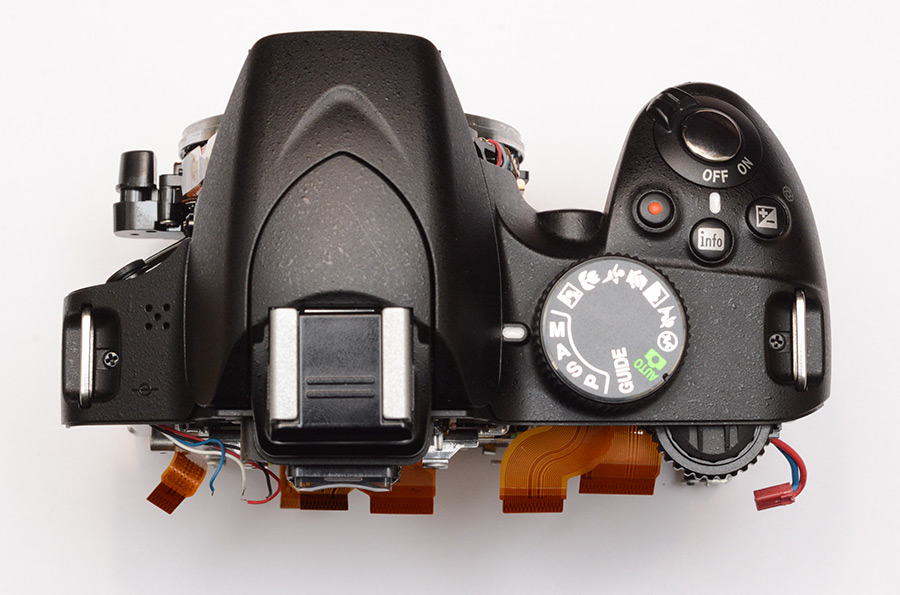
Before the top panel can come off, there are still two screws to remove, hidden away next to the strap lugs.
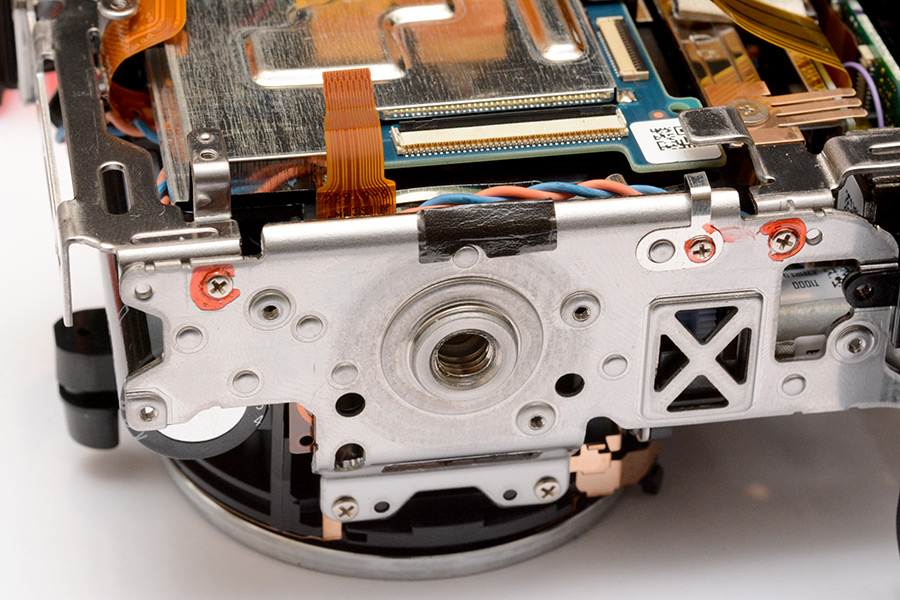
We now need to (groan) remove the three screws along the base which have been loctite'd in place. A sharp twist with the correct size screwdriver should break them free.
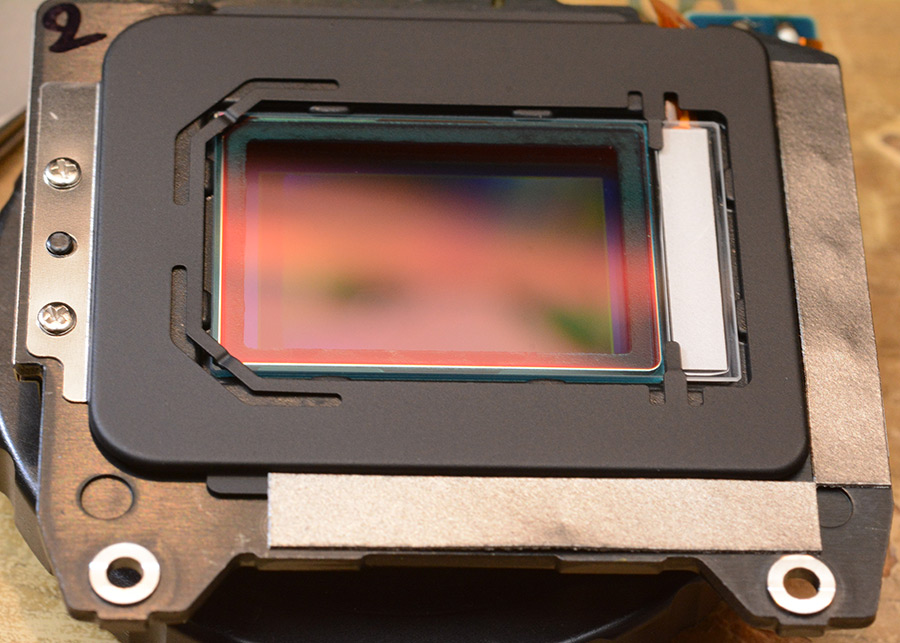
At last the frame should be free to move. It takes some gentle wiggling to ease it out of its place, but eventually we can get it far enough out of the way to access the three screws which secure the sensor in place. There is also a bit of tape which needs to be unpeeled.
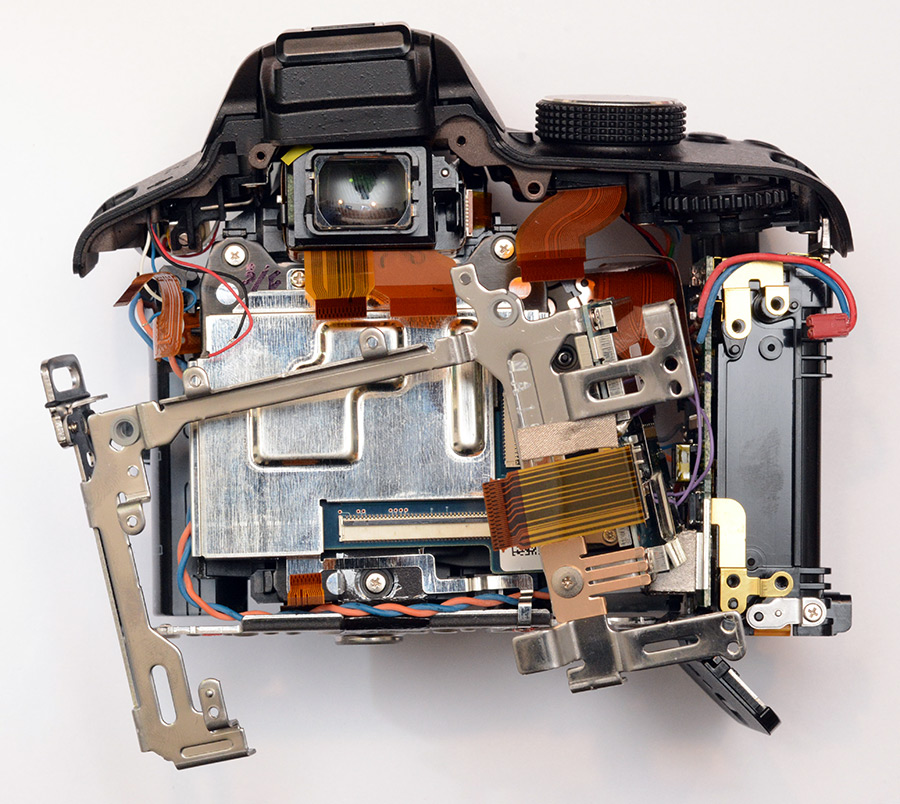
Hoorah!

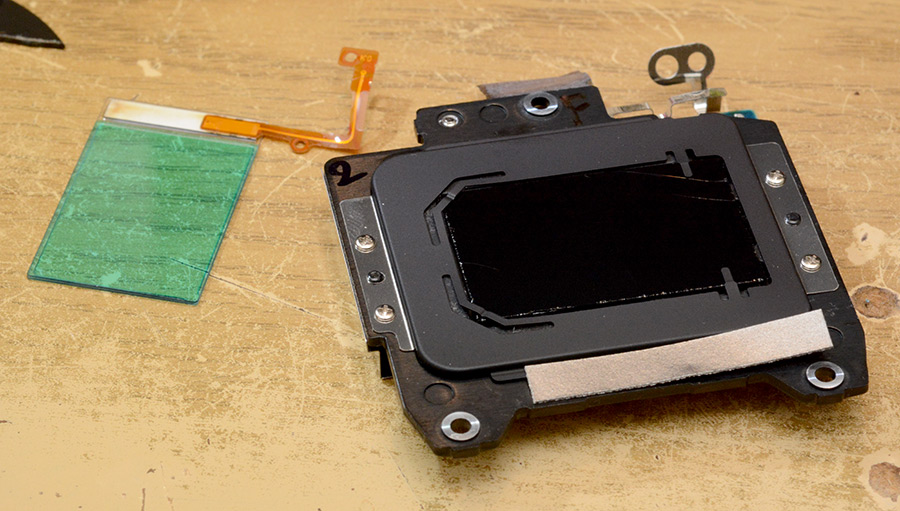
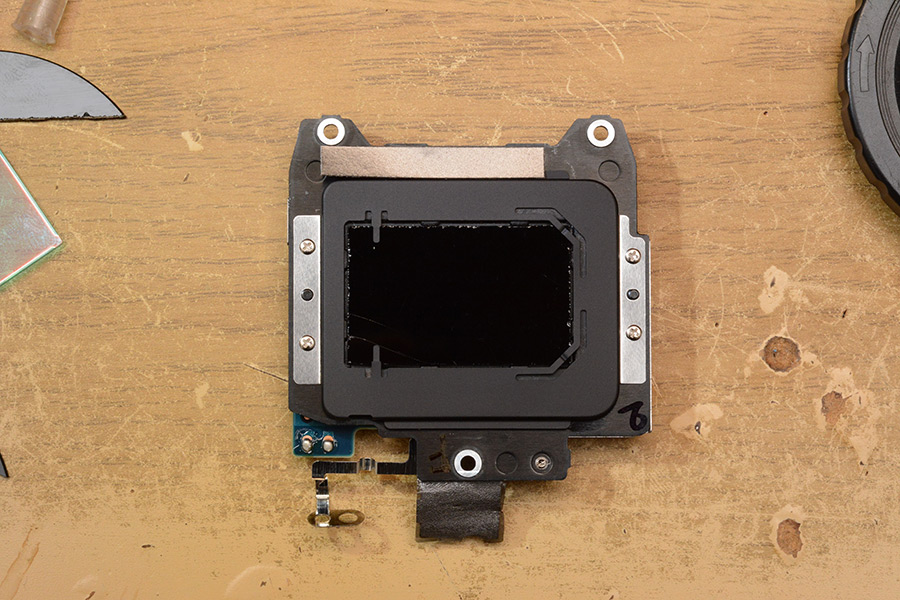
The Nikon D3200, being a modern newfangled camera, has an ultrasonic cleaner on the front window. This will unfortunately be lost as a result of our modification. The combined front window and IR cut filter has a thickness of only 0.6mm, whereas the IR-pass filter I plan on using is about 1mm thick. It looks like it would be a lot of work to separate the ultrasonic element from the rest of it. There are four screws which hold the filter retainer in place, two of which are underneath tape.
Producing a replacement filter
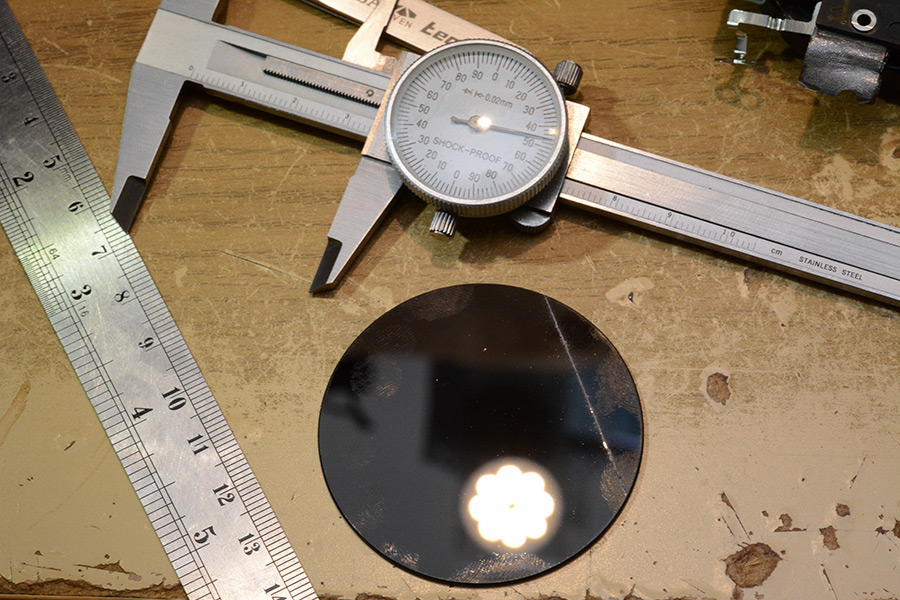
I took an off-the-shelf 720nm filter which I bought a while back to replace the previous filter I had cut up for the same purpose. The 58mm ring, like almost all filters, can be unscrewed from itself either using a lens tool or by wedging a flat-head screwdriver into the tabs on the inner ring, and rotating. This lets us take out the glass disk.The rectangle we want to produce needs to be 21.5mm by 34.5mm. They have been nice enough to make the actual sensor smaller than that, so if we mess up the edges it's not the end of the world. Using a diamond cutting disk works, but doing that freehand is risky, because unless you have very steady hands the glass is likely to crack.
If you've ever watched factories cutting large panels of glass or mirror into exact shapes, they seem to just score it and it snaps perfectly along the line. I've never found it to be quite as easy as they make it look, but it is possible to do it this way. The trick is to score it as deep as you dare. Too deep, and the glass will fracture around the score mark, ruining your edge. Too shallow, and the break won't follow the score mark.
Here goes...
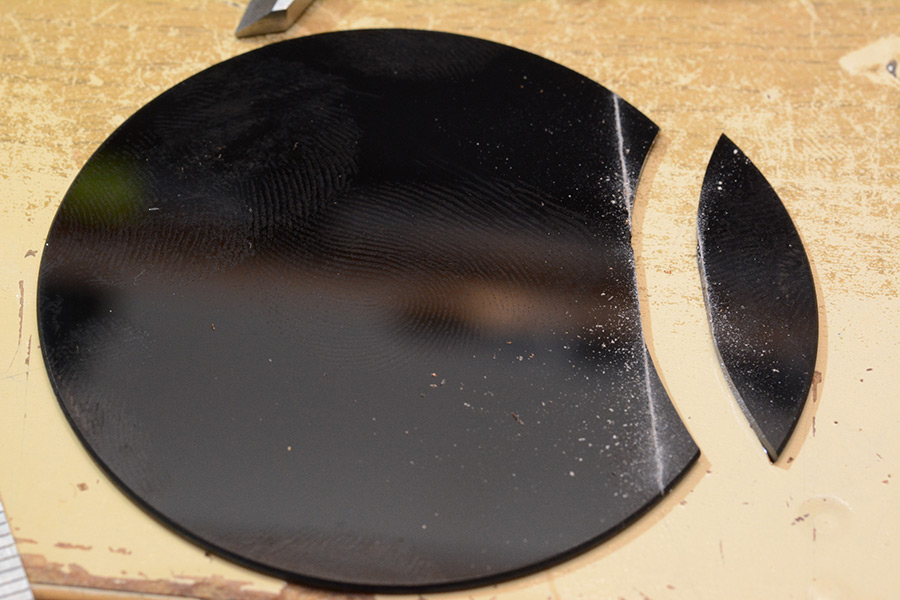
Hmm, well, at least it broke towards the waste part. Consider that a test cut. I deliberately aimed for a rectangle very slightly larger than the target size, and after cutting, we can file down to final dimensions using a diamond disk.
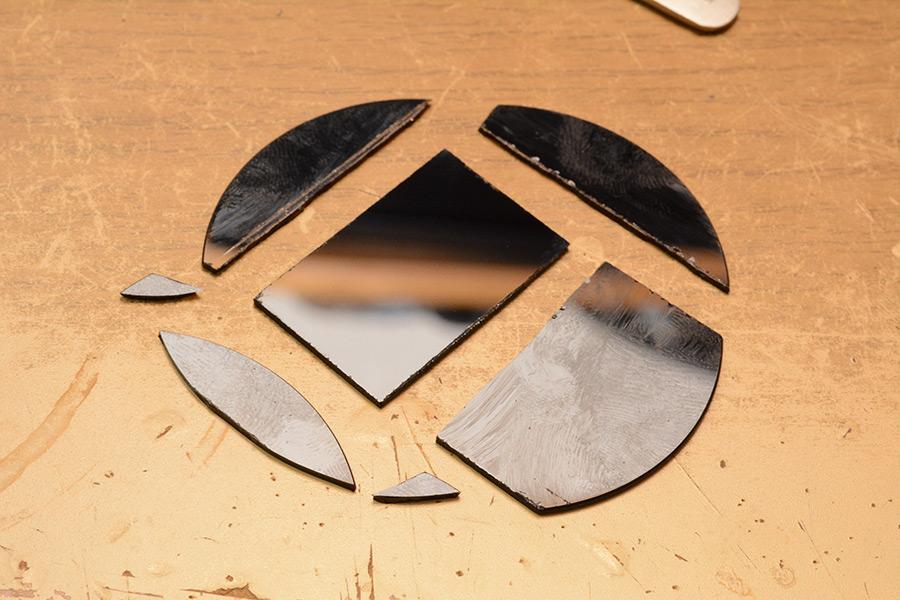
Somehow a couple of minor scratches appeared on my rectangle. We deliberately place these face-up, to get them as far away from the sensor as possible, and also choose the rotation that puts them in the corner where the ultrasonic cleaning element was.
That about sums up the modification. From here, it's just following the pictures in reverse order.
One final point remains, regarding focus calibration. There are adjustment screws inside the mirror box which let us set the focus calibration.
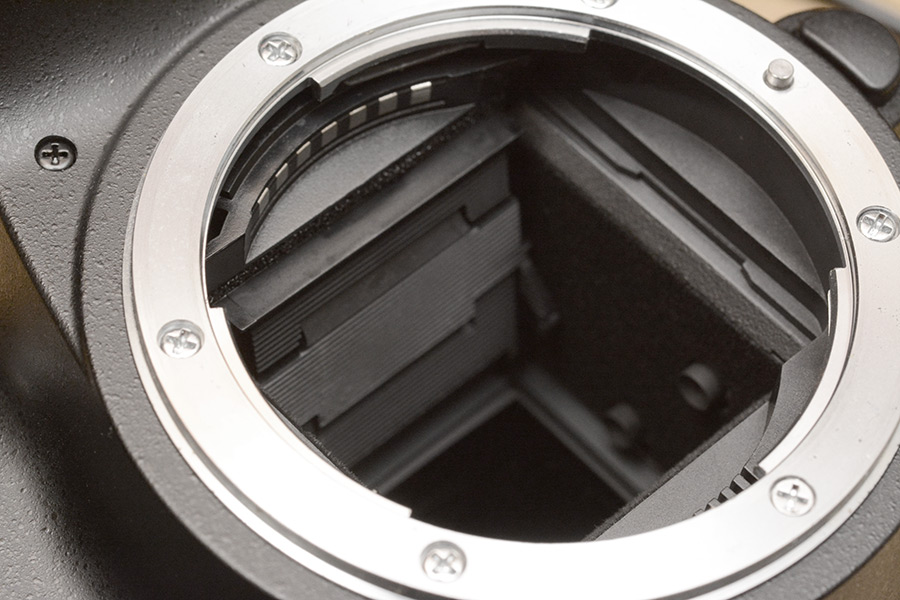
One allen screw sets the calibration between viewfinder and sensor, the other sets the calibration between sensor and autofocus mechanism. The problem is that infrared focus is not just a simple offset that can be applied like this. The offset will depend on the focal length of the lens, and for a zoom lens, the offset could be different at different ends. If we do choose to calibrate like this, the procedure is to essentially just turn it a bit and take pictures to see if it's improved or not. I might try this at some point, maybe to just get one prime lens with which autofocus will work, but really I expect the vast majority of focusing will take place using Live-view.
The D3200 is disappointingly limited in terms of white balance adjustment, you cannot enter a custom colour temperature and it only has one preset slot, which it seems to be particularly stubborn about when it comes to making a measurement. Perhaps I have been spoiled by the features of higher-end cameras. I have the rather controversial opinion that if you have to correct things in post, you are not using the camera correctly. Still, the weird false colours you see in infrared photos are just a result of the white balance algorithm going nuts with the data it's been given.
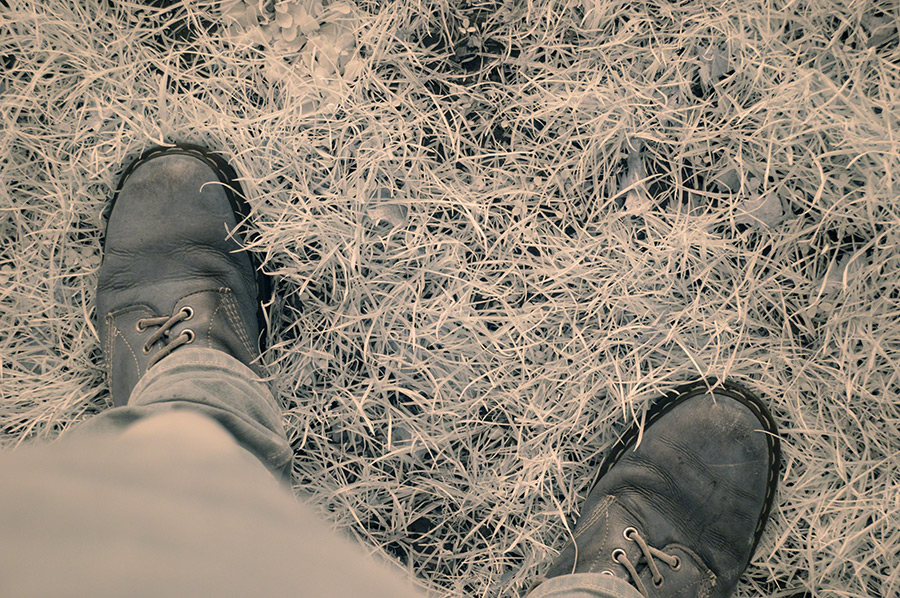
I will probably play around with the settings a bit more, but just to test if it's working I went outside and took the traditional picture of my feet, confirming that in infrared, grass does indeed look white.