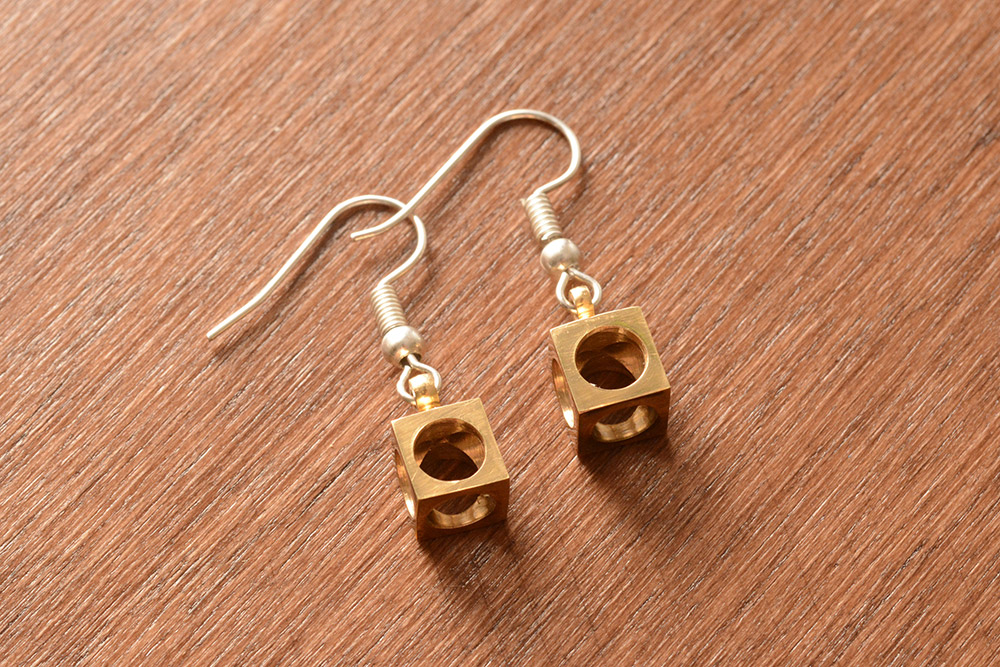
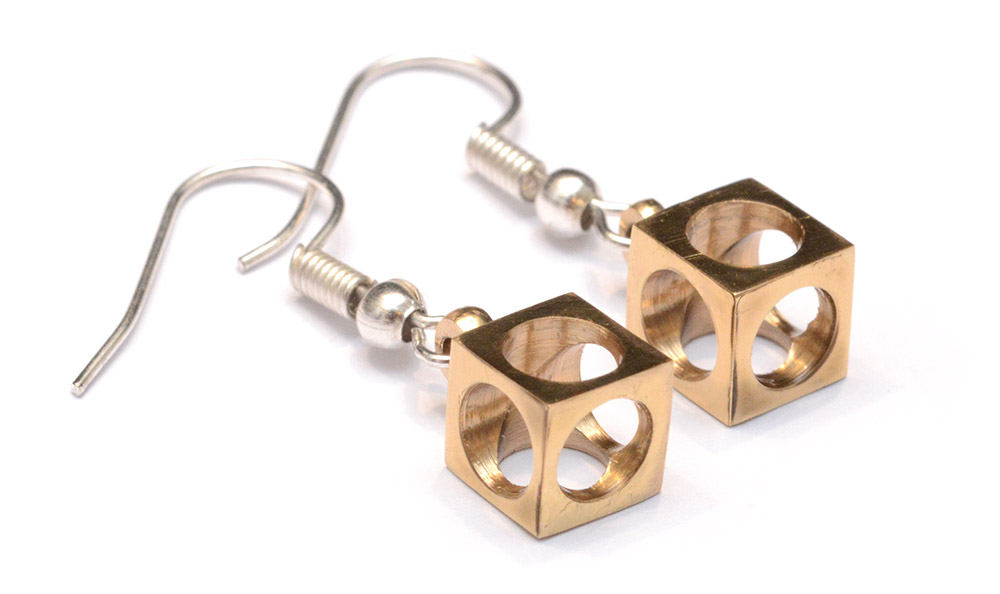
Cube Earrings
19 Dec 2019Progress: Completed
I am working on a few projects which are taking an awfully long time. Particularly in metalworking, trying to film a video of the process seems to tripple the amount of time everything takes. So I find it a healthy activity to think up shorter, simpler projects to fill the void.
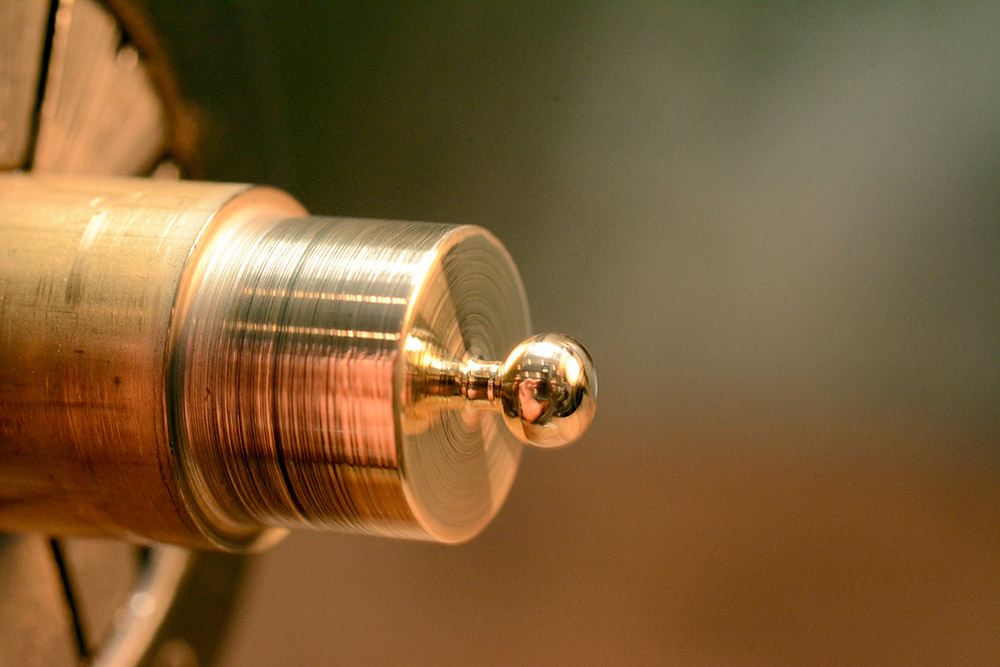
To produce these hollow cube earrings I began with some round brass stock. I turned a ball (or maybe an ovaloid) onto the end using a needle file, the diameter is about 3.5mm.

This was then polished to a mirror finish.
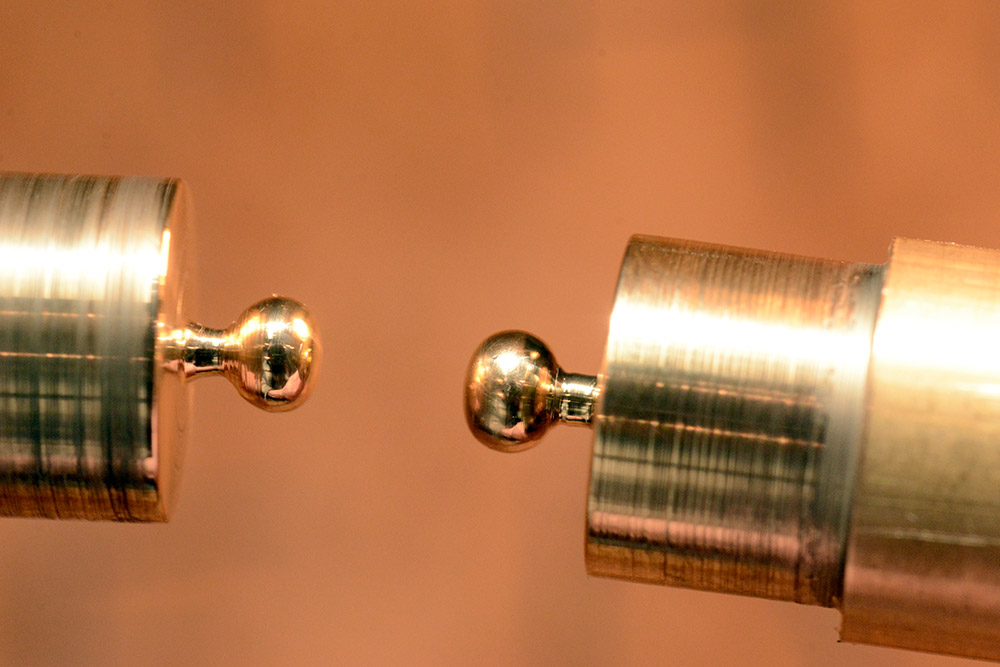
Next we pull it out of the collet and produce another one. I thought I'd managed to make them pretty similar, but under the scrutinizing eye of the macro lens you can see they're embarrassingly uneven. Still, it adds to the handmade look I suppose.
Next we transfer the collet to the milling machine. The square collet-holder is held in the small vice with the rim of the nut acting as a depth stop.
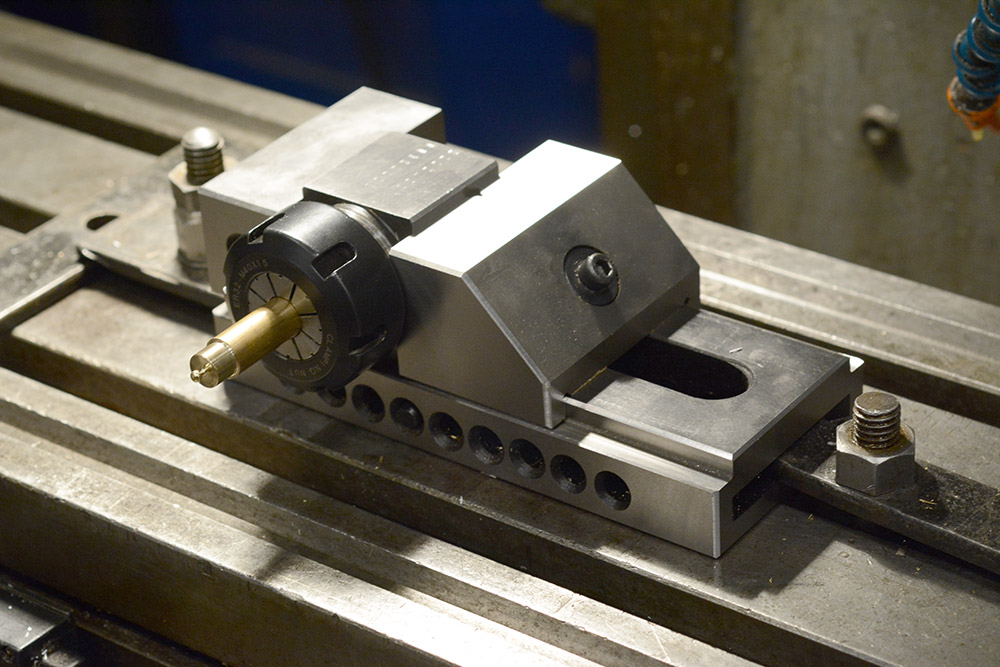
The outer turned section is there to give us a surface to edge-find. I used the larger diameter of this simple edge-finder, the diameters don't matter as we're just finding each side and zeroing on the centre between them.
We don't want any more stick-out than is necessary. As is shown in the picture below, the clearance between the two collet nuts is about 1mm. The real danger here is that I turn one of the handles in the wrong direction, it still happens occasionally (I find myself drifting into the frame-of-reference of the cutting tool, rather than the bed) so it's important to remain focussed.
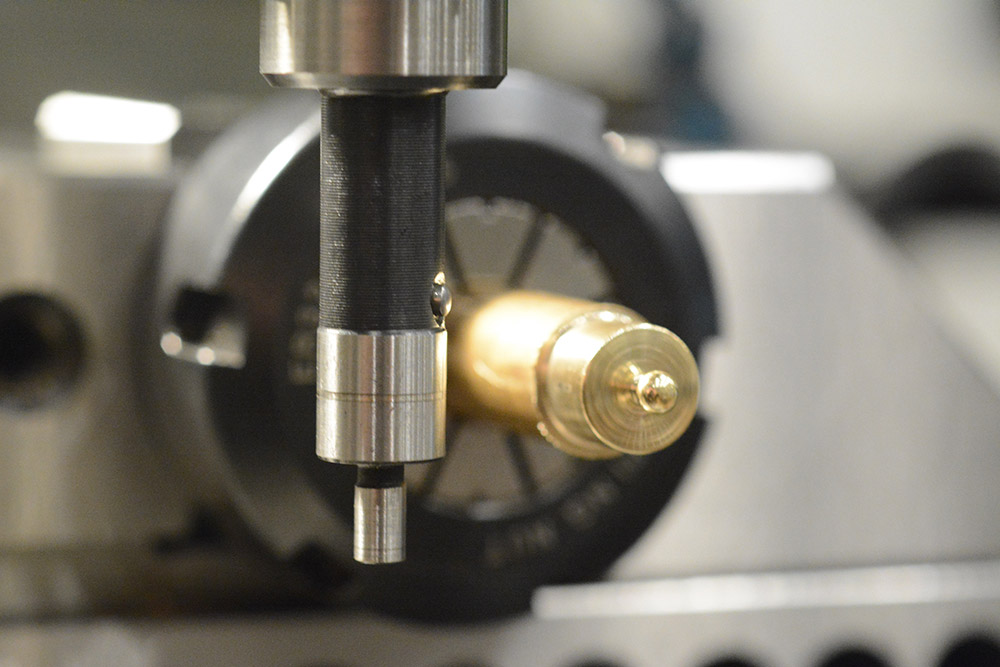
The edges were squared up, rotating the collet holder in the vice, and then a flat spot was added to each side of the ball.
To drill a tiny hole I've found it best to mount the drillbit directly in a collet, not only is it truer than a drill chuck, but it lets us retract the drill much further than we would be able to otherwise. With a collet it's fine to hold a drillbit on the flutes, so we can have it sticking out only a fraction more than it needs to be, giving us much more rigidity. As a result we generally don't need to spot-drill or centre-punch, which is handy.
Another reason to avoid switching to a drill chuck is the Z-movement needed. The chuck is big enough that we have to drop the knee substantially. If the head is even slightly out of tram, this can cause us to lose alignment.
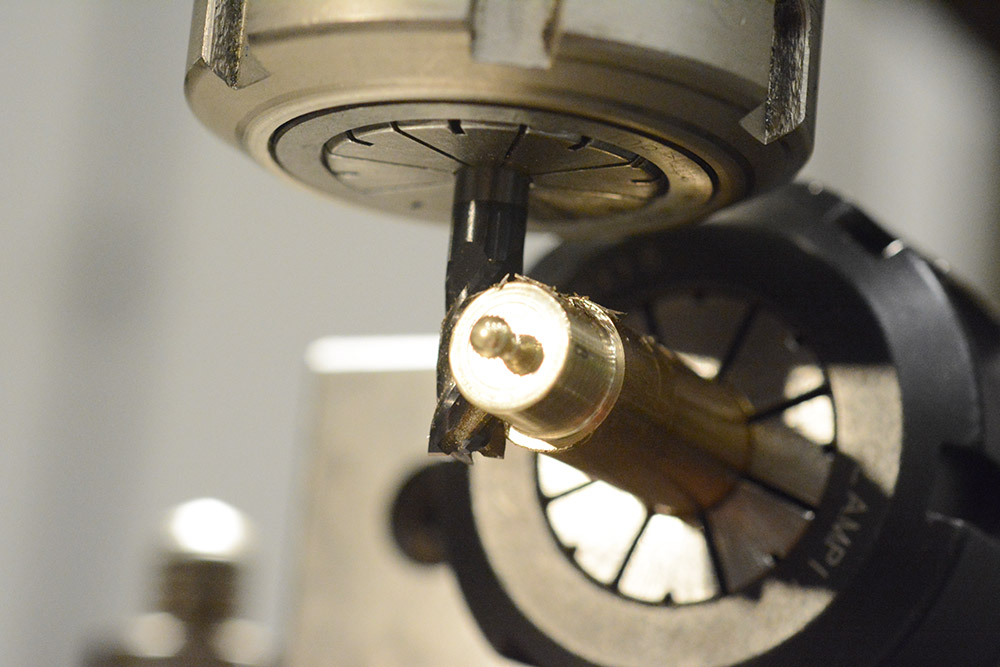
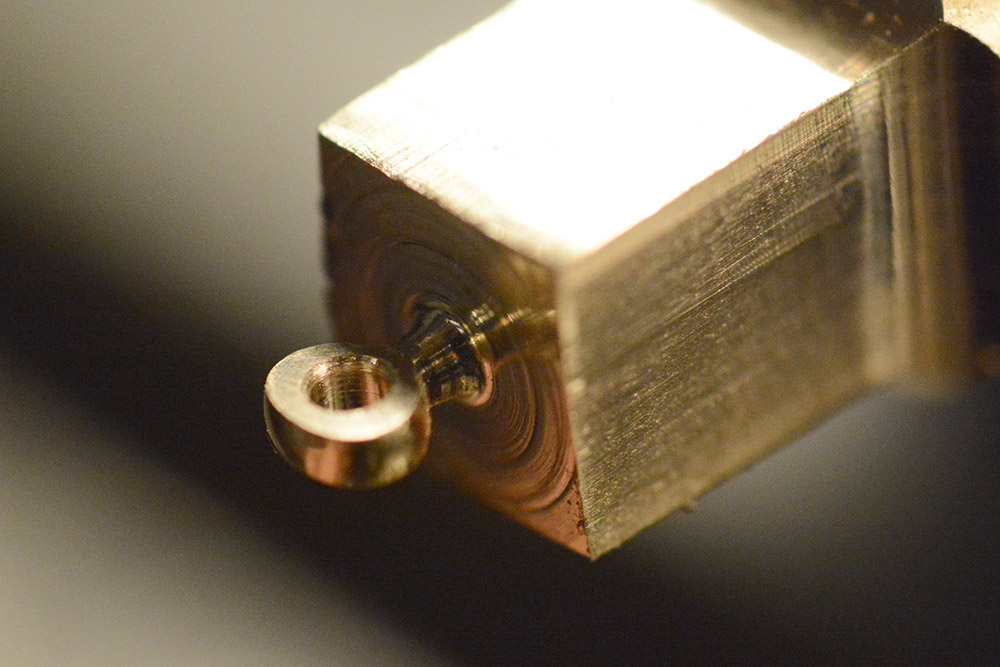
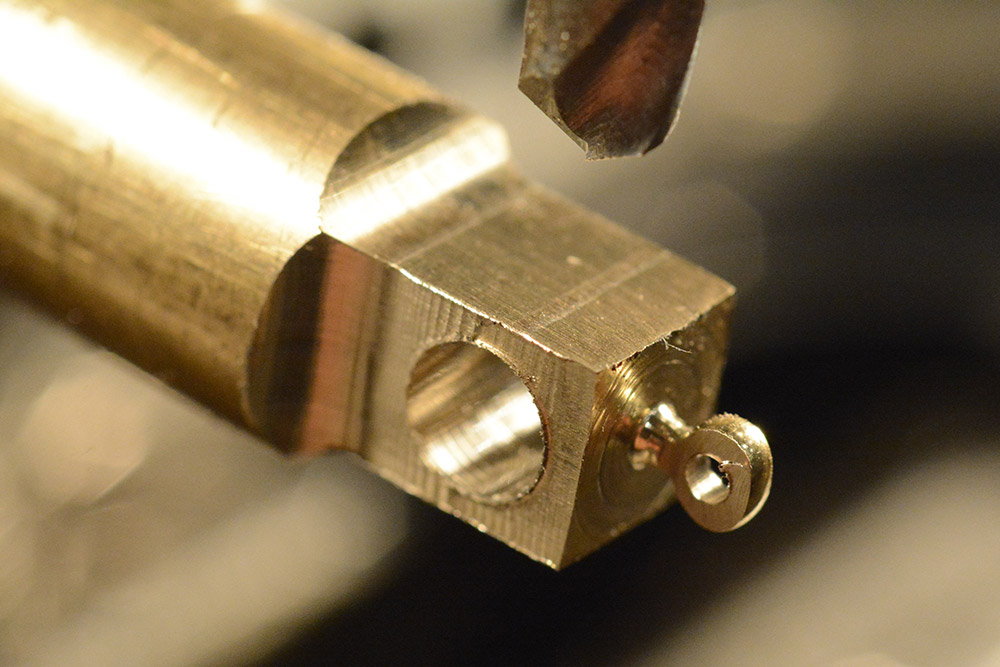
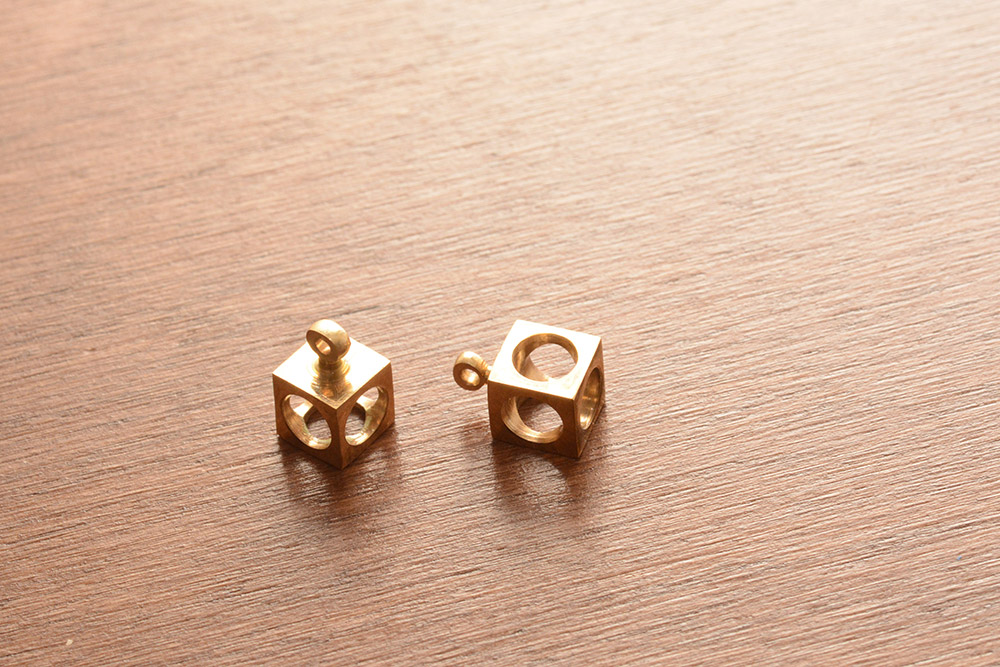
The cube is 7mm on a side; each face now gets a 5mm hole in it.
The part now undergoes some extremely gentle deburring with a razor blade. We don't want to lose those crisp edges though.
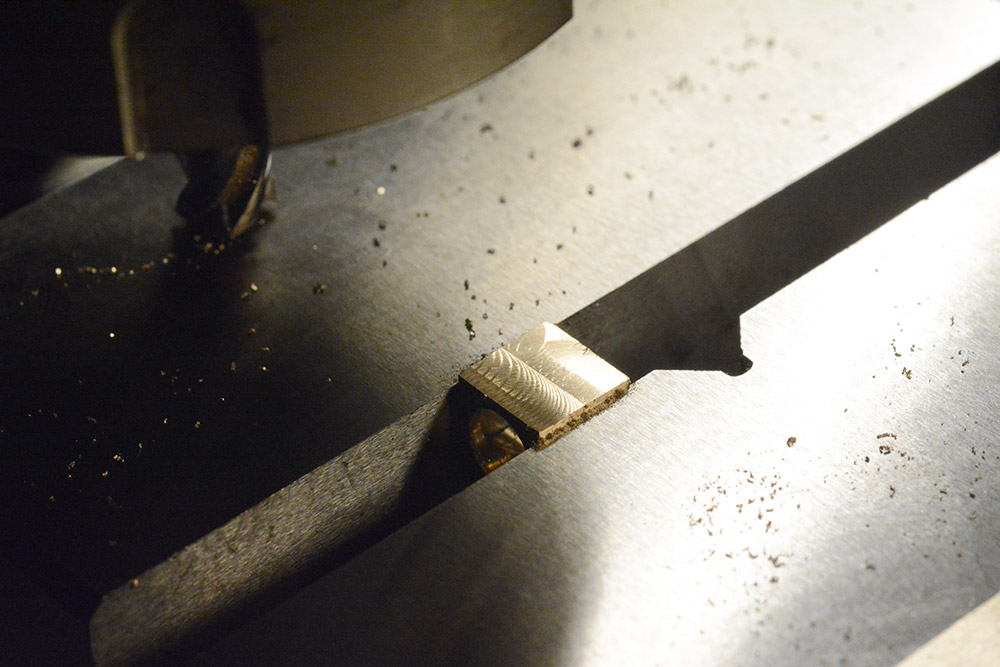
The process is then repeated for the other one. Before parting them off, I took this moment to polish out the tool marks.
Both pieces were then mounted back in the lathe and parted off with a bit of headroom.

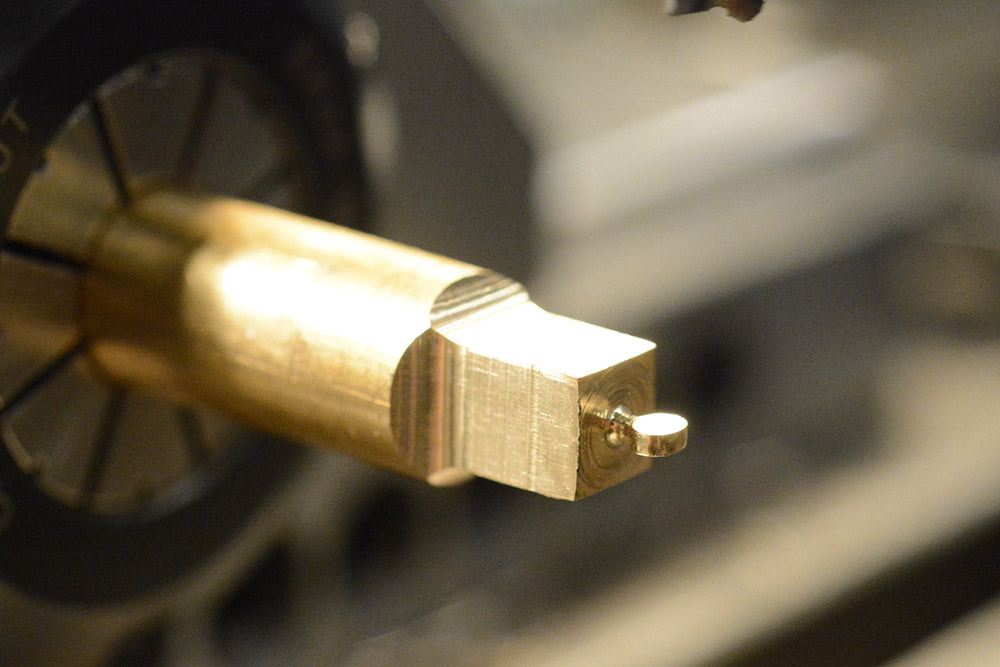
I don't have any parallels small enough, so to mount the parts squarely in the vice I put a 5mm drill rod through it and visually got it parallel to the jaw. From here we just mill down to the line (not that I scribed one) and drill the last hole.
I was cautious not to crush the little thing, but while drilling the first one it jumped out of the vice. A scary moment but no damage done. To be fair, this was a sharp drill bit on brass so I was asking for trouble. For the next one I tightened it down fully and it was fine.
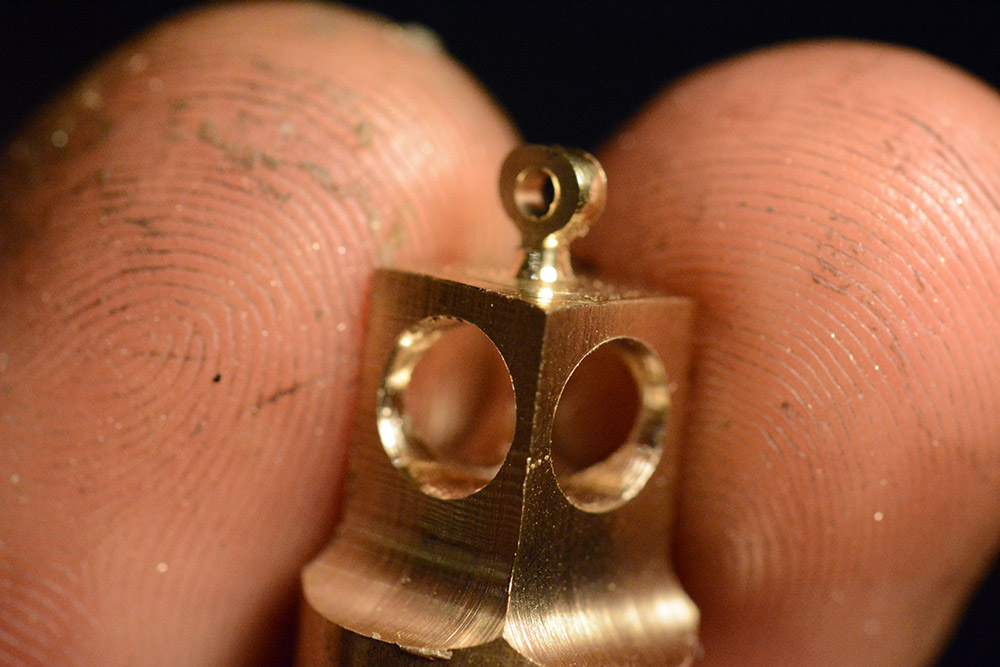
The finished parts were then given a final polish, trying to get that mirror finish on all sides. Even a fingerprint sullies the surface.

Brass tarnishes quickly. I decided to give each earring a coat of varnish.
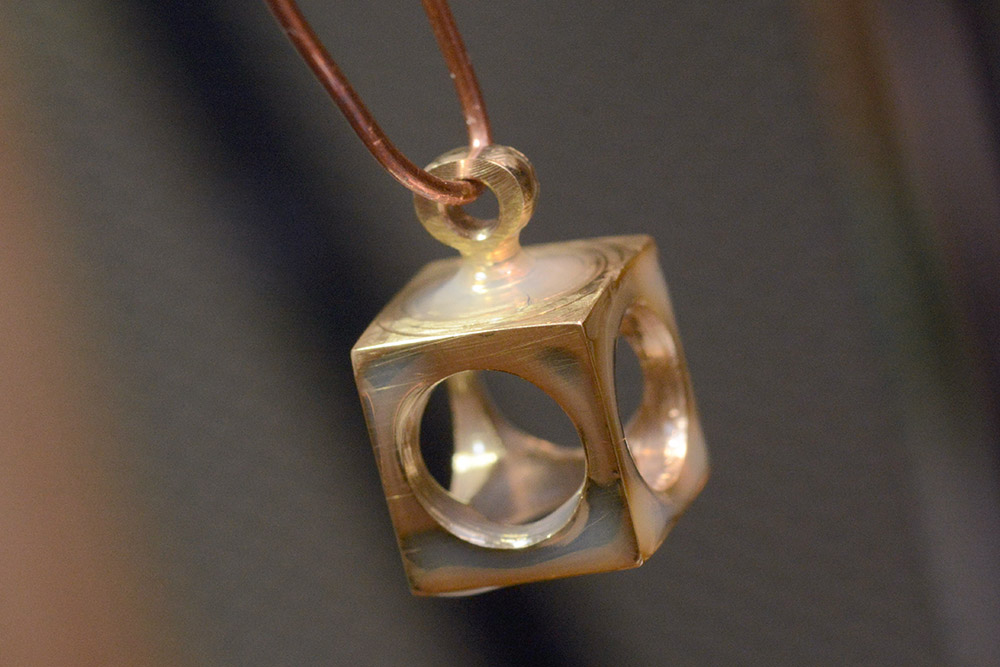
Surface tension appears to be our enemy here. After drying it improves a bit but honestly I'm not that impressed with the final result, it's lost a little bit of that perfect-cube-ness. If I was under less time pressure I would probably re-do it, I mean, gold-plating them would probably make more sense. But – not bad for an evening's work.
As usual I used some off-the-shelf ear hooks. Perhaps I should start making these bits too?
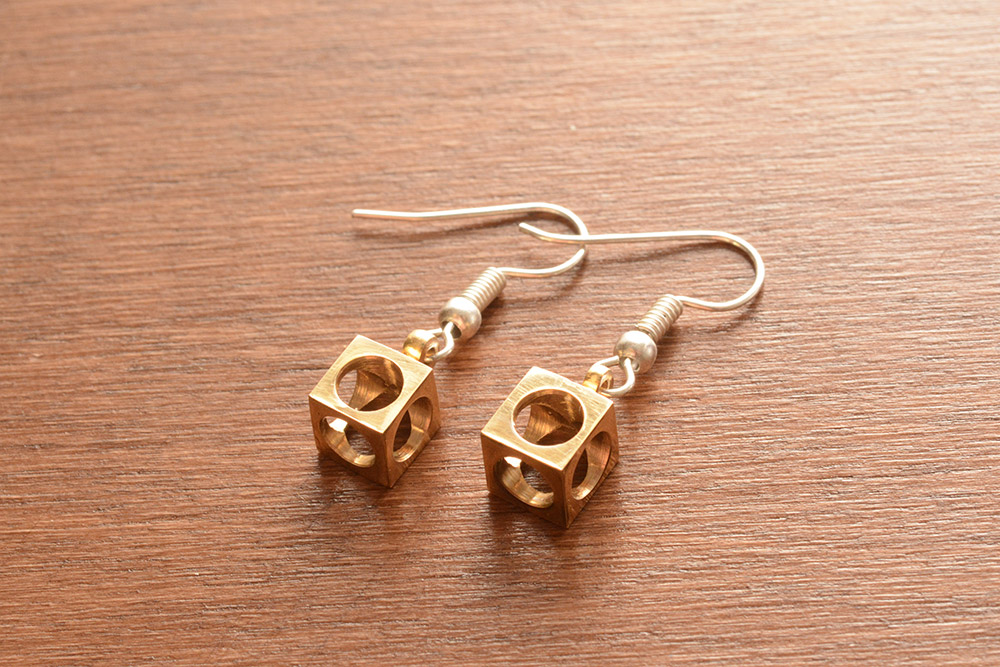
Cubes!