
Games Console Enclosure
22 Dec 2018Progress: Complete
* * *
Some thought needed to go into this. It really should look like a retro device, if that's possible. A tribute to 70s computers. A beige moulded plastic case wouldn't really work though. The circuit is small enough to fit into a cassette tape box, but I'm not sure how great that'd look. I finally settled on a simple project box. Not an ordinary project box, but a die-cast aluminium project box. This, combined with our all-powerful embossing label maker, should get the job done.
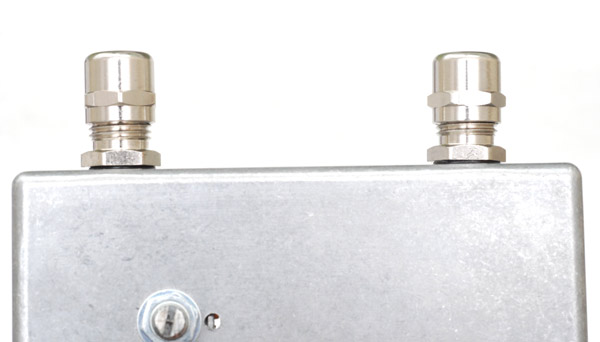
Sticking connectors to it is straight forward, mostly, but the controller ports, made from extension cables, need to be attached nicely. Cable glands are the solution. But since we're going all out on this, I went for the executive option: metal cable glands. IP67 too. Sign of quality.
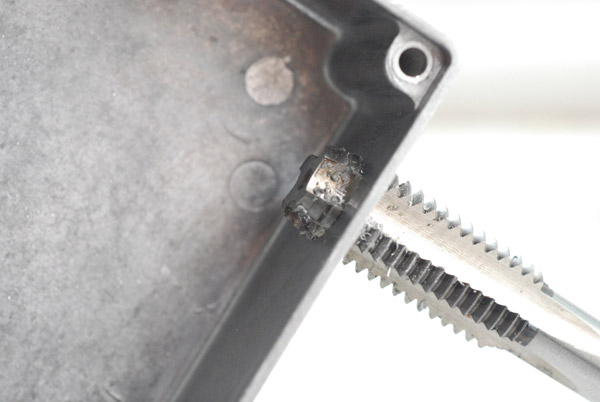
These cable glands had an M12 0.5 pitch thread, and did not come with locknuts. I only have an M12 0.75 pitch tap, but they're pretty similar, right? I don't think I've ever used a tap this big. I think there was no harm in trying it on the thin walls of the project box.
You may laugh, but it actually held much better than I expected.
Best to be on the safe side, though. I sawed out some squares of normal 6061 aluminium sheet and tapped holes in them to use as nuts.
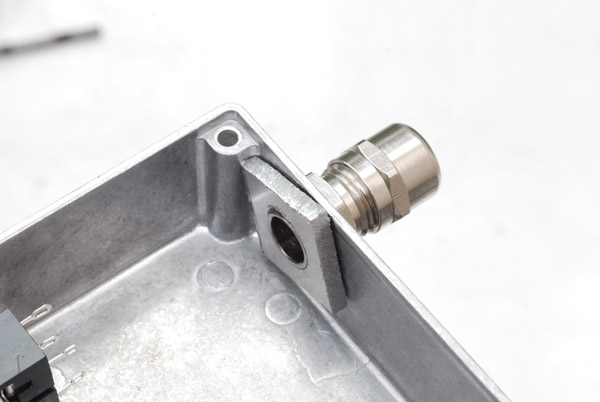
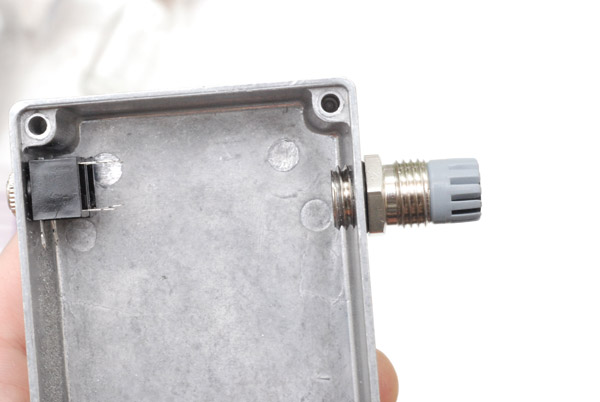
There's an enormous difference in the alloys, the cast aluminium is so much softer. The second nut ended up less wonky.
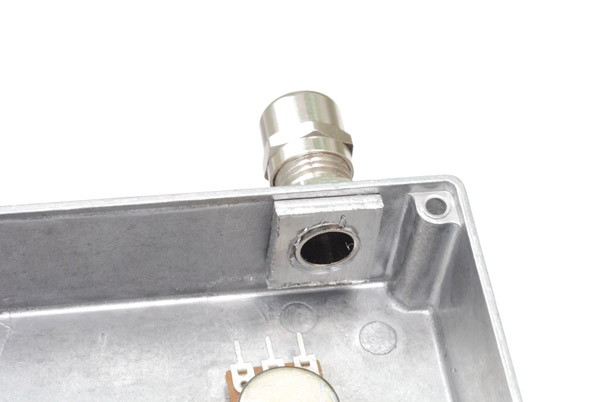
Marvellous. They are a teeny bit cockeyed but I can live with it. They will be slightly shorter when they're tightened down.
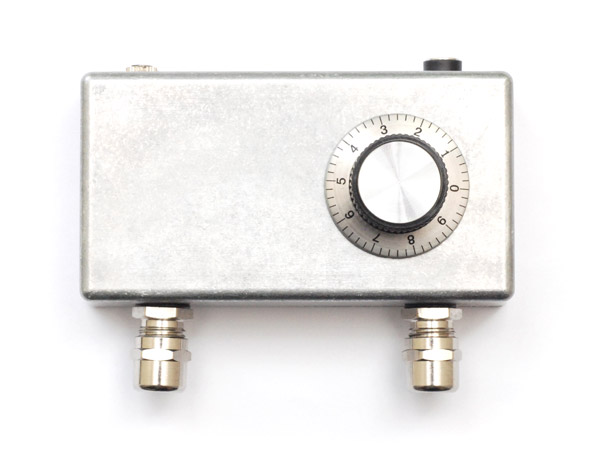
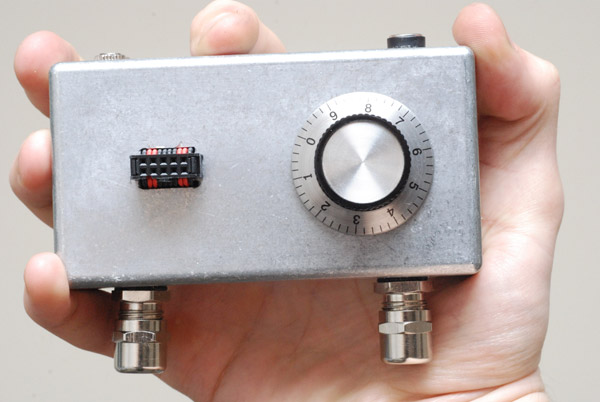
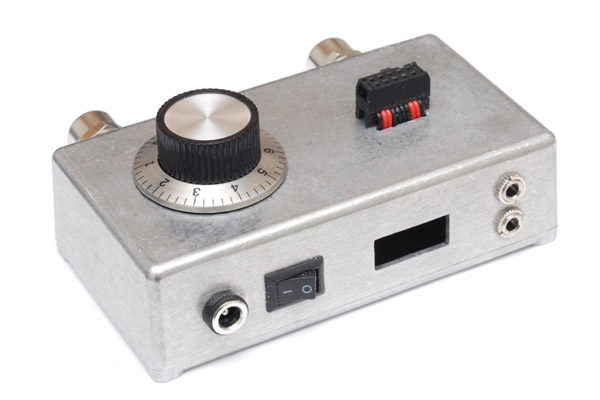
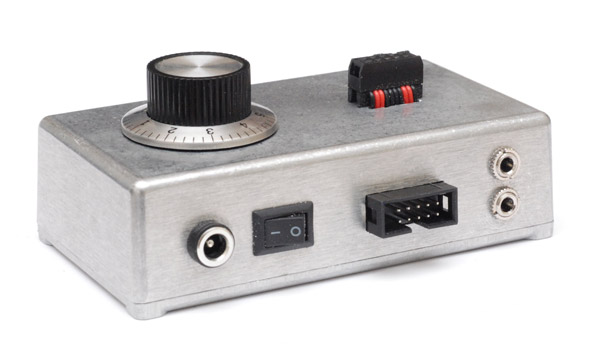
You'll notice the potentiometer, that's for the volume knob, and there's the 3.5mm jacks for audio and video, and the barrel jack for power. The volume pot needs to be swish. Is this swish enough?
Now things get interesting. A mockup for where the cartridge'll go...
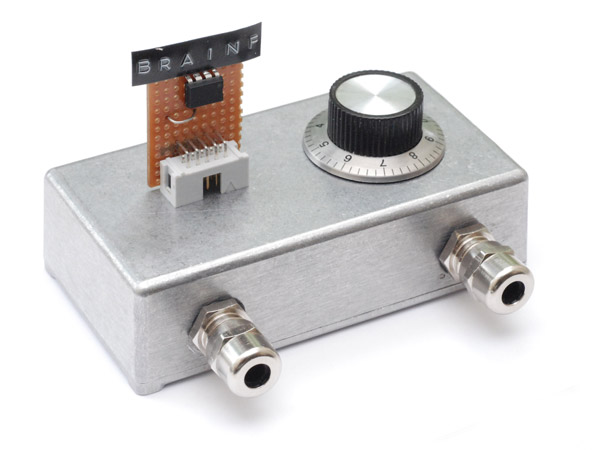
Centred like that, or further back? Am I going to add a power-on light and a reset button? And if so, is that where I'd want to put them, given how far they'll stick into the case?
I think centred like that. But the connector is not going to be easy, it's an IDC header pin connector thingy. And yes, you can see from the cart that I got the gender the wrong way around for "insert cart" to make any sense. But those were the connectors I had at the time and I don't feel like rebuilding and reprogramming every cart.
A ribbon cable could be threaded between two slots and the connector clamped on to it. Time to make some slots then.
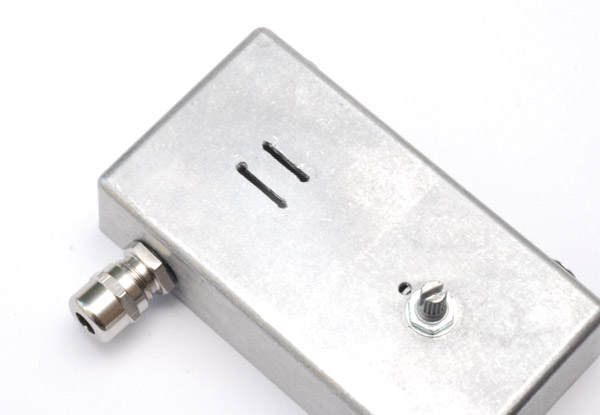
My minidrill skills were a little rusty I'll admit. That lower slot is wider than it needs to be. Hopefully won't be too noticeable. The only ribbon cable I had was that dull grey stuff, so why not use ordinary wires bunched together?
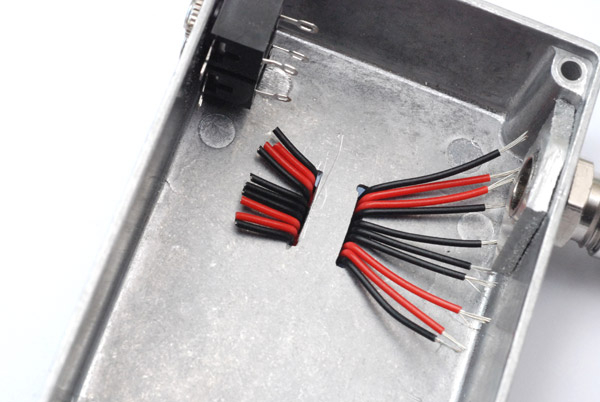
I hope you like my aesthetic arrangement of colours. Yes, it was an inconvenient time to run out of black in that gauge.
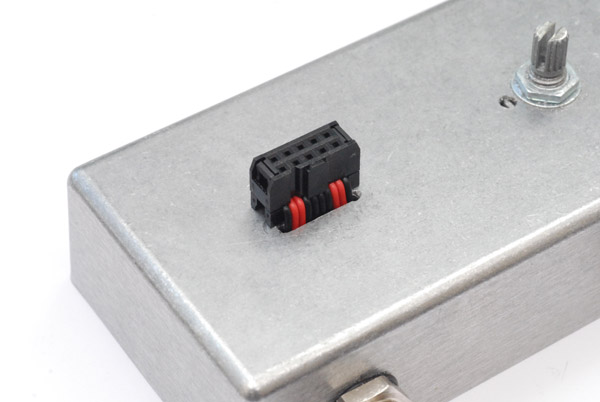
An acceptable result, I think. The connector held rock solid even before I glued it.
It is starting to ooze an industrial feeling, it reminds me of plumbing. Perhaps I should have run with the steampunk groove and made some of it out of brass. Perhaps not.
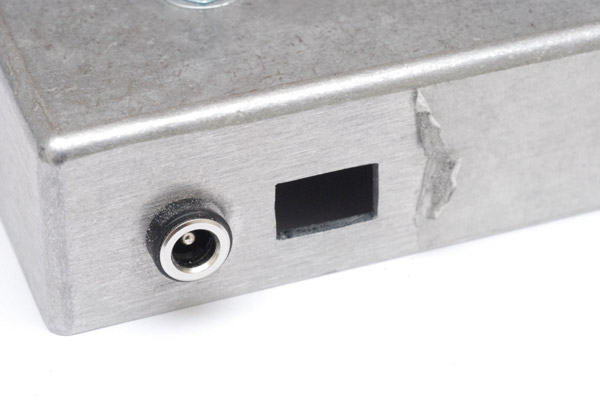
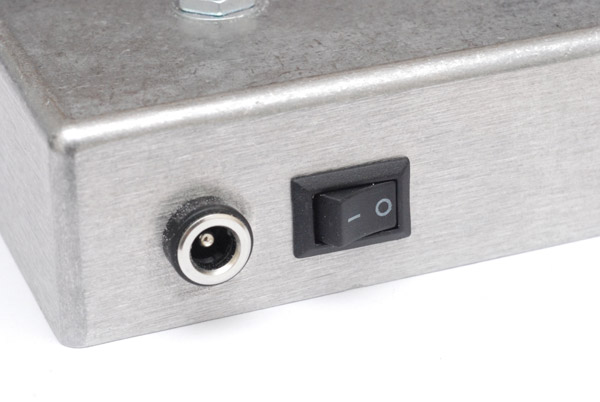
Almost forgot the power switch, which needs a square hole. There's still masking tape on the side there, very useful for not mucking up the finish.
Not too shabby.
Now, I should mention that when I test fired the circuit up and played tetris for the first time in six months, I immediately found a glitch. This, doubtless, will be the first of many and for that reason I decided I wanted to be able to reprogram the cartridges via the console without having to undo any screws. This means fitting an ISP connector, that's the other gender of IDC header. But by this point I was back in the swing of things with my minidrill and had no problems making a rectangular cutout.
It's about as tidy as you could hope for. Shame it's on the back and won't be seen.
It's just soldered to a bit of protoboard and the board is then superglued to the inside of the case. Works well enough.
Thus ends the mechanical difficulties, but to fit the electronics into the case? That's a whole separate venture...