A Tiny Theremin
30 Jul 2015Progress: Work-in-progress
Update: Video (11 Mar 2016)
Note: I forgot to set the fuses on that chip before filming it, so it was running at 8Mhz instead of the 16Mhz (PLL clock source) that I developed it on. The range is slightly better at 16Mhz.
Note: I forgot to set the fuses on that chip before filming it, so it was running at 8Mhz instead of the 16Mhz (PLL clock source) that I developed it on. The range is slightly better at 16Mhz.
Update (26 Mar 2016)
Source code and hex file. Have a play with it and let me know if you have any ideas.
Source code and hex file. Have a play with it and let me know if you have any ideas.
When I first played with an ATtiny85, my overall feeling was, "wow, is there anything they can't do?"
Seeing Sprite_tm's generation of FM radio with one through the PLL and continuous recalibration of the internal oscillator only reinforced this viewpoint.
Now, I had wanted to make a theremin for a long time, but they have a reputation for being fiddly. Oh, not if you just want something that makes funny noises, but if you want it to be playable it takes effort. There's lots of scattered info on the subject but nothing that ever convinced me to jump in.
People have made 'alternative' theremins, and I don't mean there's anything wrong with using ultrasonic sensors or infrared LEDs to judge distance, but to me, a theremin is a capacitive instrument. So, could we build a real theremin with an ATtiny85? It's worth a shot.
A real theremin works by using the capacitance of the aerials in oscillator circuits, at very high frequencies since the capacitances are so small. These are then heterodyned with a fixed frequency to give a beat that corresponds to the hand position. I've seen capacitance measurement ideas for microcontrollers, but usually they're talking about much higher capacitances than a hand several inches away. There are capacitive touch libraries - I didn't even look at them since again, we're talking very low capacitances. I figured a hand waving a few inches away was at best 1 picoFarad.
Some methods used a high-value resistor to slowly charge the capacitor, and measure the time it takes to reach 63% or whatever. For that method, I'd need gigaohms of resistance. But I had an idea, involving the analog-to-digital converter on board. I set out to investigate, and a day or so later, I'd created this.
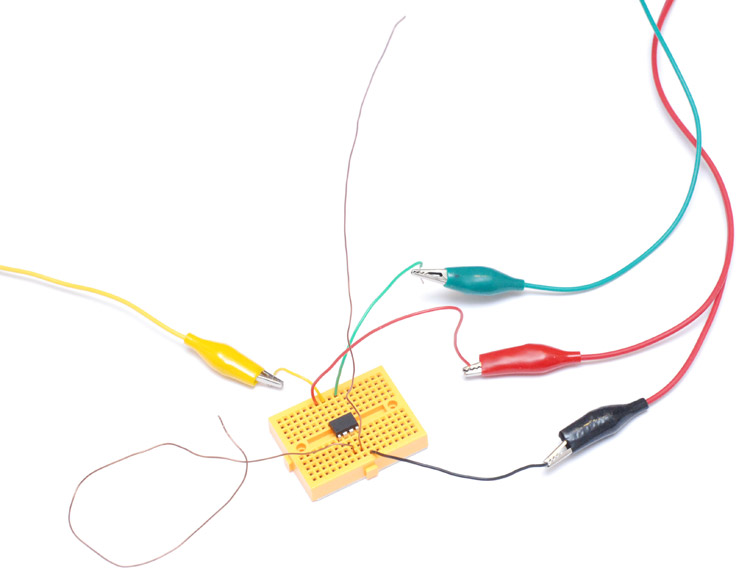
A theremin with only one component! Well, some wires and a breadboard too. Red and black are power, green is audio, and the loose copper wires are the volume and pitch antennas.
There are a couple of things worth noting. One, grounding is an issue, and the performance is best when you wear a wrist strap (yellow wire). This isn't very satisfactory, and even though there are commercial theremins that need a wrist strap, it takes a slice out of the whole play-it-without-physical-contact thing. You can instead connect it to mains earth, but only when powered by battery or an isolated supply, as the chip's GND pin has to be floating. More on this in a minute.
The range is programmable (i.e. reprogram the hex file to change it) and works to about 18 inches from the antenna. Being so small, it's difficult to set it so that the pitch and volume fields aren't too overlapping. I later extended the antennas outwards to help with this. Oh, and the fields are pretty nonlinear - despite being digital, I didn't attempt to correct this. The outermost octave is about eight inches, while closest half inch contains probably two octaves. It squeaks right up when you touch it as you'd expect.
How does it work?
The short answer is, I'm not entirely sure. I set out to build a capacitive theremin, and did so, but not in the way I'd intended. I originally wanted to use high-valued resistors to charge the capacitor, and after a fixed time, I would read the analog voltage. How high resistance - I dunno. But I figured it'd be on the order of the 'high-impedance' of a tri-stated input. The procedure for measuring capacitance is as follows:- The antenna is configured as output, and grounded. PB2 is grounded too.
- The antenna pin is tri-stated, and then PB2 is set high. We wait a fixed amount of time, then read the ADC from the antenna pin.
If you connect PB2 to mains ground, then the circuit floats and still works fine - no signal is sent through your body then. No need for a wrist strap either. The reason to avoid this is that with each capacitance measurement, the circuit is floated up and down, which comes through as an audible signal (a few kHz) in the audio output. This happens to an extent (although not as bad) even if you use the PWM in differential output mode. The capacitance is measured at such high speed because the measurement is extremely noisy, and you need to average a few hundred to get a usable reading.
So I don't really understand how it works, but it does. I reckon, with a better understanding of what's going on, it should be possible to build a version which needs no wrist-strap - or at least, doesn't need to float up and down with each measurement.
The rest of the design is simple: there's a sinewave lookup table which is advanced at the speed of the capacitance reading. This is output as analog via the 125kHz PWM from the PLL. To avoid trying to do a multiplication, and since the whole code was only a few hundred bytes out of the 8kB available, I did a big 6kB lookup table with sinewaves of different amplitudes. The low/high bytes of the Z pointer are then set to the amplitude and phase that you want to read. Simple and effective.
Currently the averaging is done by making a few hundred readings, adding their values up and dividing. This is very quantized, it works fine for volume but pitch, which advances the phase of the sine wave at the end of each average, ends up with lots of phase noise. It sounds a bit like a howling wind. This shouldn't be too hard to fix, we just need a continuous rolling average of the last n values so the pitch jumps are smoother. This will be done at some point.
In the mean time I decided to build a less temporary version. Mounted on the top of a 9V battery clip.
Construction
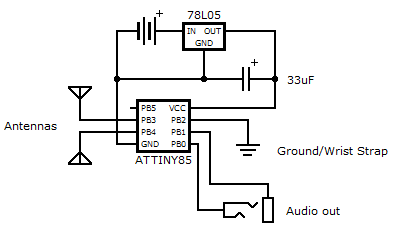
It's just about possible to fit a linear regulator into a battery clip. I've done this before, as it's quite useful to have a 5V battery on hand. This 78L05 in the usual TO-92 package did need filing a bit. A capacitor on the output is needed, especially in a noise sensitive application like this. The thick copper wire at the back is a bar that'll be connected to PB2, exposed so you can clip a wrist strap to it.
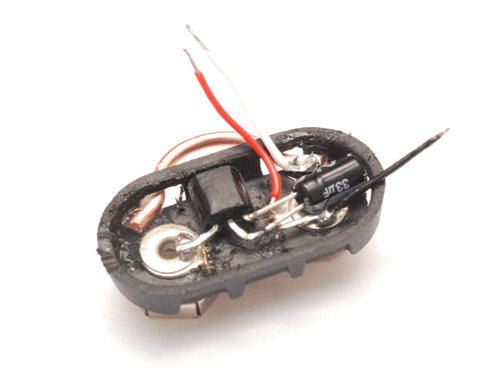
To connect the antennas in a removable way I made little clamps. I did think of using these little telescopic antennas that came with those 433MHz remotes I got for the wireless foot switch, but figured copper wire is probably better. More flexible (in terms of design, I mean). But I do want them held securely, and I don't want them snapping the support if they get knocked, I'd rather they just bend.
I took a couple of little brass nuts and drilled through them on the lathe. Then I soldered some copper wire to each of them.
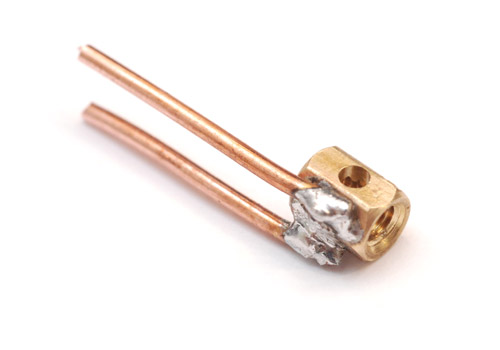
Incidentally I've been trying to think of a good project to make use of both an ATtiny85 and my lathe. Drilling a couple of holes doesn't count, of course. That solder may not look pretty, but it was strong enough to withstand the thick wire being bent into L-shapes. Then I trimmed them short, inserted into the clip and flooded it with superglue.
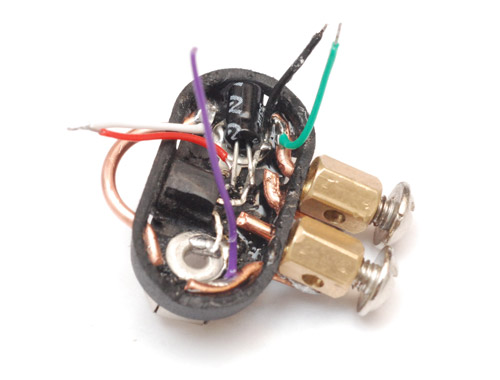
Finally we perform some rather fiddly wiring with the audio jack and the DIP socket. This shot is just before gluing it in place. The wires are long enough that it can be soldered, but just short enough that the whole thing can be pressed flush together. With more glue.
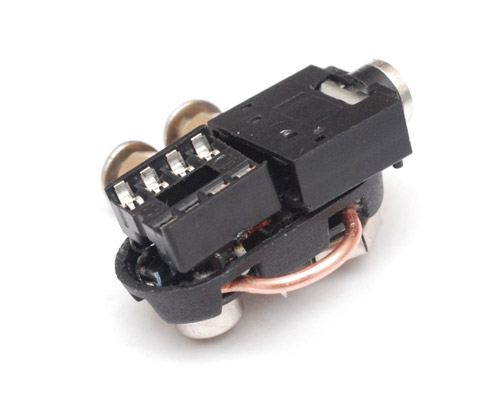
After the glue has set, insert antennas, ATtiny85, battery and realize that there was probably a more logical direction to face the headphone jack. Oh well, I can use a right-angled connector if need be. Or swap the antennas. Or make them bigger.
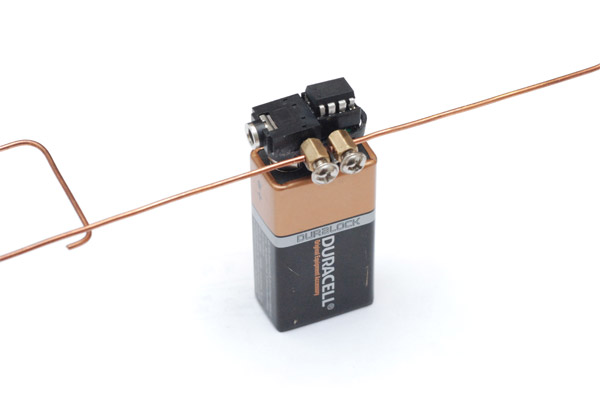
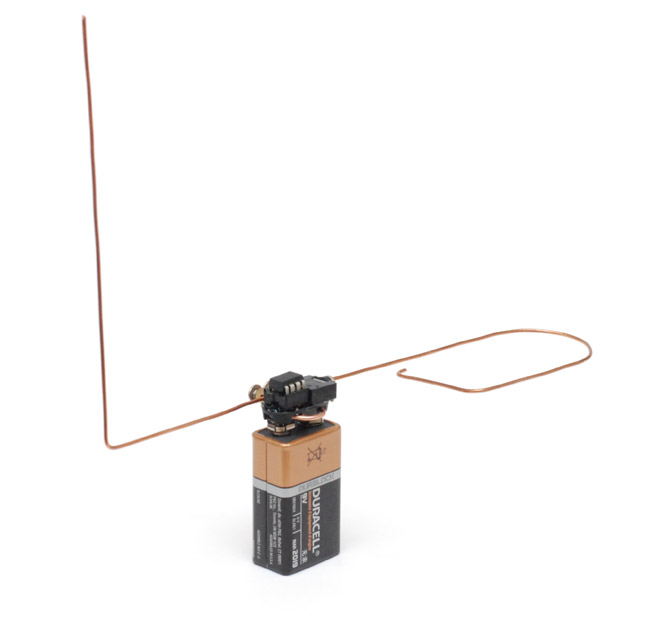
Ah, there we go. A minimalist theremin. A tiny theremin. An ATtiny theremin!
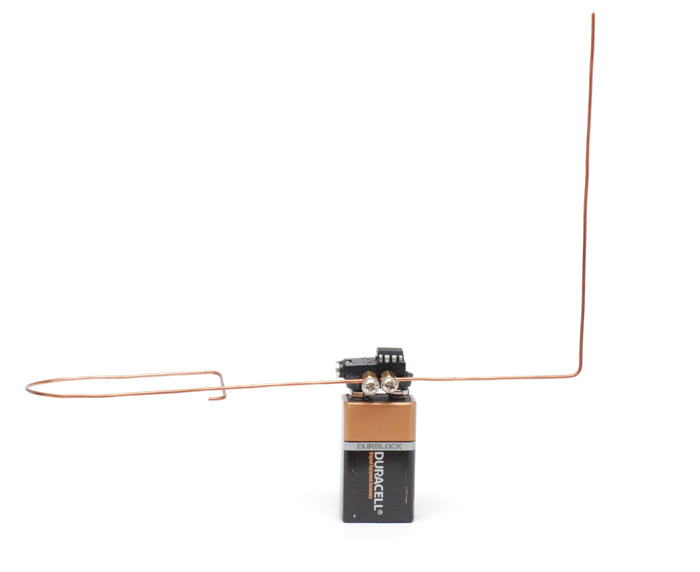
Sound could do with improvement, linearity is unsatisfactory, and needs a wrist-strap for any hope of playing a tune. But it's capacitive, and I will come back to this and enhance it at some point.
