
| AnthonyFuller | Posted: 30 Jan 2019, 10:28 PM |
|---|---|
 Member Posts: 2 Joined: 30-January 19 |
Will you be releasing the files of the StyloCard on github or something? It would be really nice if you could. Ta, Anthony. Last edit by AnthonyFuller at 30 Jan 2019, 10:28 PM ------------- |
| [top] | |
| mit | Posted: 1 Feb 2019, 10:19 PM |
 yeah whatever Admin Posts: 687 Joined: 4-May 16 |
I'm still hoping I might be able to get my act together and sell some of them. Honestly, any day now. I'll probably release the files eventually anyway, but it's not hard to lay-out your own version of it if you want, all the information should be there. ------------- |
| [top] | |
| TheRealDing | Posted: 1 Feb 2019, 11:42 PM |
 Member Posts: 2 Joined: 1-February 19 |
What parts are needed? And how do you program the Stylocard? ------------- |
| [top] | |
| mit | Posted: 2 Feb 2019, 01:24 PM |
|
yeah whatever Admin Posts: 687 Joined: 4-May 16 |
If you look through my project pages, all of the information is there. QUOTE (TheRealDing)
And how do you program the Stylocard? First one was programmed using the technique shown at the end of this page. The newer design has a USB bootloader. ------------- |
| [top] | |
| AnthonyFuller | Posted: 2 Feb 2019, 02:27 PM |
|
Member Posts: 2 Joined: 30-January 19 |
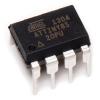
It's mostly all of the actual components on the board. I was going to use this as the example for my actual PCB file 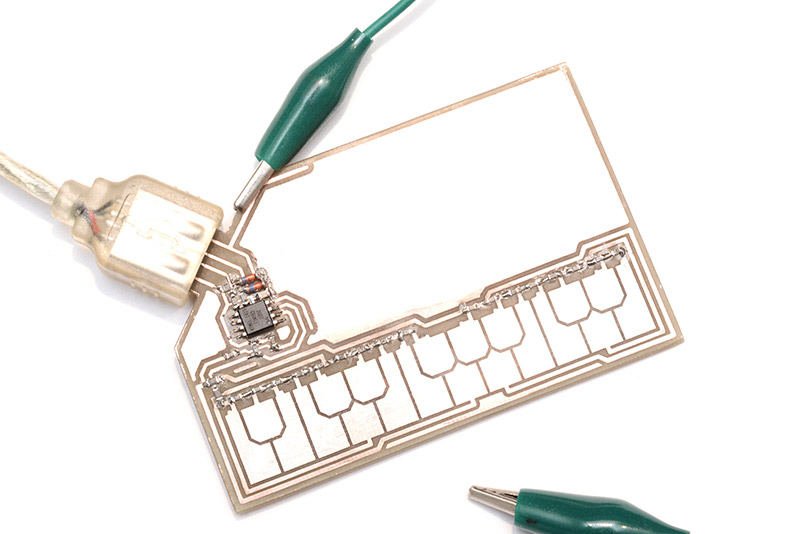 But I'm just unsure on what components are on there for example all of these resistors, chips etc and if the actual resistance of the resistors matter etc if you could be a pretty clear on all my questions haha that would be cool (I'm guessing its a ATtiny)  ------------- |
| [top] | |
| scottygee123 | Posted: 24 Feb 2019, 04:28 PM |
 Member Posts: 1 Joined: 24-February 19 |
I was also wondering about when you may be selling the board and for how much - I think that just looking at the comments section on that video you made about the board, there is money being lost ;). But If they aren't hard to upload, I think the components and pcb files would be really handy to people who want to create and make things like this (although please don't do what other youtubers have done which is put a price tag of about £5 on it.) Thanks in advance. Last edit by scottygee123 at 24 Feb 2019, 04:29 PM ------------- |
| [top] | |
| TheRealDing | Posted: 12 May 2019, 03:03 AM |
|
Member Posts: 2 Joined: 1-February 19 |
Any updates on releasing the files or at least a BOM? ------------- |
| [top] | |
| Veox | Posted: 16 Jun 2019, 12:21 PM |
 Member Posts: 1 Joined: 16-June 19 |
Hello, when will the files appear? Is it possible to record sound from the card to the computer? ------------- |
| [top] | |
| DAVID | Posted: 18 Jun 2019, 02:10 AM |
 I love mcus Member Posts: 237 Joined: 10-September 17 |
QUOTE (Veox)
the card is a midi controller so what you are recording are just notes from the controller that you can then play on any patch sound you like.Is it possible to record sound from the card to the computer? for recording obviously you need software such as FL Studio (that you can download a demo for free) ------------- |
| [top] | |
| DAVID | Posted: 18 Jun 2019, 10:52 PM |
|
I love mcus Member Posts: 237 Joined: 10-September 17 |
since there were lots and lots of posts about realeasing the pcb files, i made a clone (but it looks quite bad) that you can download from here: https://easyeda.com/elpro/mitxelas-s-stylocard well it seems like i have some problems with the voltage divider so i will suspend this clone Last edit by DAVID at 20 Jun 2019, 07:26 PM ------------- |
| [top] | |
| DAVID | Posted: 3 Aug 2019, 05:38 AM |
|
I love mcus Member Posts: 237 Joined: 10-September 17 |
Ok, now i finally made it. It took quite a while to get it working reliably. My code its all commented so that it would be easier to understand it. I wrote it in the Arduino IDE and also made it in c++ and a makefile. For programing the attiny85 i use the Trinket bootloader but since you need to wait for the bootloader to time out so that it will execute the code that it is loaded. So i just modified a bit so that it will enter in to bootloader mode when PB0 is connected to GND at power up. A feature that i added in to my Stylophone is a calibration mode, since if someone tries to recreate this project the resistors will be a bit different from mine so it ADC readings are going to be different. PCB and Schematic: https://easyeda.com/elpro/mitxelas-s-stylocard Code (c++) : https://github.com/theawsomeavr/mitxela-Stylophone Arduino : https://github.com/theawsomeavr/mitxela-stylophone-arduino Bootloader: https://github.com/theawsomeavr/trinket-bootloader Video: https://www.youtube.com/watch?v=VuqBGZg8MVY Calibration video: https://youtu.be/axKZPebcptM Last edit by DAVID at 3 Aug 2019, 07:28 AM ------------- |
| [top] | |
| mit | Posted: 3 Aug 2019, 12:45 PM |
|
yeah whatever Admin Posts: 687 Joined: 4-May 16 |
Hey, that's really cool. Nice song! When I first tried a project like this (a long time ago) I did something similar with the calibration step. But there is a way to do it without needing the calibration, just by changing the way the resistors are wired up. I could explain it, but I took all my inspiration from the Stylophone Studio 5 project that I linked to on the project page. He does a good job of explaining how it works. My newer stylocard (which I made more than a year ago and still haven't made a video) uses an atmega16u2 and has enough input pins to do the keyboard directly, which is a lot simpler really. ------------- |
| [top] | |
| DAVID | Posted: 3 Aug 2019, 07:16 PM |
|
I love mcus Member Posts: 237 Joined: 10-September 17 |
Oh I see, yeah i have deal with button matrixes. Since past year i own a Korg microkey 37 midi keyboard but i was not happy about it since i could not add a midi serial out, So i just swap the main board and put an atmega32u4 ------------- |
| [top] | |
Sign in to post a reply.