
| aeropic | Posted: 30 Apr 2022, 04:11 PM |
|---|---|
 Member Posts: 12 Joined: 30-April 22 |
Hi, first of all huge congratulations for your ideas and your humour too ! I do love the music box and I must say I'm very tempted to build one, just for the fun of it ! Listening to your video I understand you did not go the way of a push-pull mechanism to rotate the washers. The reason you invoque is the added latency... Do you think that it would be huge to move the servo arm a little bit backwards to rotate the washer by a few degrees more ? If I understand well the extra motion would be twice the few degrees (once in each direction) ? I'm just afraid of wearing the plastic parts... Anyway, this is such a cool project :-) Regards Alain ------------- |
| [top] | |
| mit | Posted: 30 Apr 2022, 05:39 PM |
 yeah whatever Admin Posts: 687 Joined: 4-May 16 |
Hello. I'm afraid I don't fully understand your question. The motion of the fingers is just push then pull. Forwards then backwards. It was originally going to be backwards then forwards, which would add latency, but hold the wafers away from the tines. Since making the video I came up with a better solution to keeping the tines free until needed, I added a thin plastic comb on the opposite side (laser cut acetate on some laser-cut acrylic). 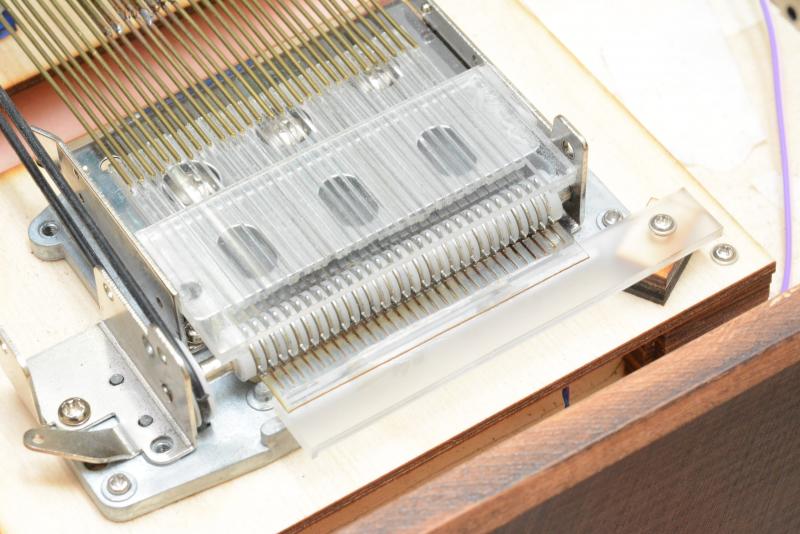 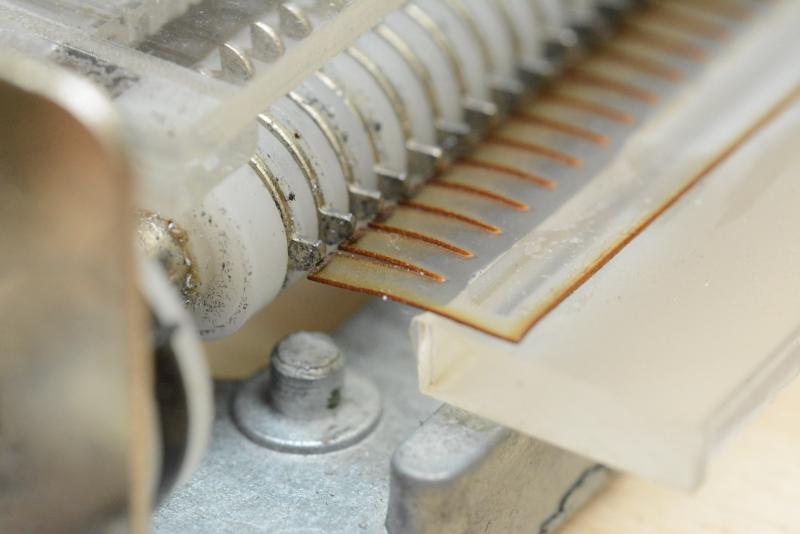 This is pretty effective at stopping the buzz noise when the wafers hit the tine on their way round. When the finger pushes forwards, the acetate comb is just pushed out of the way. I wouldn't worry about wear on the plastic parts, I've had dozens of hours of use out of the music box with basically no maintenance. A few people have built copies of the music box, one person did it with entirely 3D printed parts, I was very impressed (it involved a lot of sanding to get the bits to move smoothly). ------------- |
| [top] | |
| aeropic | Posted: 1 May 2022, 09:47 AM |
|
Member Posts: 12 Joined: 30-April 22 |
whooaoo thanks for your answer and your new idea... My intention was to 3D print long U shaped fingers On the left the servo. The first corner would push the washer while the bottom one tip would finish rotating the washer after the note when the finger is pulled back by the servo. The final idea was to get rid of the motor to suppress the noise from it. With your comb, I do not understand if the motor is still needed ? To play a note, if I understand well, the washer must be rotated by 90°. But the push finger cannot perform a full 90° rotation as the washer will enter in contact on the finger's left part ? Can it ? I understand that it was the job of the motor to finish the rotation when the finger is pulled back to clear the washer. Am I wrong ? I have to understand better the geometry of the thing ... I ordered my music box waiting for it from China. I got it very cheap for 25€ 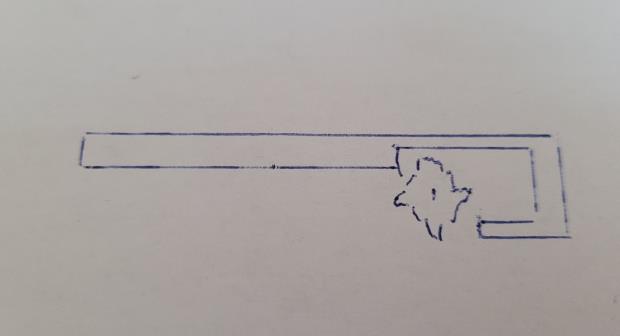 Last edit by aeropic at 1 May 2022, 10:02 AM ------------- |
| [top] | |
| mit | Posted: 6 May 2022, 09:54 AM |
|
yeah whatever Admin Posts: 687 Joined: 4-May 16 |
Yes, the motor is still needed in my design. I moved it and added a belt drive to reduce noise. I would be interested to see if your method works. I've spent a while trying to think of a good design for it but never came up with anything better. Also worth looking at the design of harpsichord plectrums - they have a one-way mechanism to pluck the string similar to what's needed for the musicbox. https://en.wikipedia.org/wiki/Harpsichord#Mechanism I had an idea to make laser-cut plectrums from delrin, but never got around to trying it. ------------- |
| [top] | |
| aeropic | Posted: 6 May 2022, 11:22 AM |
|
Member Posts: 12 Joined: 30-April 22 |
Meanwhile i started drawing something more detailled even if I don't yet get the music box nor its measurements! I have the feeling it should work... Here are some screenshots. The first one shows the position of the finger just at the end of the push motion (after the note) the washer is rotated to its green position. Then the servo pulls the finger to the left and it comes in contact with the washer at the bottom right. it will then push the washer from green to blue position and the top left pin is ready to be hocked for next move... only concern is to know if there would be room enough between the shaft+washers and the aluminum body. maybe some filing will be needed ? I will have a look to the harpsishcord thanks... 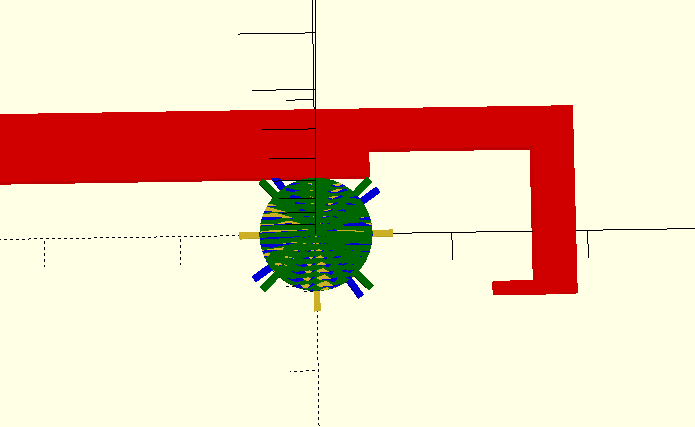 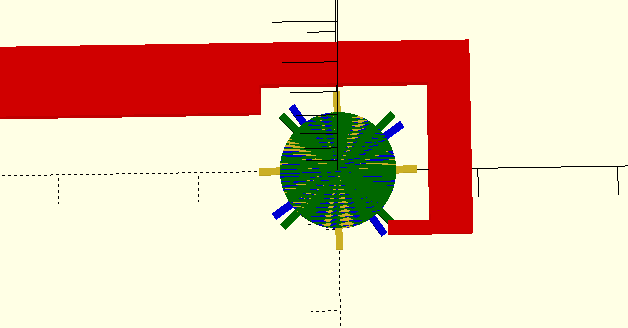 As I don't want to spend hours sanding the 3D printed parts, I wonder if I could print them 0.1mm thinner while keeping them aligned and spaced with a piano wire going through the full length of the finger and sliding into a drilled piece at the right ... (I'll make a drawing !) I made huge progress on the software, I intend to use an ESP32 to get MIDI over BLE. Meanwhile the USB version is able to receive note-ON commands in real time from the PC (arduino IDE is not as nice as assembly language but the embedded library makes the sofware so easy with only 3 lines of code to get the notes). I will simplify wiring using PCA9685 I2C 16 PWM drivers... Last edit by aeropic at 6 May 2022, 11:32 AM ------------- |
| [top] | |
| aeropic | Posted: 14 May 2022, 05:35 PM |
|
Member Posts: 12 Joined: 30-April 22 |
I received my music box. Indeed punching the holes in the cardboard is a pain. I coded a small script which eats a midi file as input and generates and openscad file. Then 3D printer to make the physical board. Of course the huge limitation is the length... Anyway it starts playing music :-) 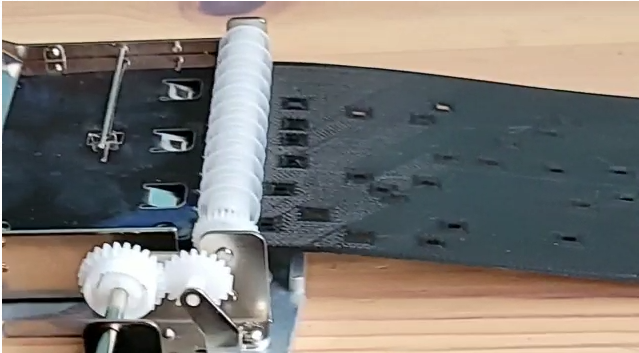 Last edit by aeropic at 14 May 2022, 05:36 PM ------------- |
| [top] | |
| mit | Posted: 15 May 2022, 10:01 AM |
|
yeah whatever Admin Posts: 687 Joined: 4-May 16 |
Oh, very interesting! That's a really neat idea. Something I would like to try is using a vinyl cutter to make the strips. It would have to be fairly thin card stock, thin enough for the blade to cut through, but still strong enough to play the music box. The benefit of the vinyl cutter is you can just get a roll of material, and cut something as long as you like. Another option I considered is to make a holder for a roll of thick paper to go in the laser cutter. You can just unplug one of the stepper motors and connect another one to create a rotary axis, I've done this in the past to etch onto round objects. ------------- |
| [top] | |
| aeropic | Posted: 15 May 2022, 06:39 PM |
|
Member Posts: 12 Joined: 30-April 22 |
definitely the roll idea is a good one ! Anyway the best option is to get it automated ;-) I just tried to print a piece to guide 1.2mm inox rods (the one used for RC plane servo rods). It seems it directly pushes with 100% success the washers. (imagine it upside down with the rods being guided by the vertical walls and sliding directly on top the metal table of the music box) With this there would be quite no effort to make the auto music box as there would be no fingers. But, of course, the motor to rotate the axis would then be needed... 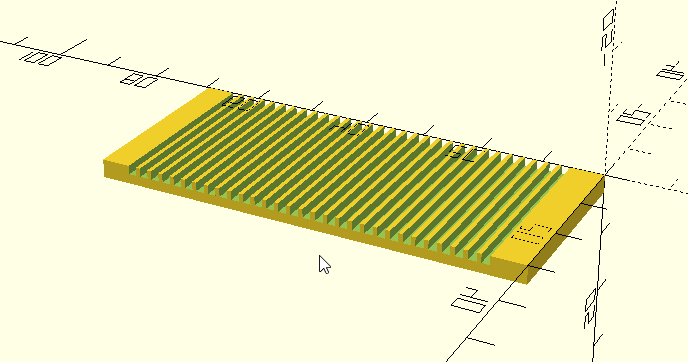 ------------- |
| [top] | |
| aeropic | Posted: 21 May 2022, 09:51 AM |
|
Member Posts: 12 Joined: 30-April 22 |
For those who would be tempted, I posted the source code of the script to generate 3D printable cards from midi files on thingiverse : https://youtu.be/SlEqRXkuC74 https://www.thingiverse.com/thing:5390853 Last edit by aeropic at 21 May 2022, 09:51 AM ------------- |
| [top] | |
| aeropic | Posted: 21 May 2022, 02:49 PM |
|
Member Posts: 12 Joined: 30-April 22 |
And the motor less music box could work too !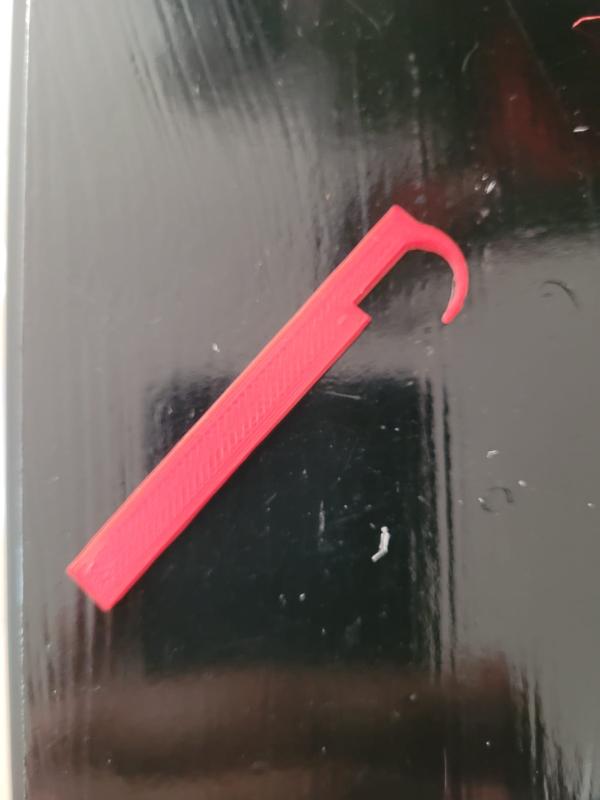 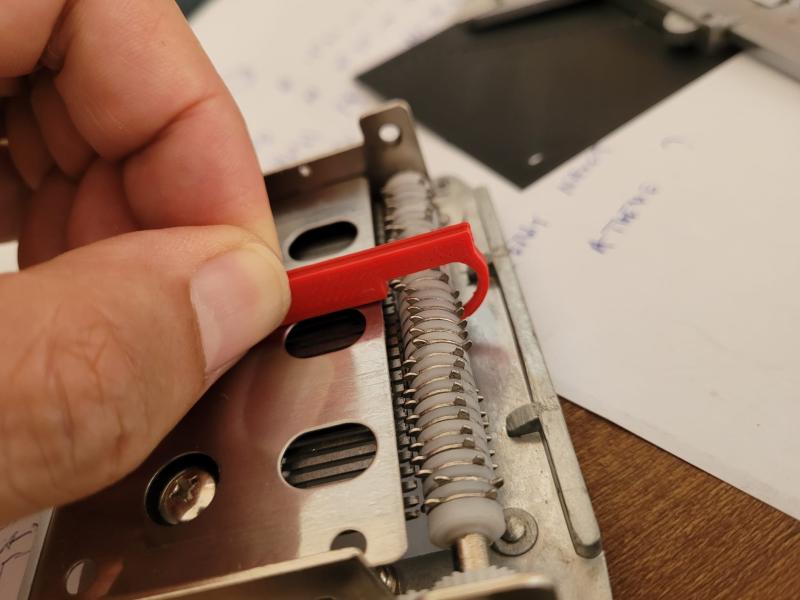 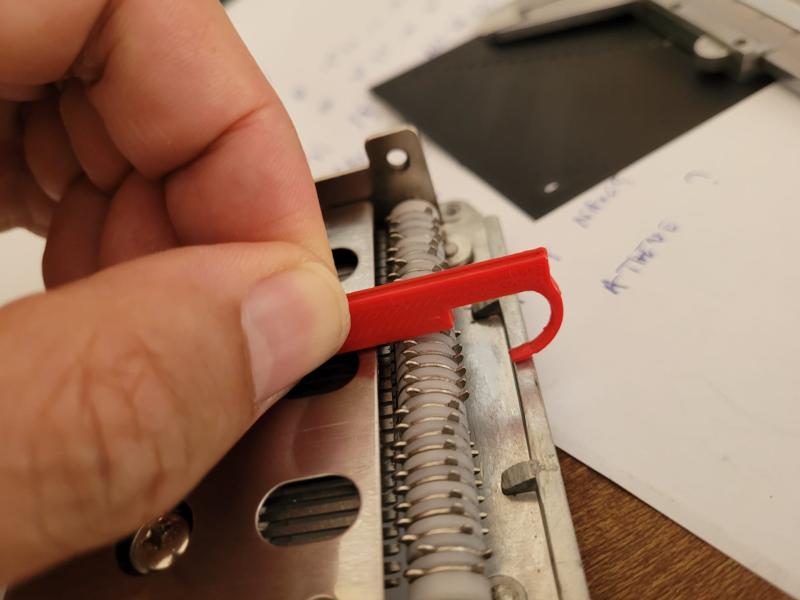 ------------- |
| [top] | |
| mit | Posted: 23 May 2022, 10:00 PM |
|
yeah whatever Admin Posts: 687 Joined: 4-May 16 |
Hey that looks really promising! On that 3D printed MIDI musicbox I mentioned, they replaced the last servo with a stepper motor and used a silent stepper driver. That seemed to work pretty well for them, but if your way works, that would be even better still. One of the things that annoys me about my musicbox is that there is still something (or things) that are rattling when it plays. I need to investigate further. The noise of the motors doesn't really bother me, but the rattling noise is quite annoying. I would be interested to see if you encounter the same thing, or if the different design helps. ------------- |
| [top] | |
| aeropic | Posted: 29 May 2022, 10:03 AM |
|
Member Posts: 12 Joined: 30-April 22 |
Well, I think I'll get rid with the special hocked fingers. Inprinciple they work fine but in reallity they need a very high manufacturing accuraty i don't get with my 3D printer... Some fingers miss the note when pushing the washer. There is some play and the finger jumps overs the washer instead of playing the note. I will for the while go with the added motor and try direct metal rods pushers guided with a 3D printed comb... ------------- |
| [top] | |
| mit | Posted: 30 May 2022, 10:09 AM |
|
yeah whatever Admin Posts: 687 Joined: 4-May 16 |
Hmm, yes 3D printing isn't ideal for it. Since the design is planar, you could maybe laser-cut them. The best material would probably be Delrin/Acetal which is laser-cuttable, low friction and reasonably tough. But you'd need the sheets to be exactly 2mm thick, which is hard to acquire - even sheets listed as 2mm are often not exactly 2mm. ------------- |
| [top] | |
| aeropic | Posted: 30 May 2022, 01:29 PM |
|
Member Posts: 12 Joined: 30-April 22 |
meanwhile i experimented with this set up (so simple). I found another arrangement of the servos so that they fit in a standard 3D printer bed. I don't get any problem with horizontal centering of the rods, but on some notes, when pushing the washer, the rod may finish its run above the washer's hook and not play the note... Which is exactely the same problem I get with the other concept (hooked fingers)! So both with the rods or the hooks I need to limit the vertical play to press the mobile part on top the washers. The motor less option might still be a good option! 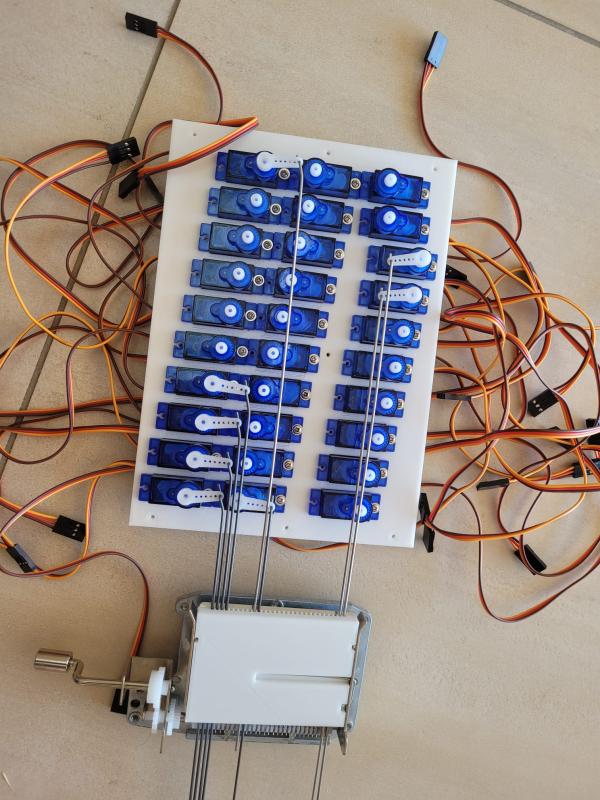 ------------- |
| [top] | |
| mit | Posted: 1 Jun 2022, 08:51 AM |
|
yeah whatever Admin Posts: 687 Joined: 4-May 16 |
Looking good! To apply downwards pressure on the rods/fingers, I superglued some strips to the metal on each side, and slid the acrylic top part underneath them. I deliberately made it a very tight fit. For the 3D printed guide, maybe you could print something that goes all the way around the musicbox, so it can clamp down on it? ------------- |
| [top] | |
Sign in to post a reply.