
| mitchb | Posted: 23 Jul 2024, 12:53 PM |
|---|---|
|
Member Posts: 1 Joined: 23-July 24 |
Hi. Would you mind sharing what your process is for creating the pretty images on white backgrounds with drop shadows? Thank you. Last edit by mitchb at 23 Jul 2024, 12:58 PM ------------- |
| [top] | |
| mit | Posted: 24 Jul 2024, 04:59 PM |
|
yeah whatever Admin Posts: 657 Joined: 4-May 16 |
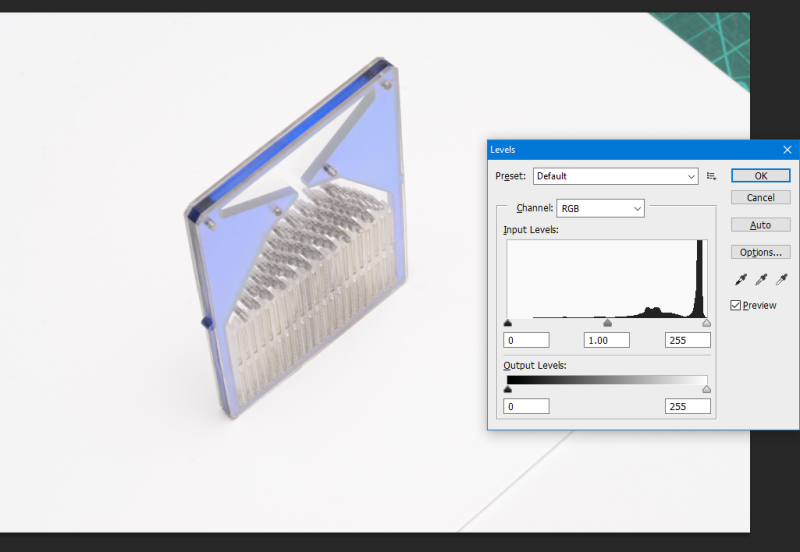
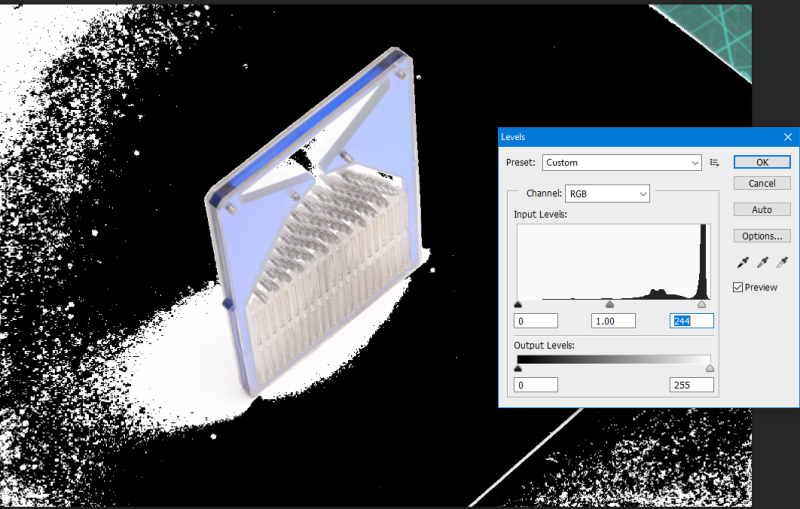
Hi, sure. The short answer is to put things on a piece of white paper, use a bounce flash and slightly over-expose the picture. It used to be a lot easier to do this on older cameras. A lot of the early shots are with a Nikon D80 and a no-name flash unit. I'd just point the flash at the ceiling (assuming the ceiling is painted white) and you get most of the benefit of being in a studio. Since it's normally a disaster if the highlights are blown, modern cameras try very hard to protect them. There are usually options to disable this (nikon calls it "active D-lighting") but even so it's really hard to get a perfectly white background. The flash unit I use has its own compensation dial, which can help, but pretty much all of the pictures I take need to be exposure corrected afterwards. Here's an unmodified picture, you can see it's just white paper with the green cutting mat in the corner.  I use a couple of photoshop macros. I don't know if there's a better way to do this, but my method is to show the highlights by duplicating the layer, setting the background to black, then in the blending options of the top layer under "Blend if: Gray" the right slider is set to 254. So it becomes transparent when the pixel value is 255. With that in a macro I just hit "show highlights" and when I drag the level slider you can see what's removed:  It takes a bit of practice to get the shots right, the more you need to adjust the more you'll affect the contrast of the image, but with practice this can be very fast. Another macro restores the image. I use the dodge tool to lighten the vignette you normally get, and any gaps between sheets of paper, maybe a brush tool to remove that cutting mat in the corner if needed or just crop the picture. That's about it, for some of the bigger pictures on the site like the accordion or the midi interceptor, I just tiled many sheets of white printer paper on the floor around them. ------------- |
| [top] | |
Sign in to post a reply.